
Tutorial–Project Bag
12 x 15 Fully Lined Project Bag with Side Zipper
½ yd. fabric for outside (main fabric)
½ yd. fabric for inside lining (best to use a light color for lining)
½ yd. iron on interfacing (weight that you desire)
16” zipper
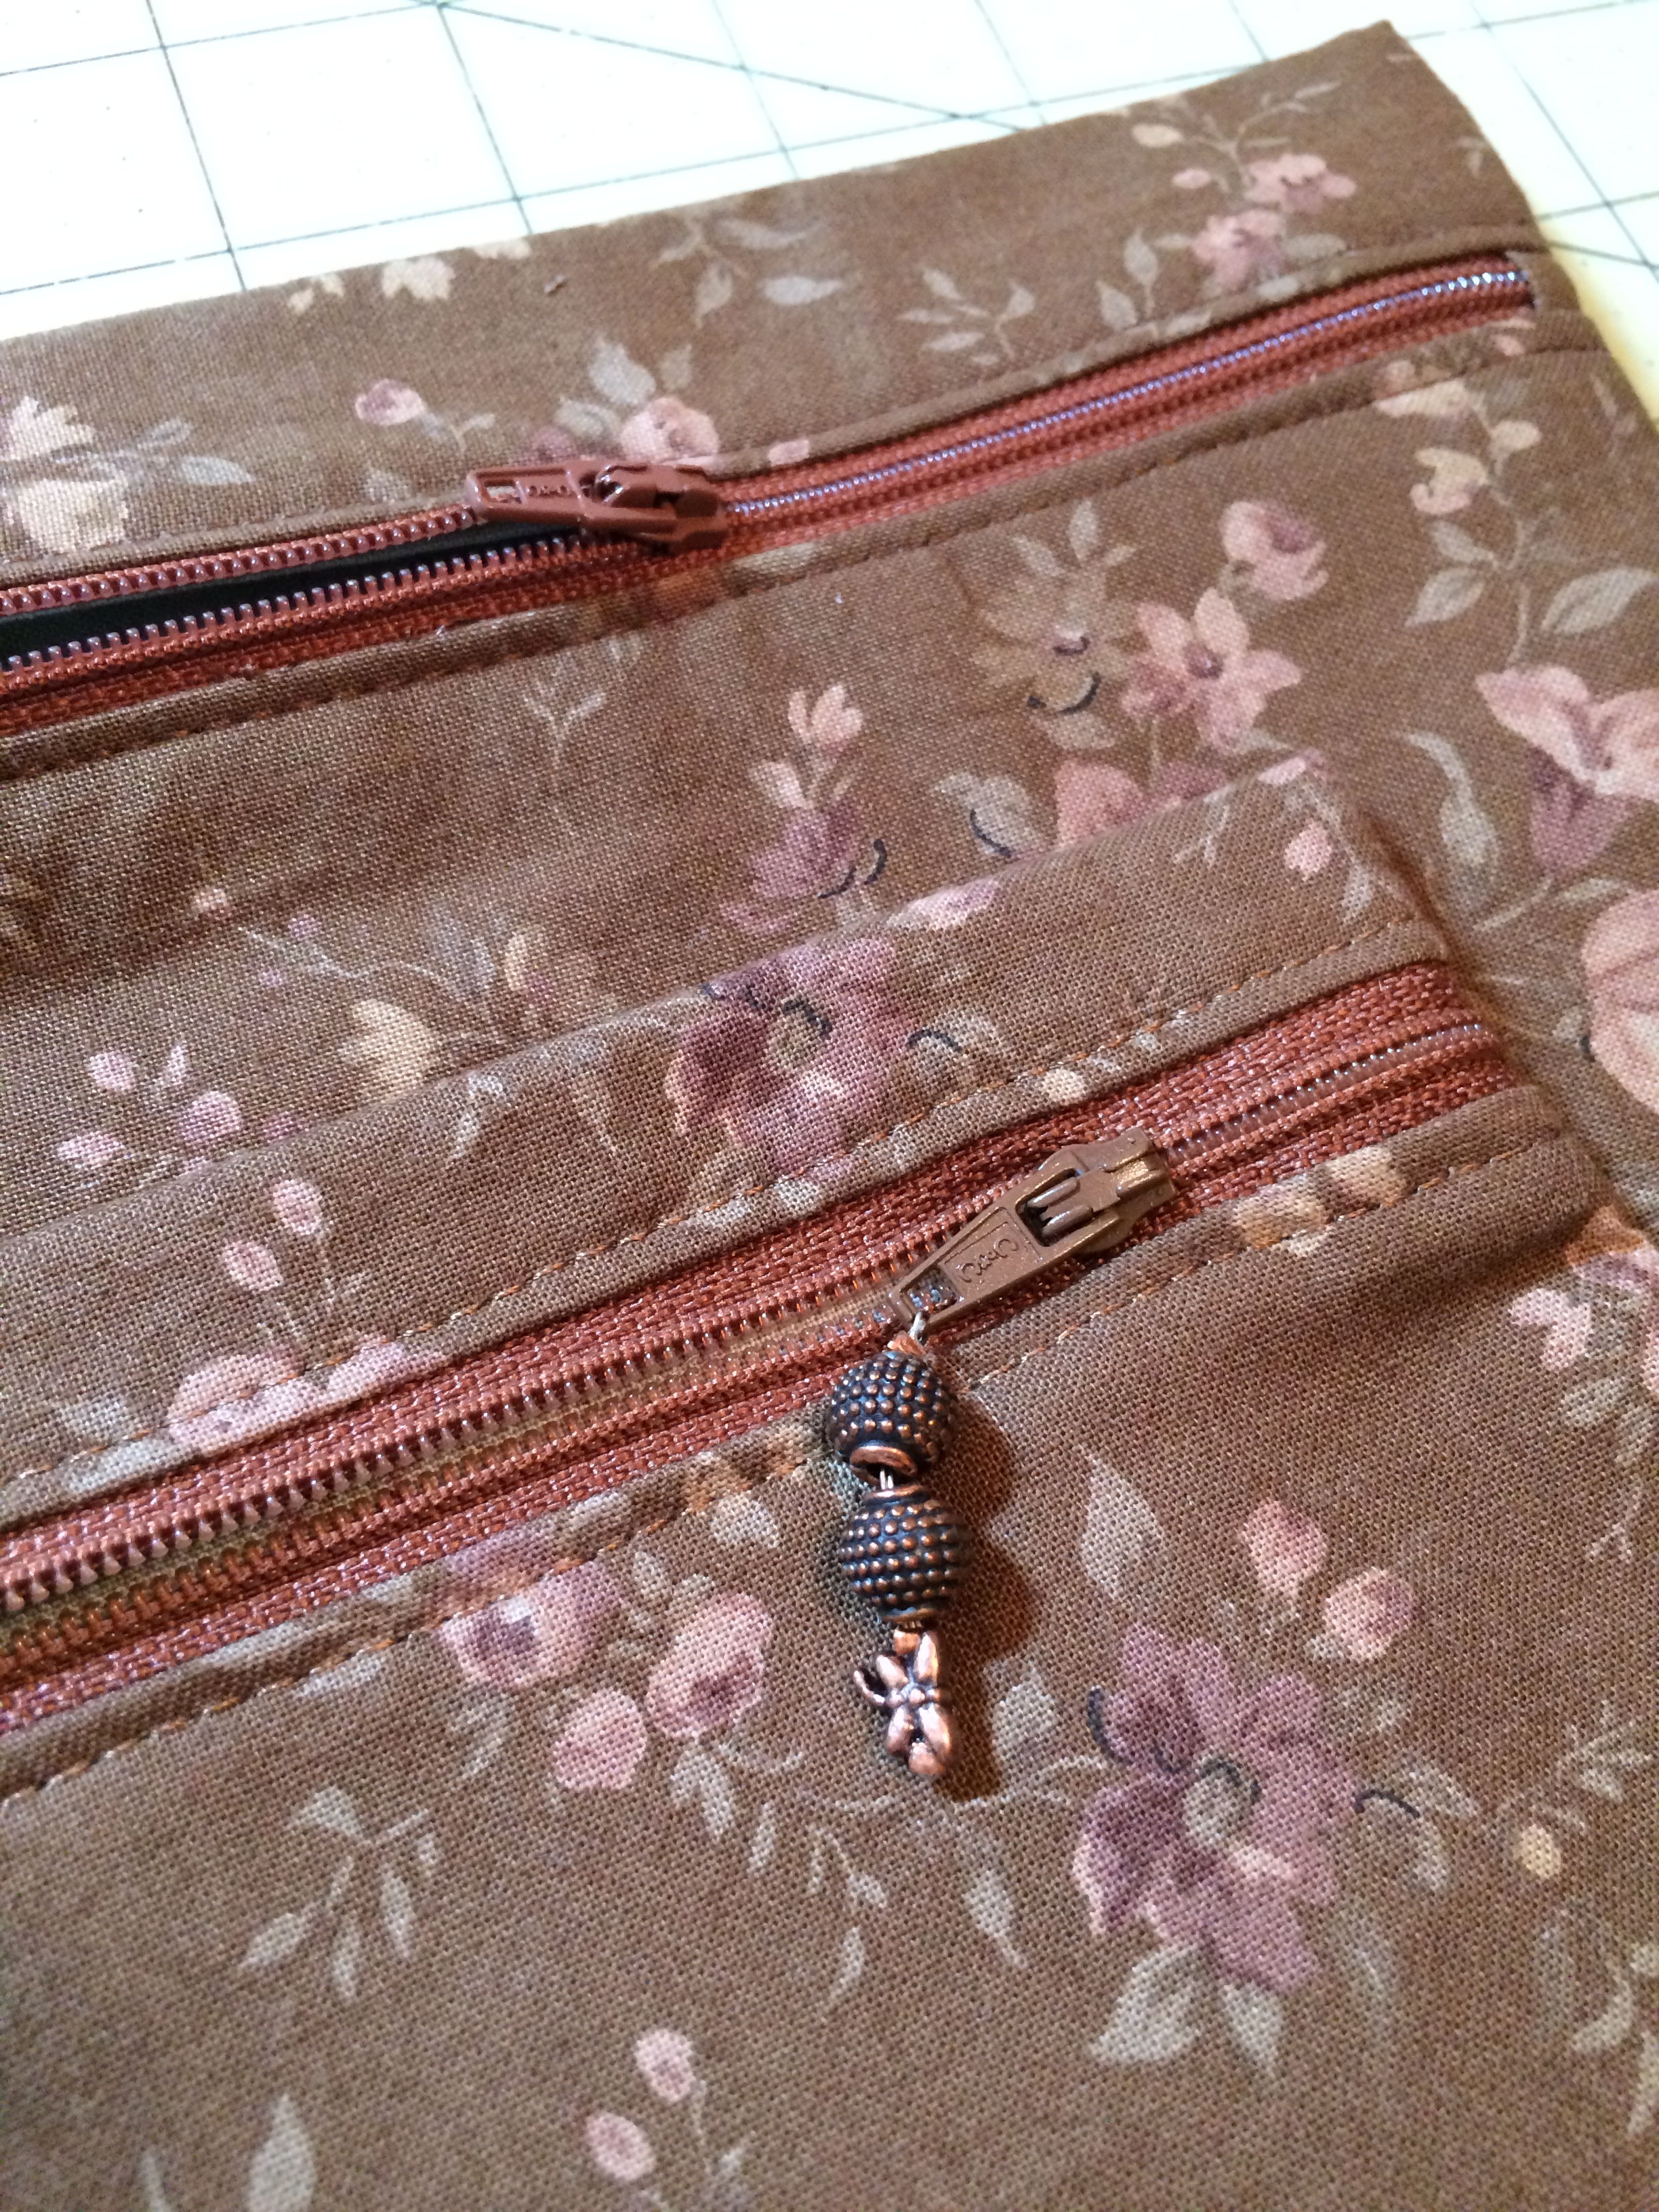
Charm(s) optional for zipper pull
NOTE: This bag can be made in any size by adjusting the measurements of your fabric in width and length. Experienced sewers should not have a problem making this bag. Others can order one custom made.
Cut a piece of fabric 14.5 x 16 from main fabric, one from lining, and one from interfacing. This longer piece allows for the fold over from the back to the front giving you a “side zipper.”
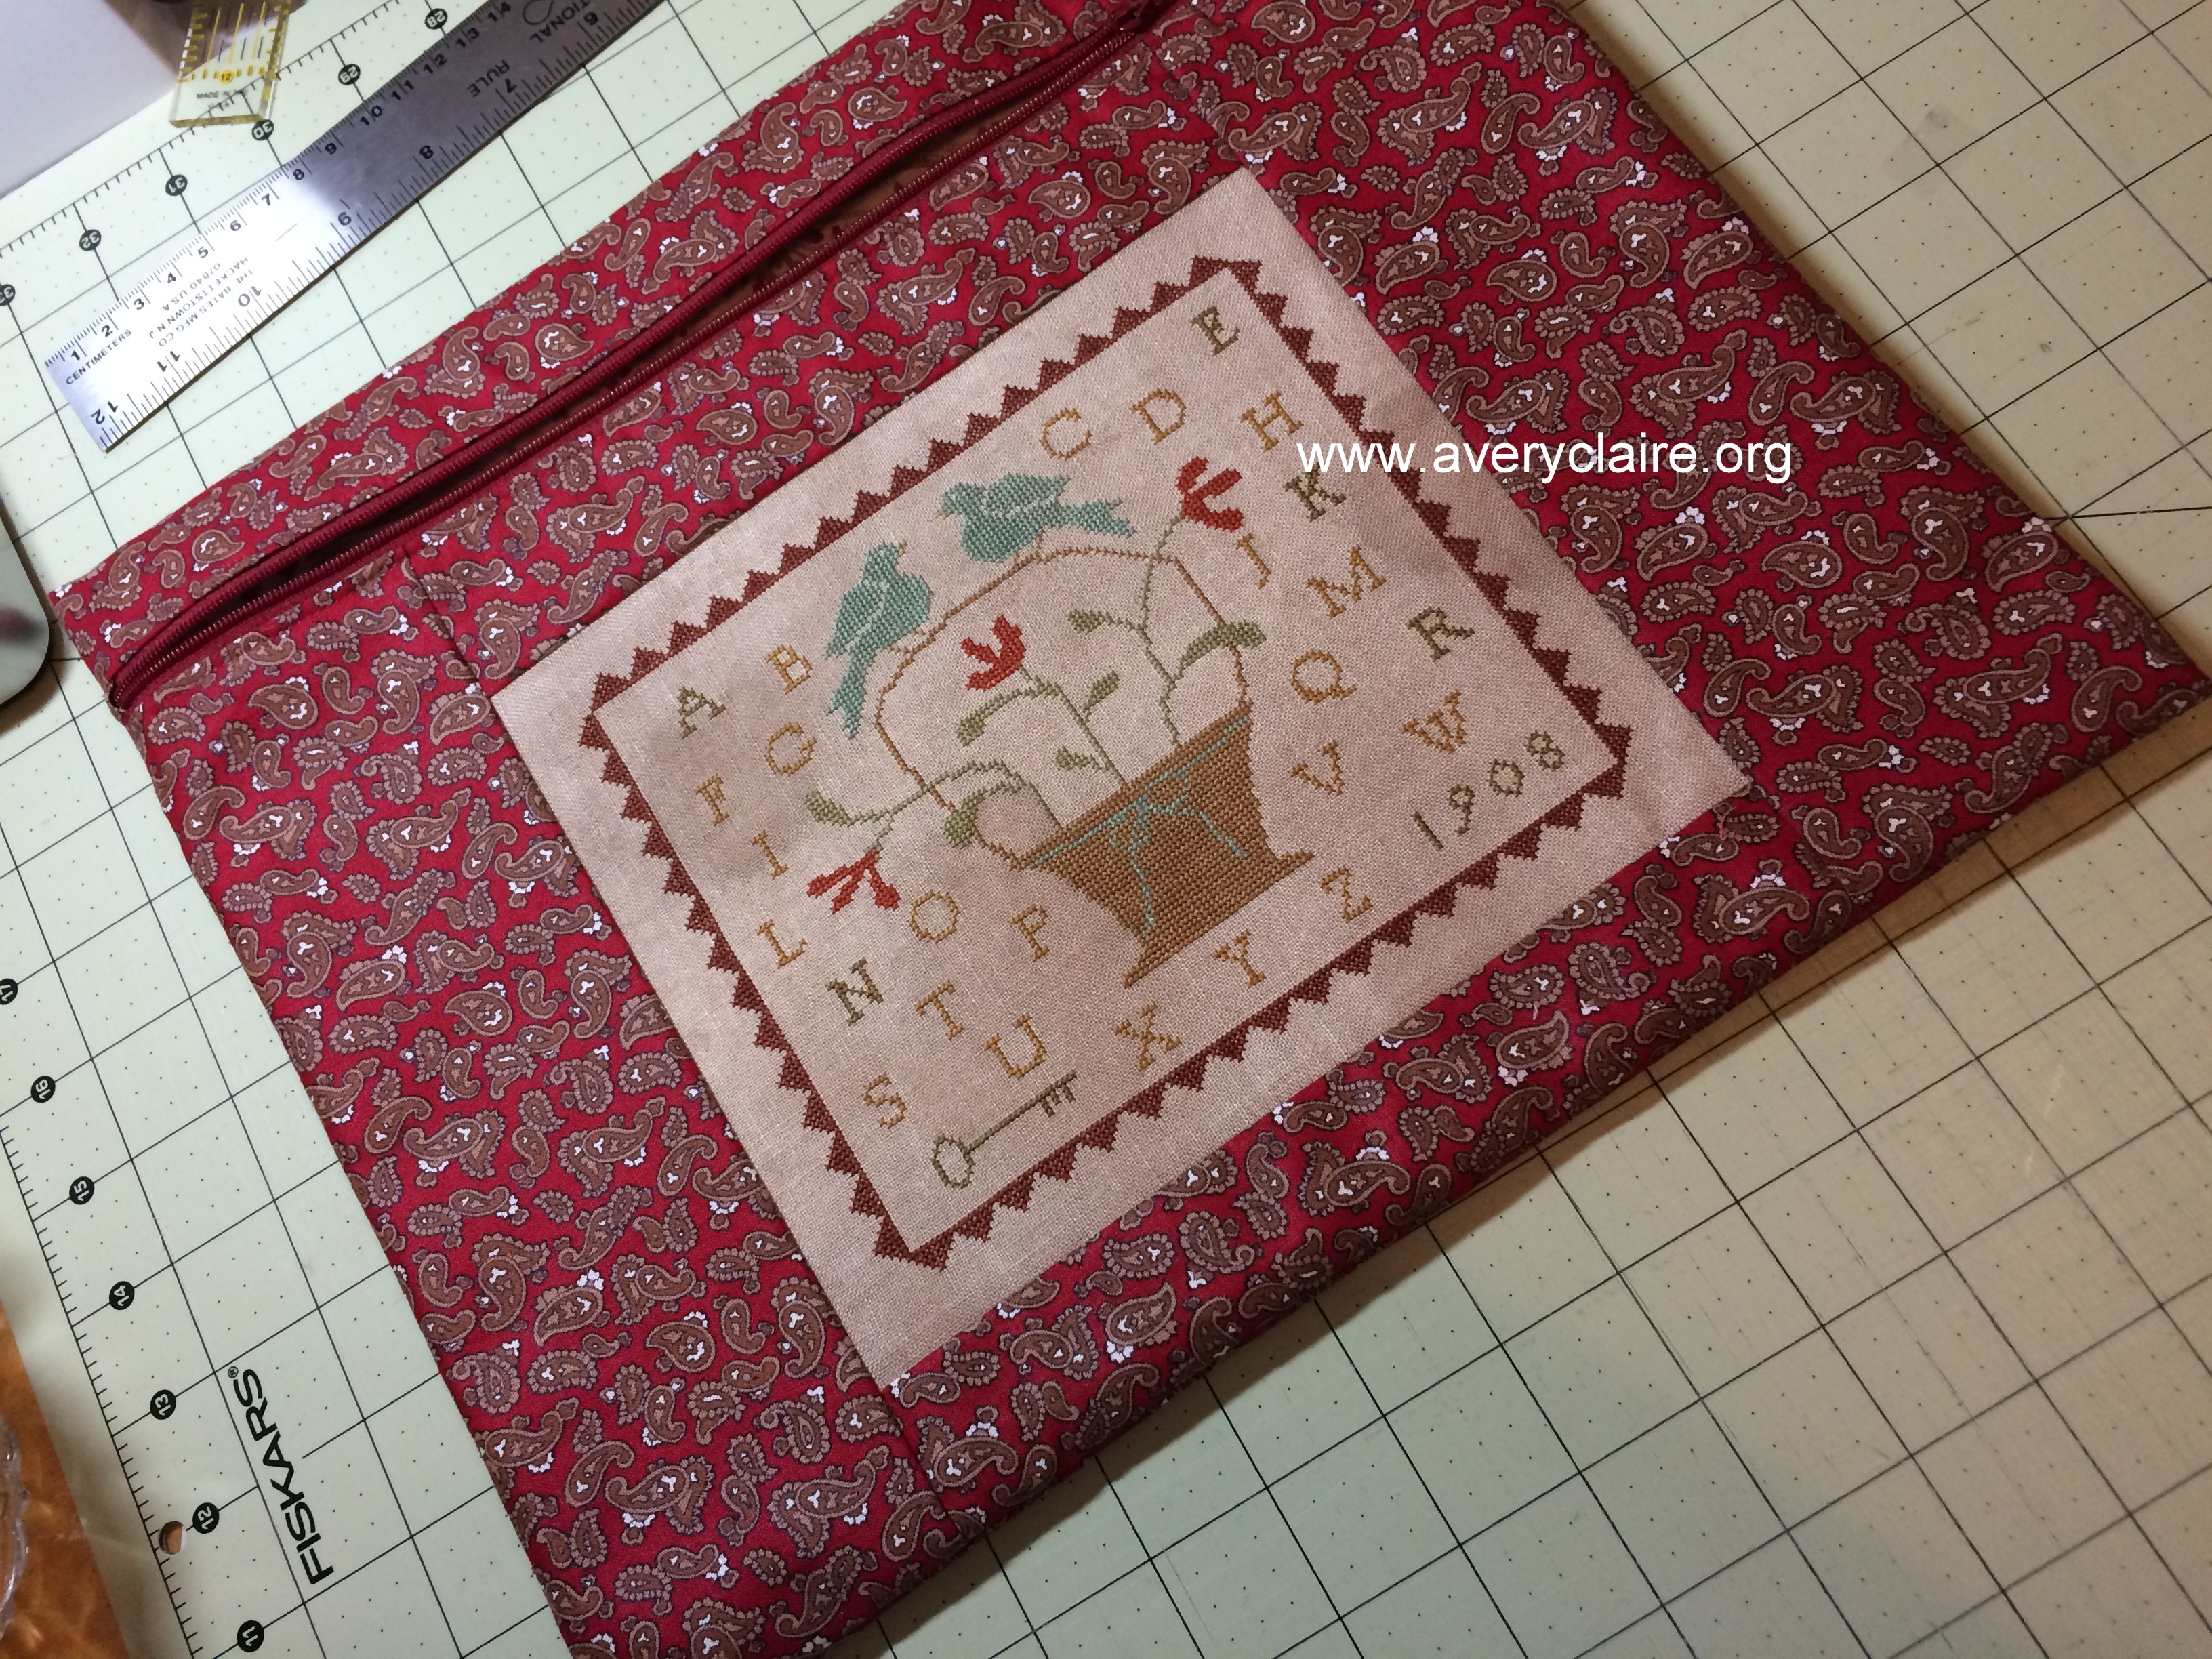
Front fabric will be cut 11.5 x 16….but here is where you decide if you want to add a piece of embroidery, cross-stitch, needlepoint, photo on fabric, etc. to the front piece of your bag.
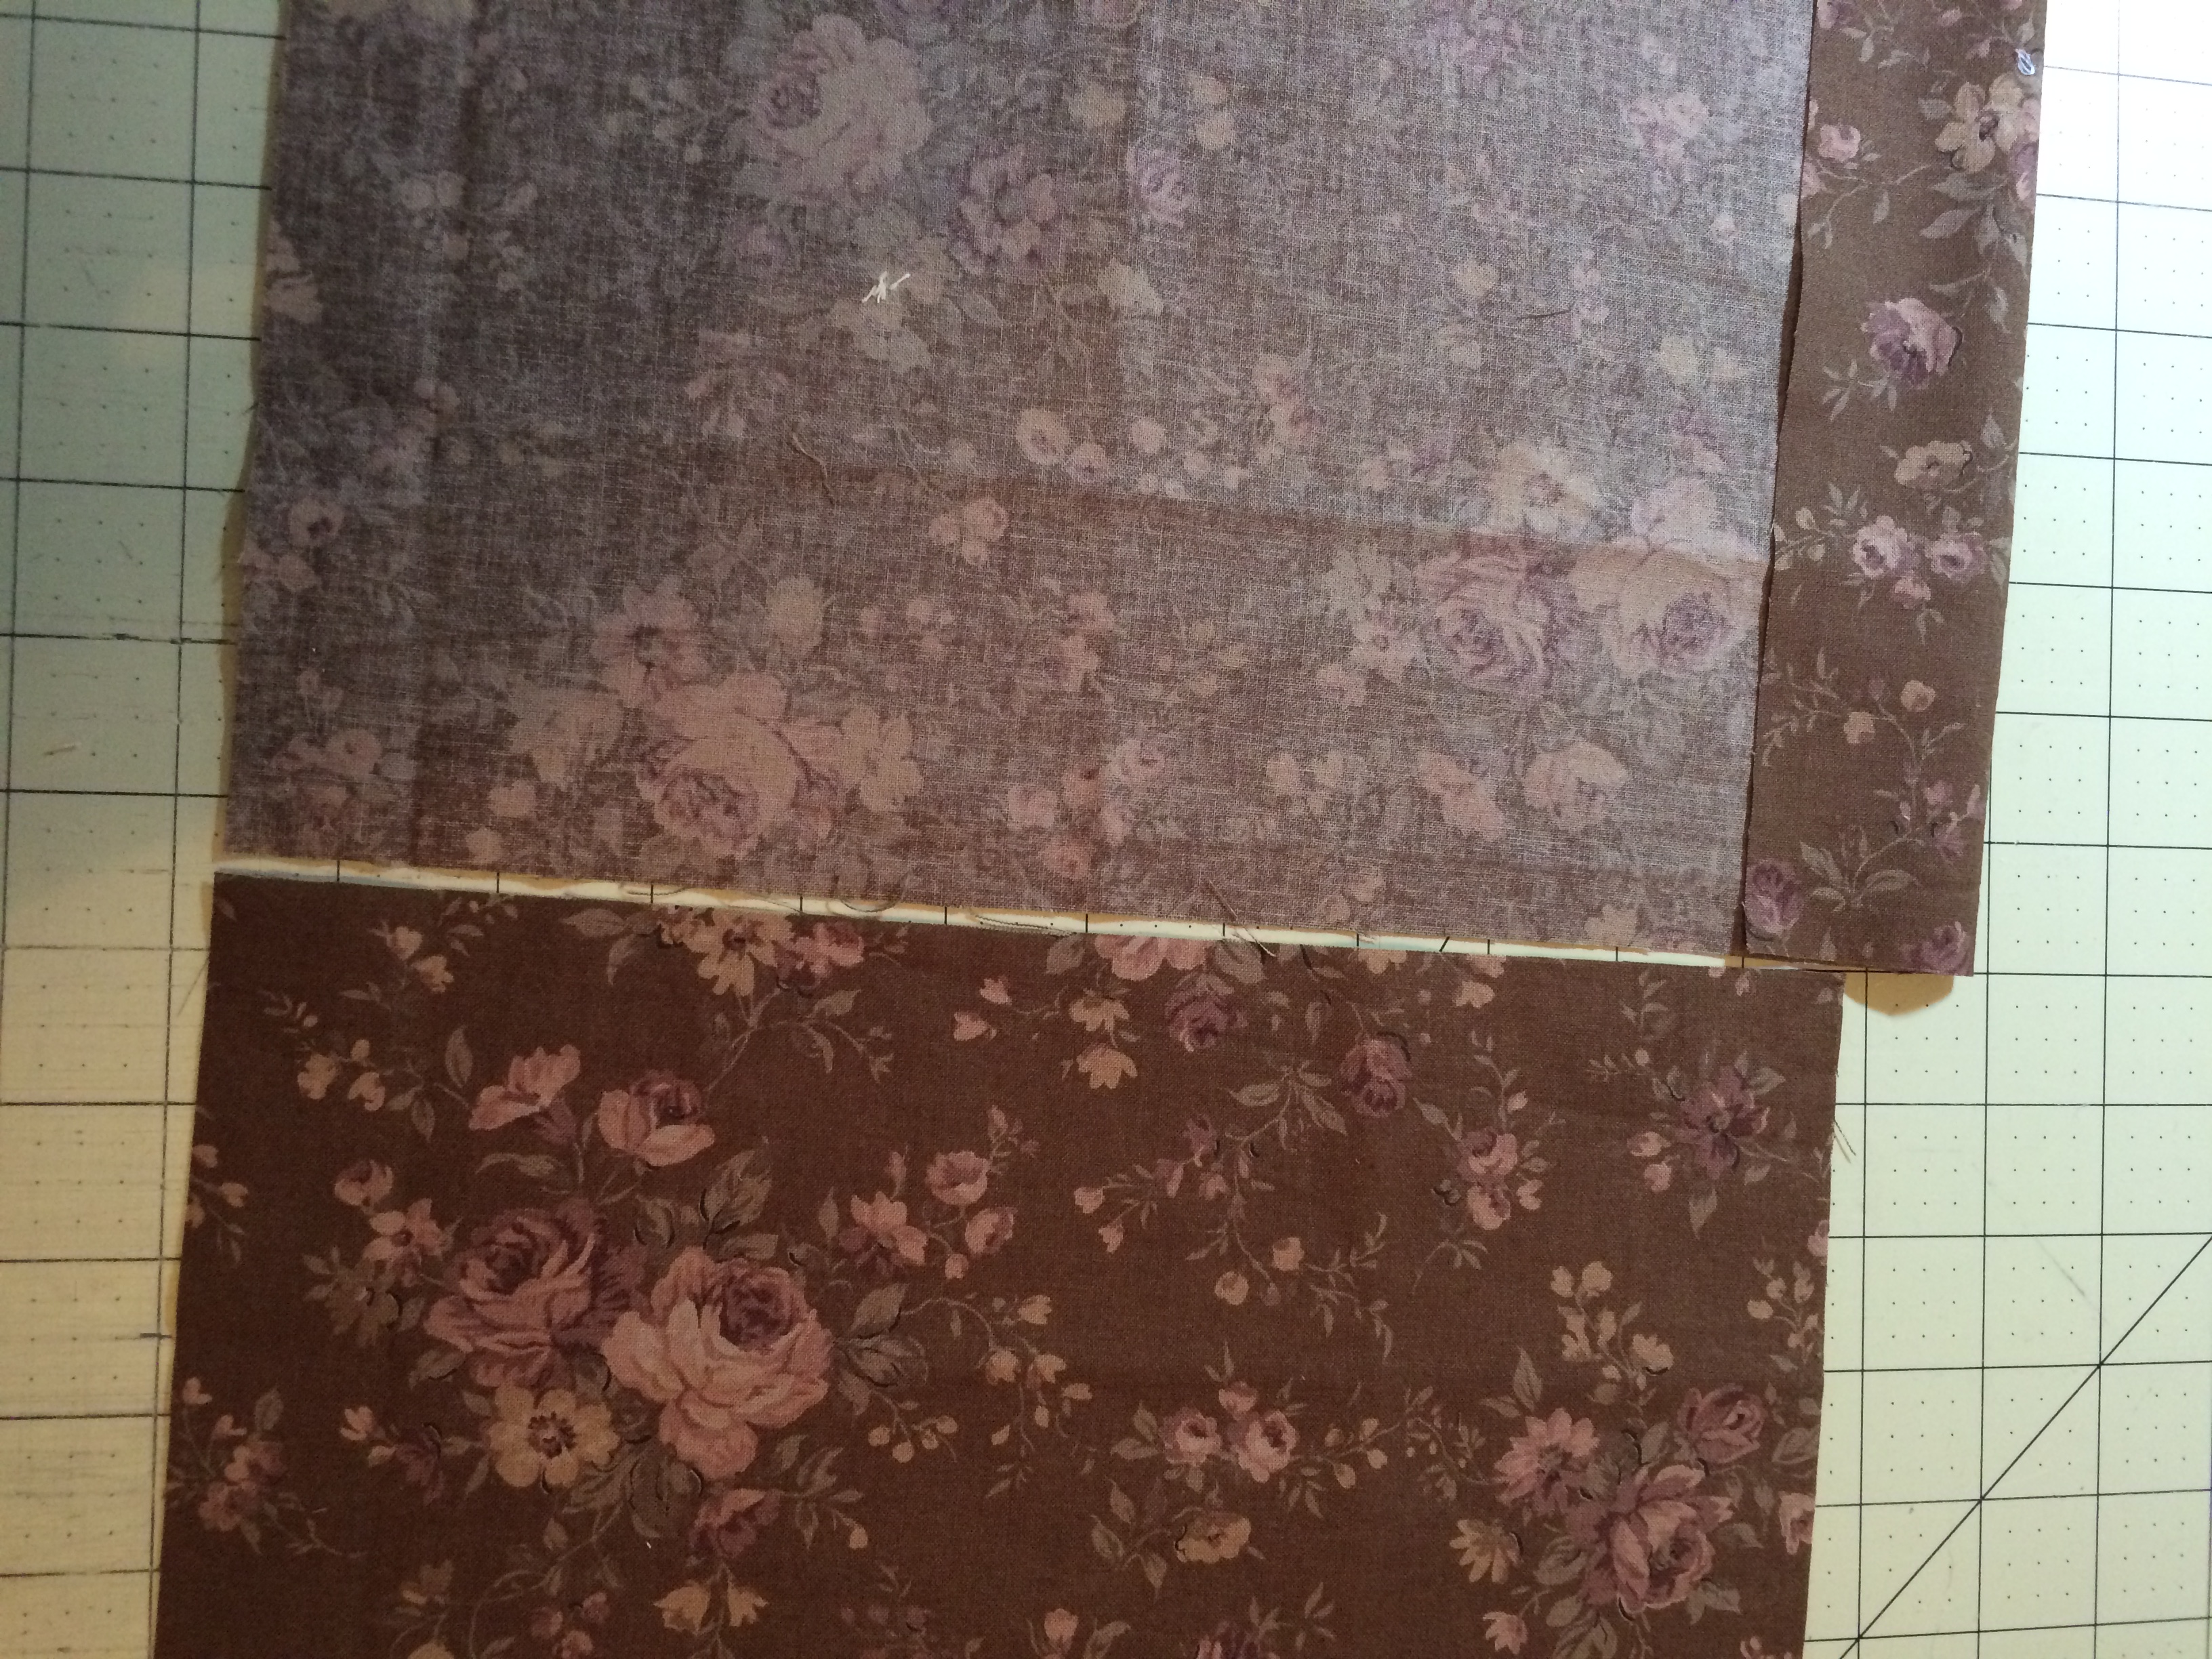
If using embroidery (or other) trim your embroidery leaving space around the embroidery to suit yourself, plus ½ inch for the seam allowance. Sew strips of main fabric around the embroidery to make it 11.5 x 16. If you are not sure about measurements here, you can sew generous strips of fabric and then using a good ruler square…line up your design in center, off-center, or wherever you wish it to be then cut the entire piece to a 11.5 x 16 front piece. This measurement includes ½ inch seam allowance all the way around.
You can clearly see the seams that hold my embroidery in the bag.
At this point I add interfacing to the two main pieces (front and back). This would include ironing one on the back of your embroidered piece with the fabric around it. I do not put interfacing on the lining of the bag.
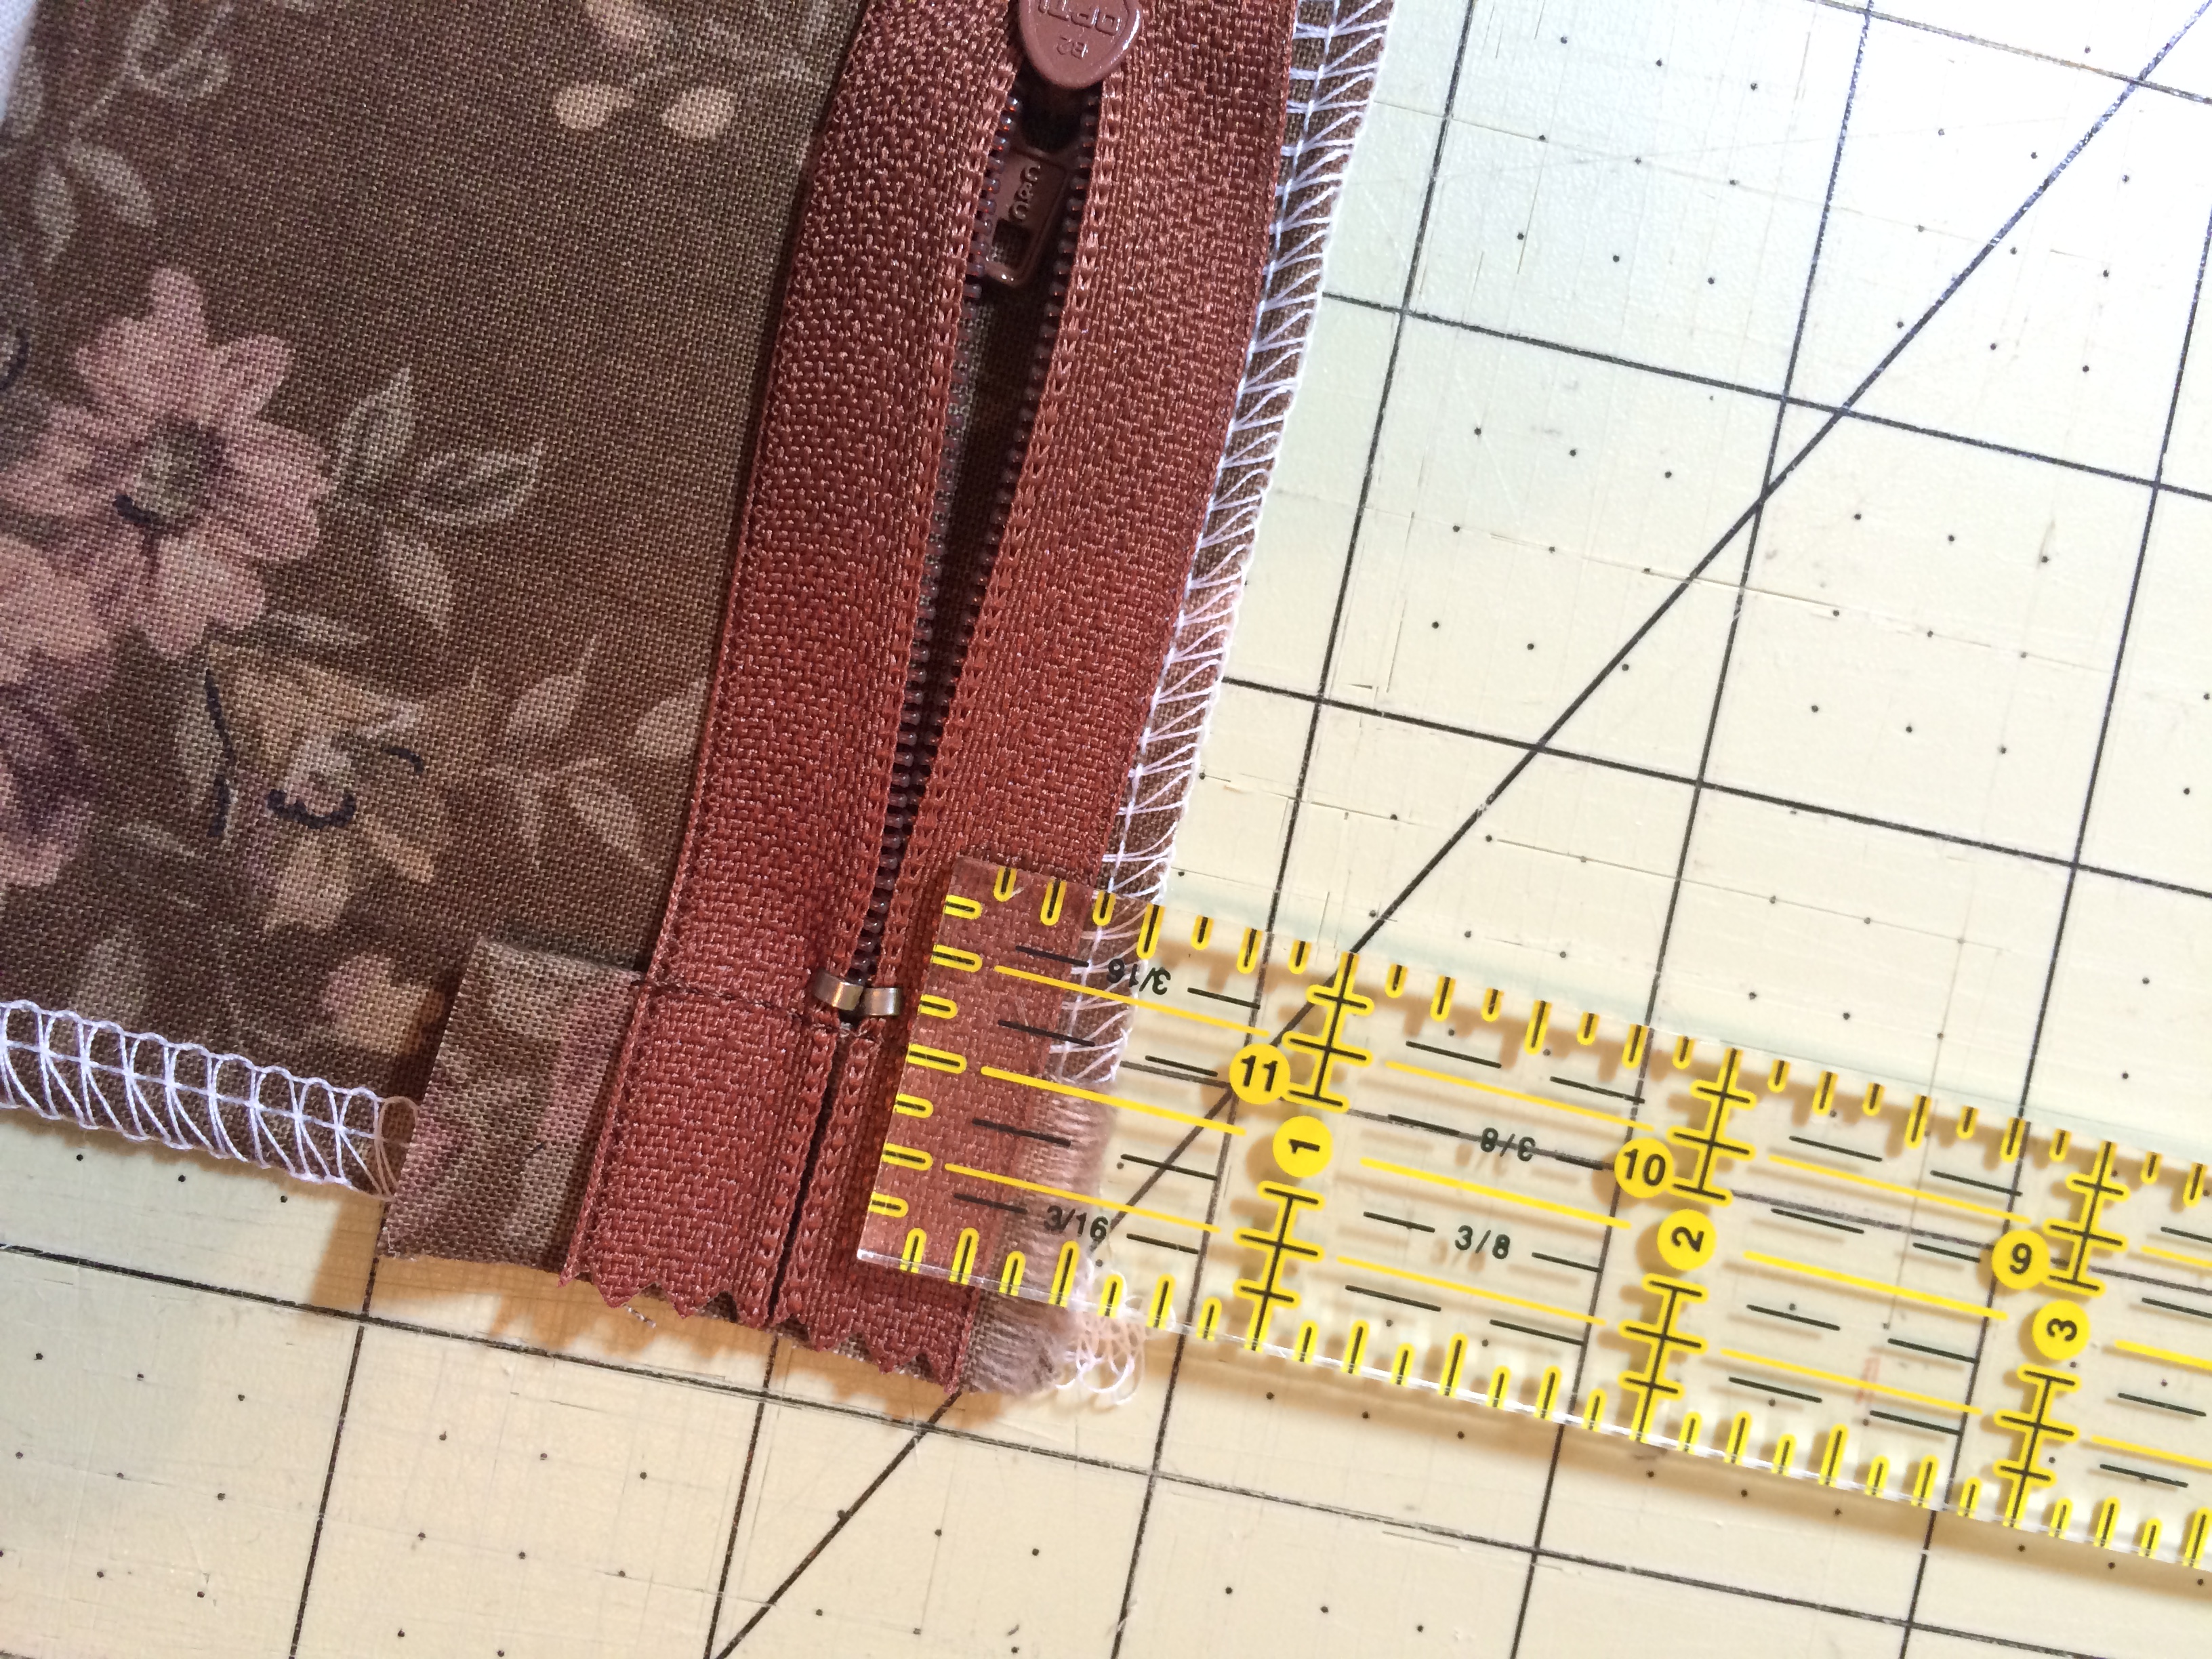
Next I ready the zipper by adding a small piece of fabric to each end. This gives a finished look. At the pull end of the zipper with fabric and zipper right sides together, sew across the zipper right above the zipper teeth. Fold piece of fabric over leaving about 3/4 inch wide fabric at end of zipper cutting off the rest of fabric.
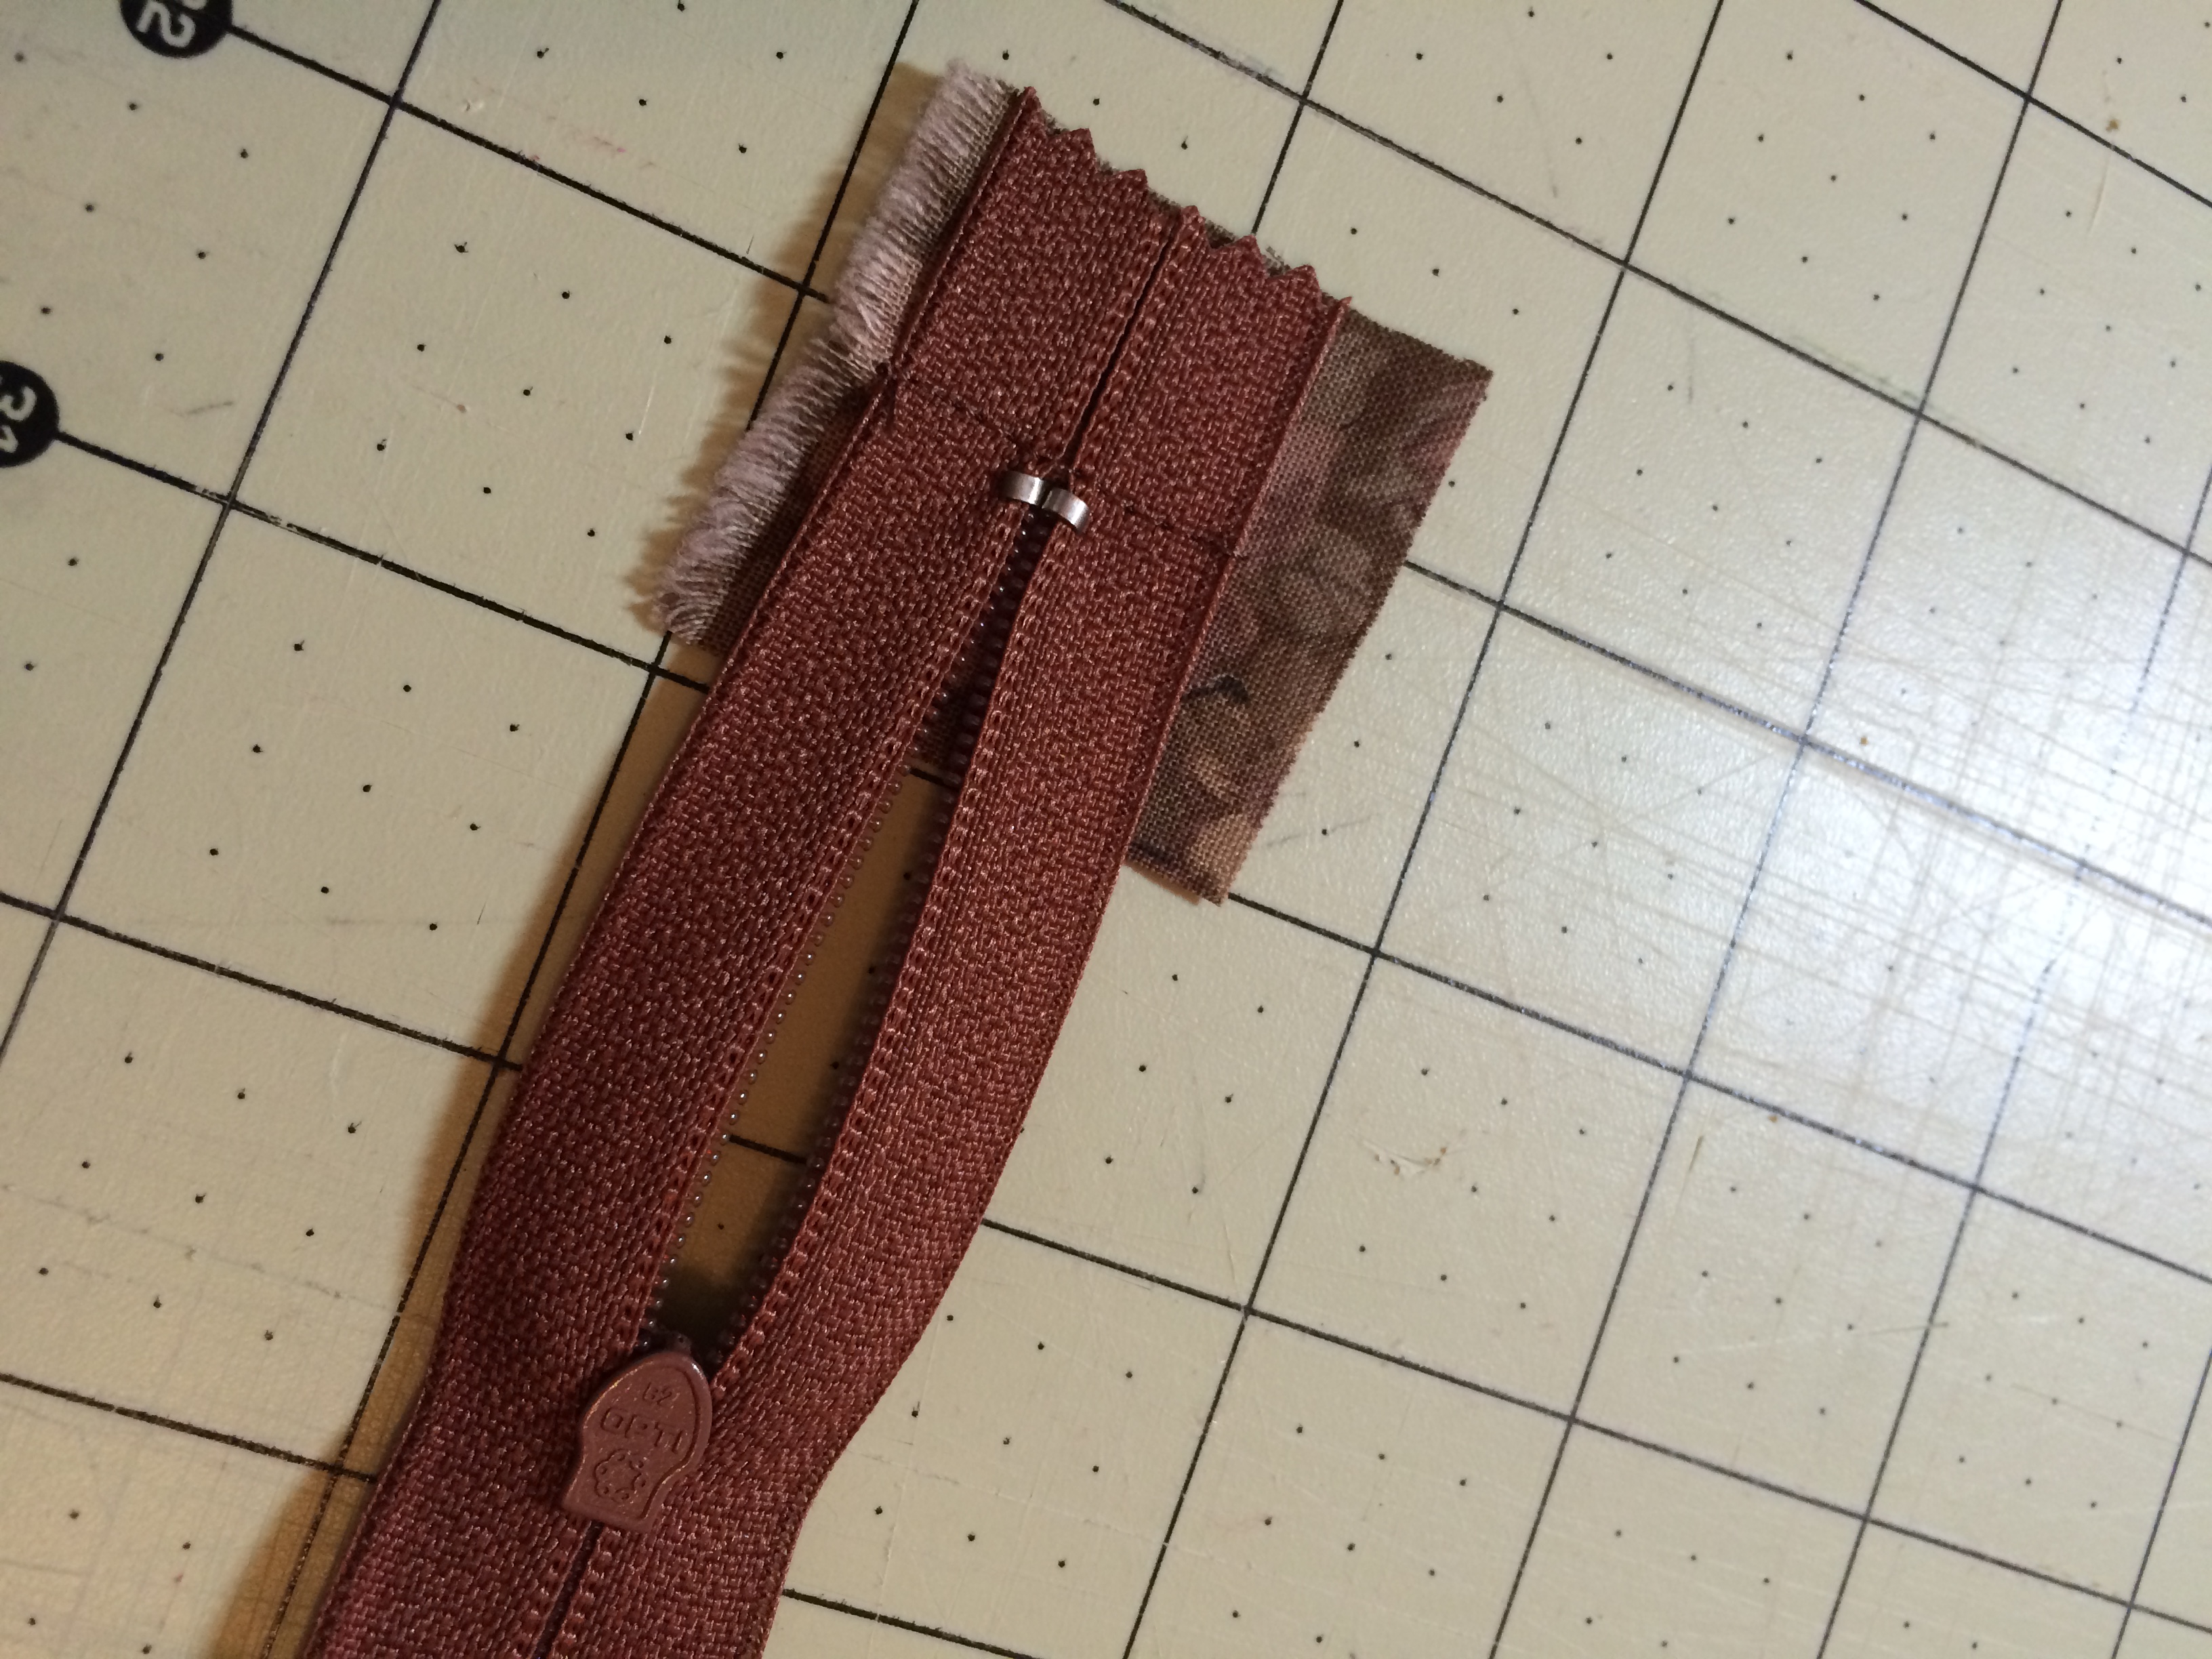
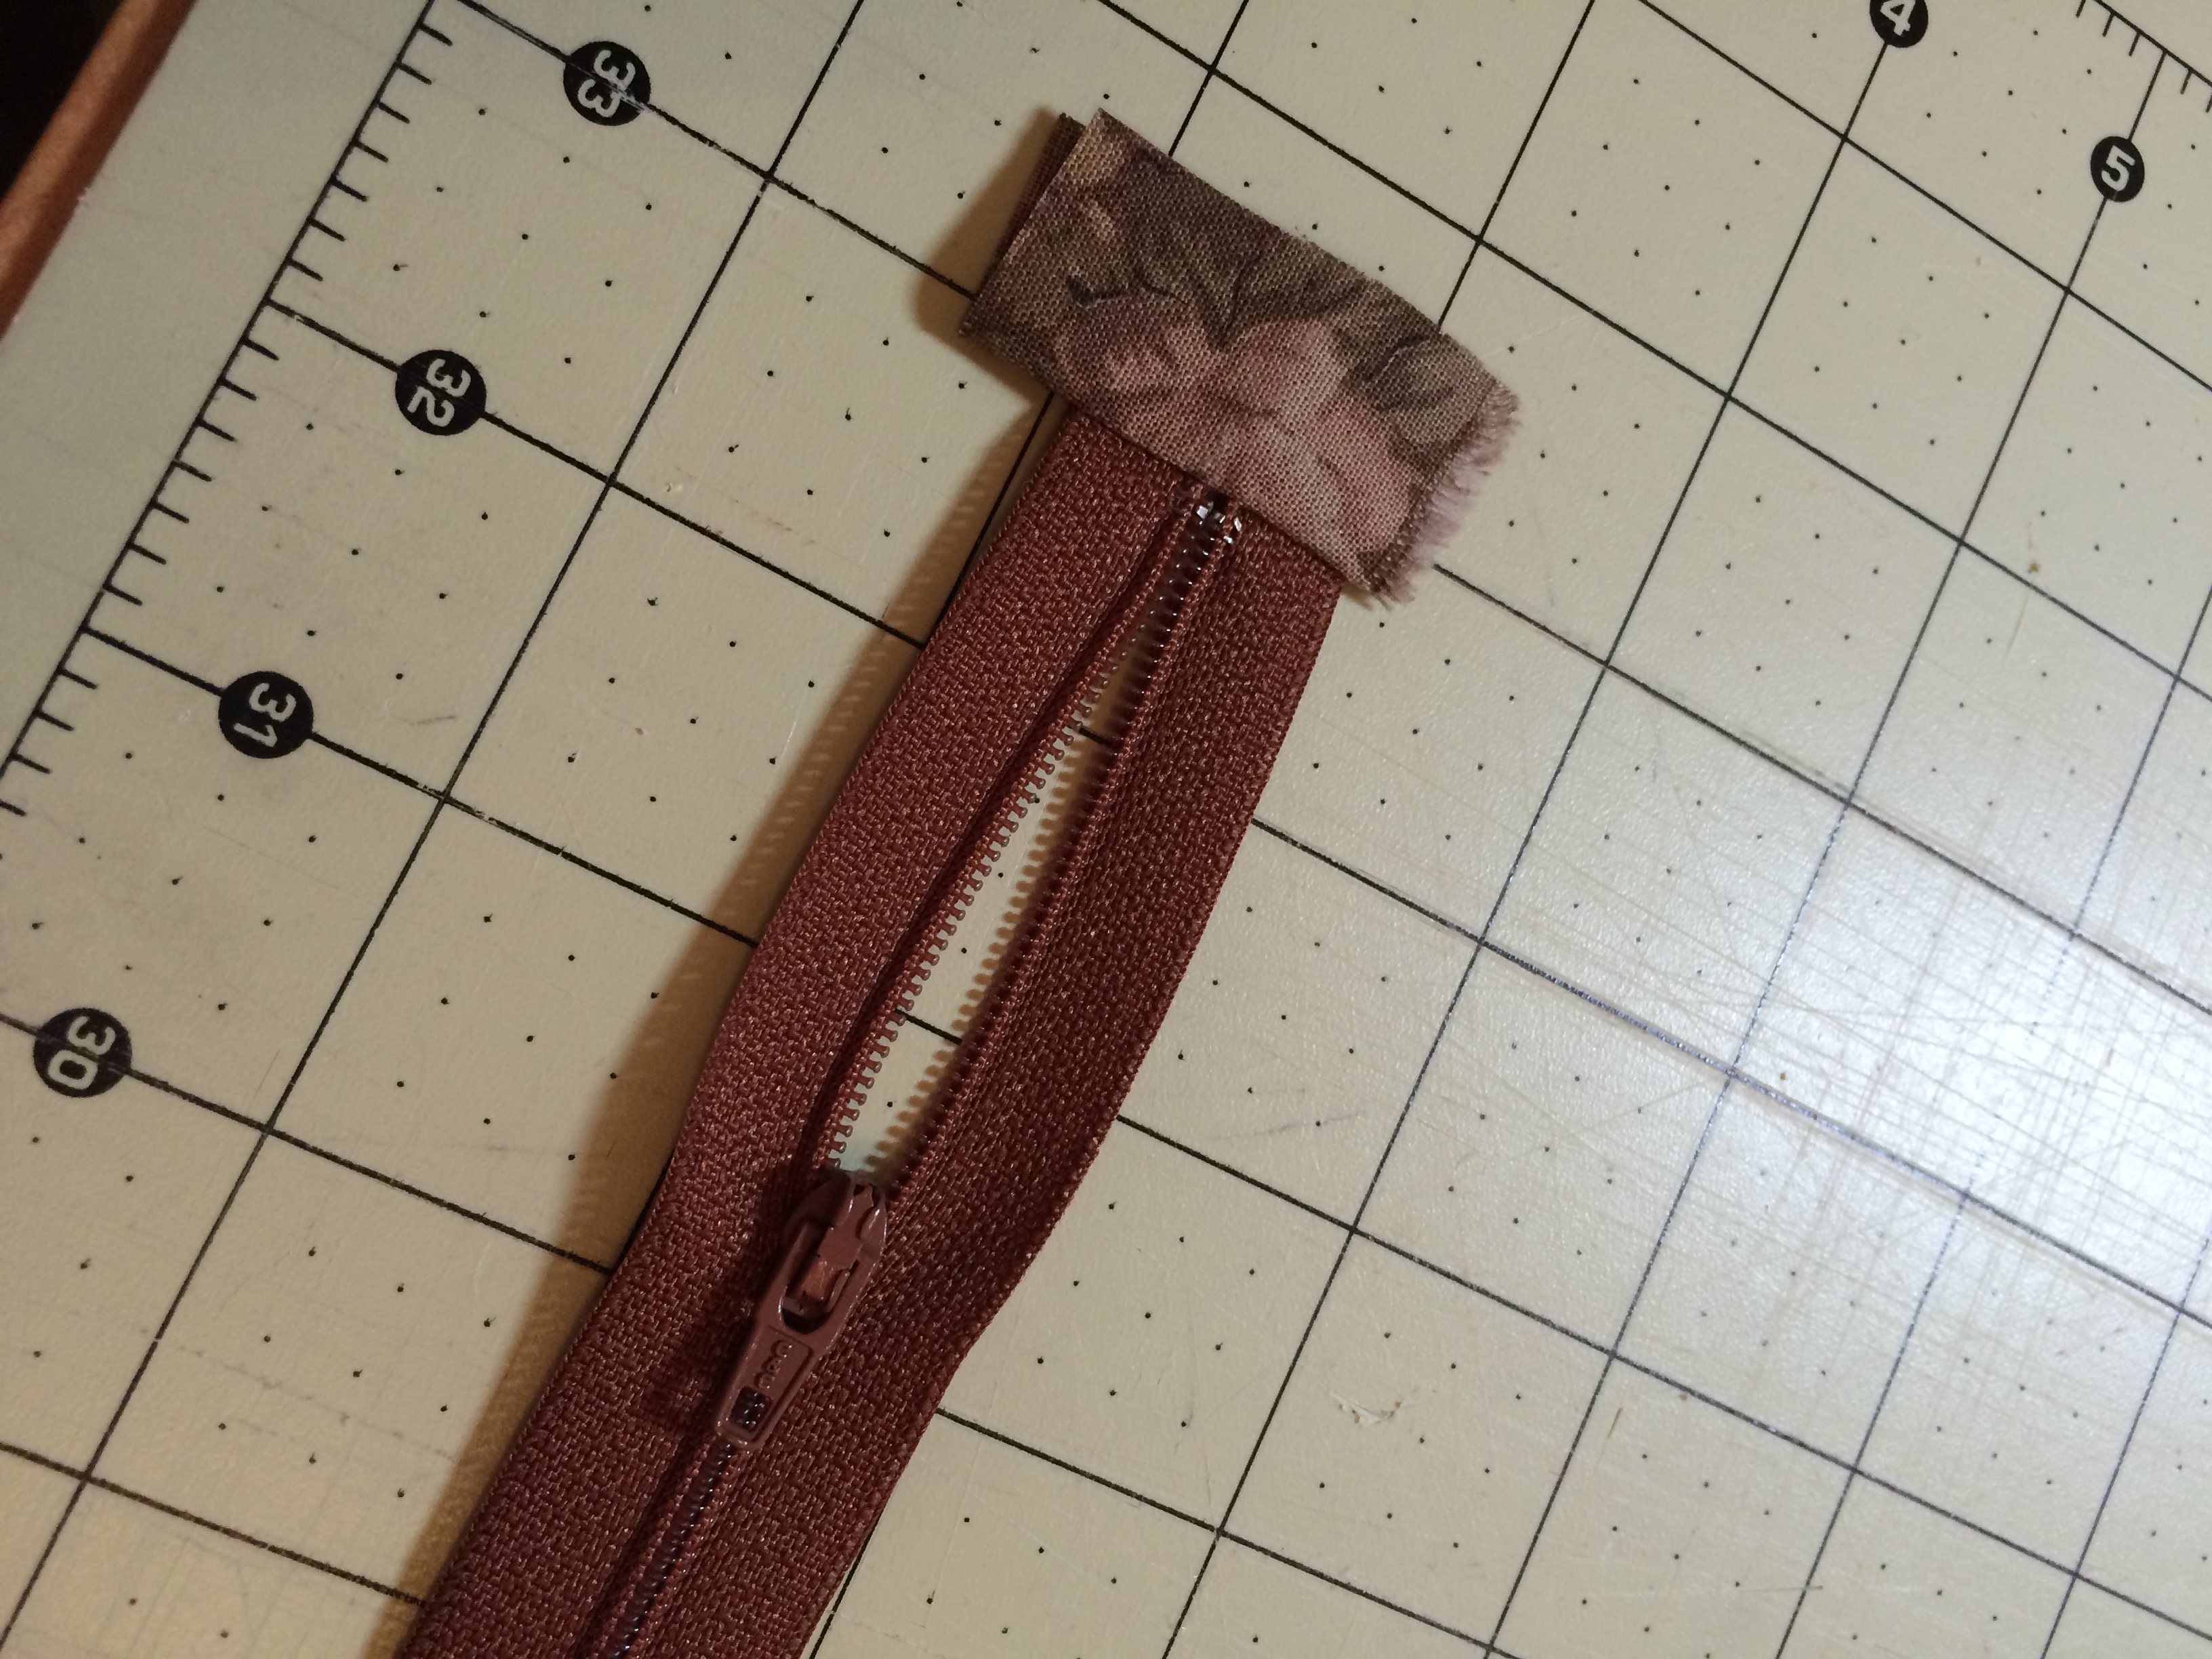
Now lay zipper across fabric to be sure it measures 16 inches. Zipper will be slightly too long. Cut the zipper off at the edge of the fabric. Do the same small piece of fabric at this end of zipper sewing ¾ inch from edge of zipper, then folding fabric over so ¾” of zipper is covered with piece of fabric. Set zipper aside for a moment.
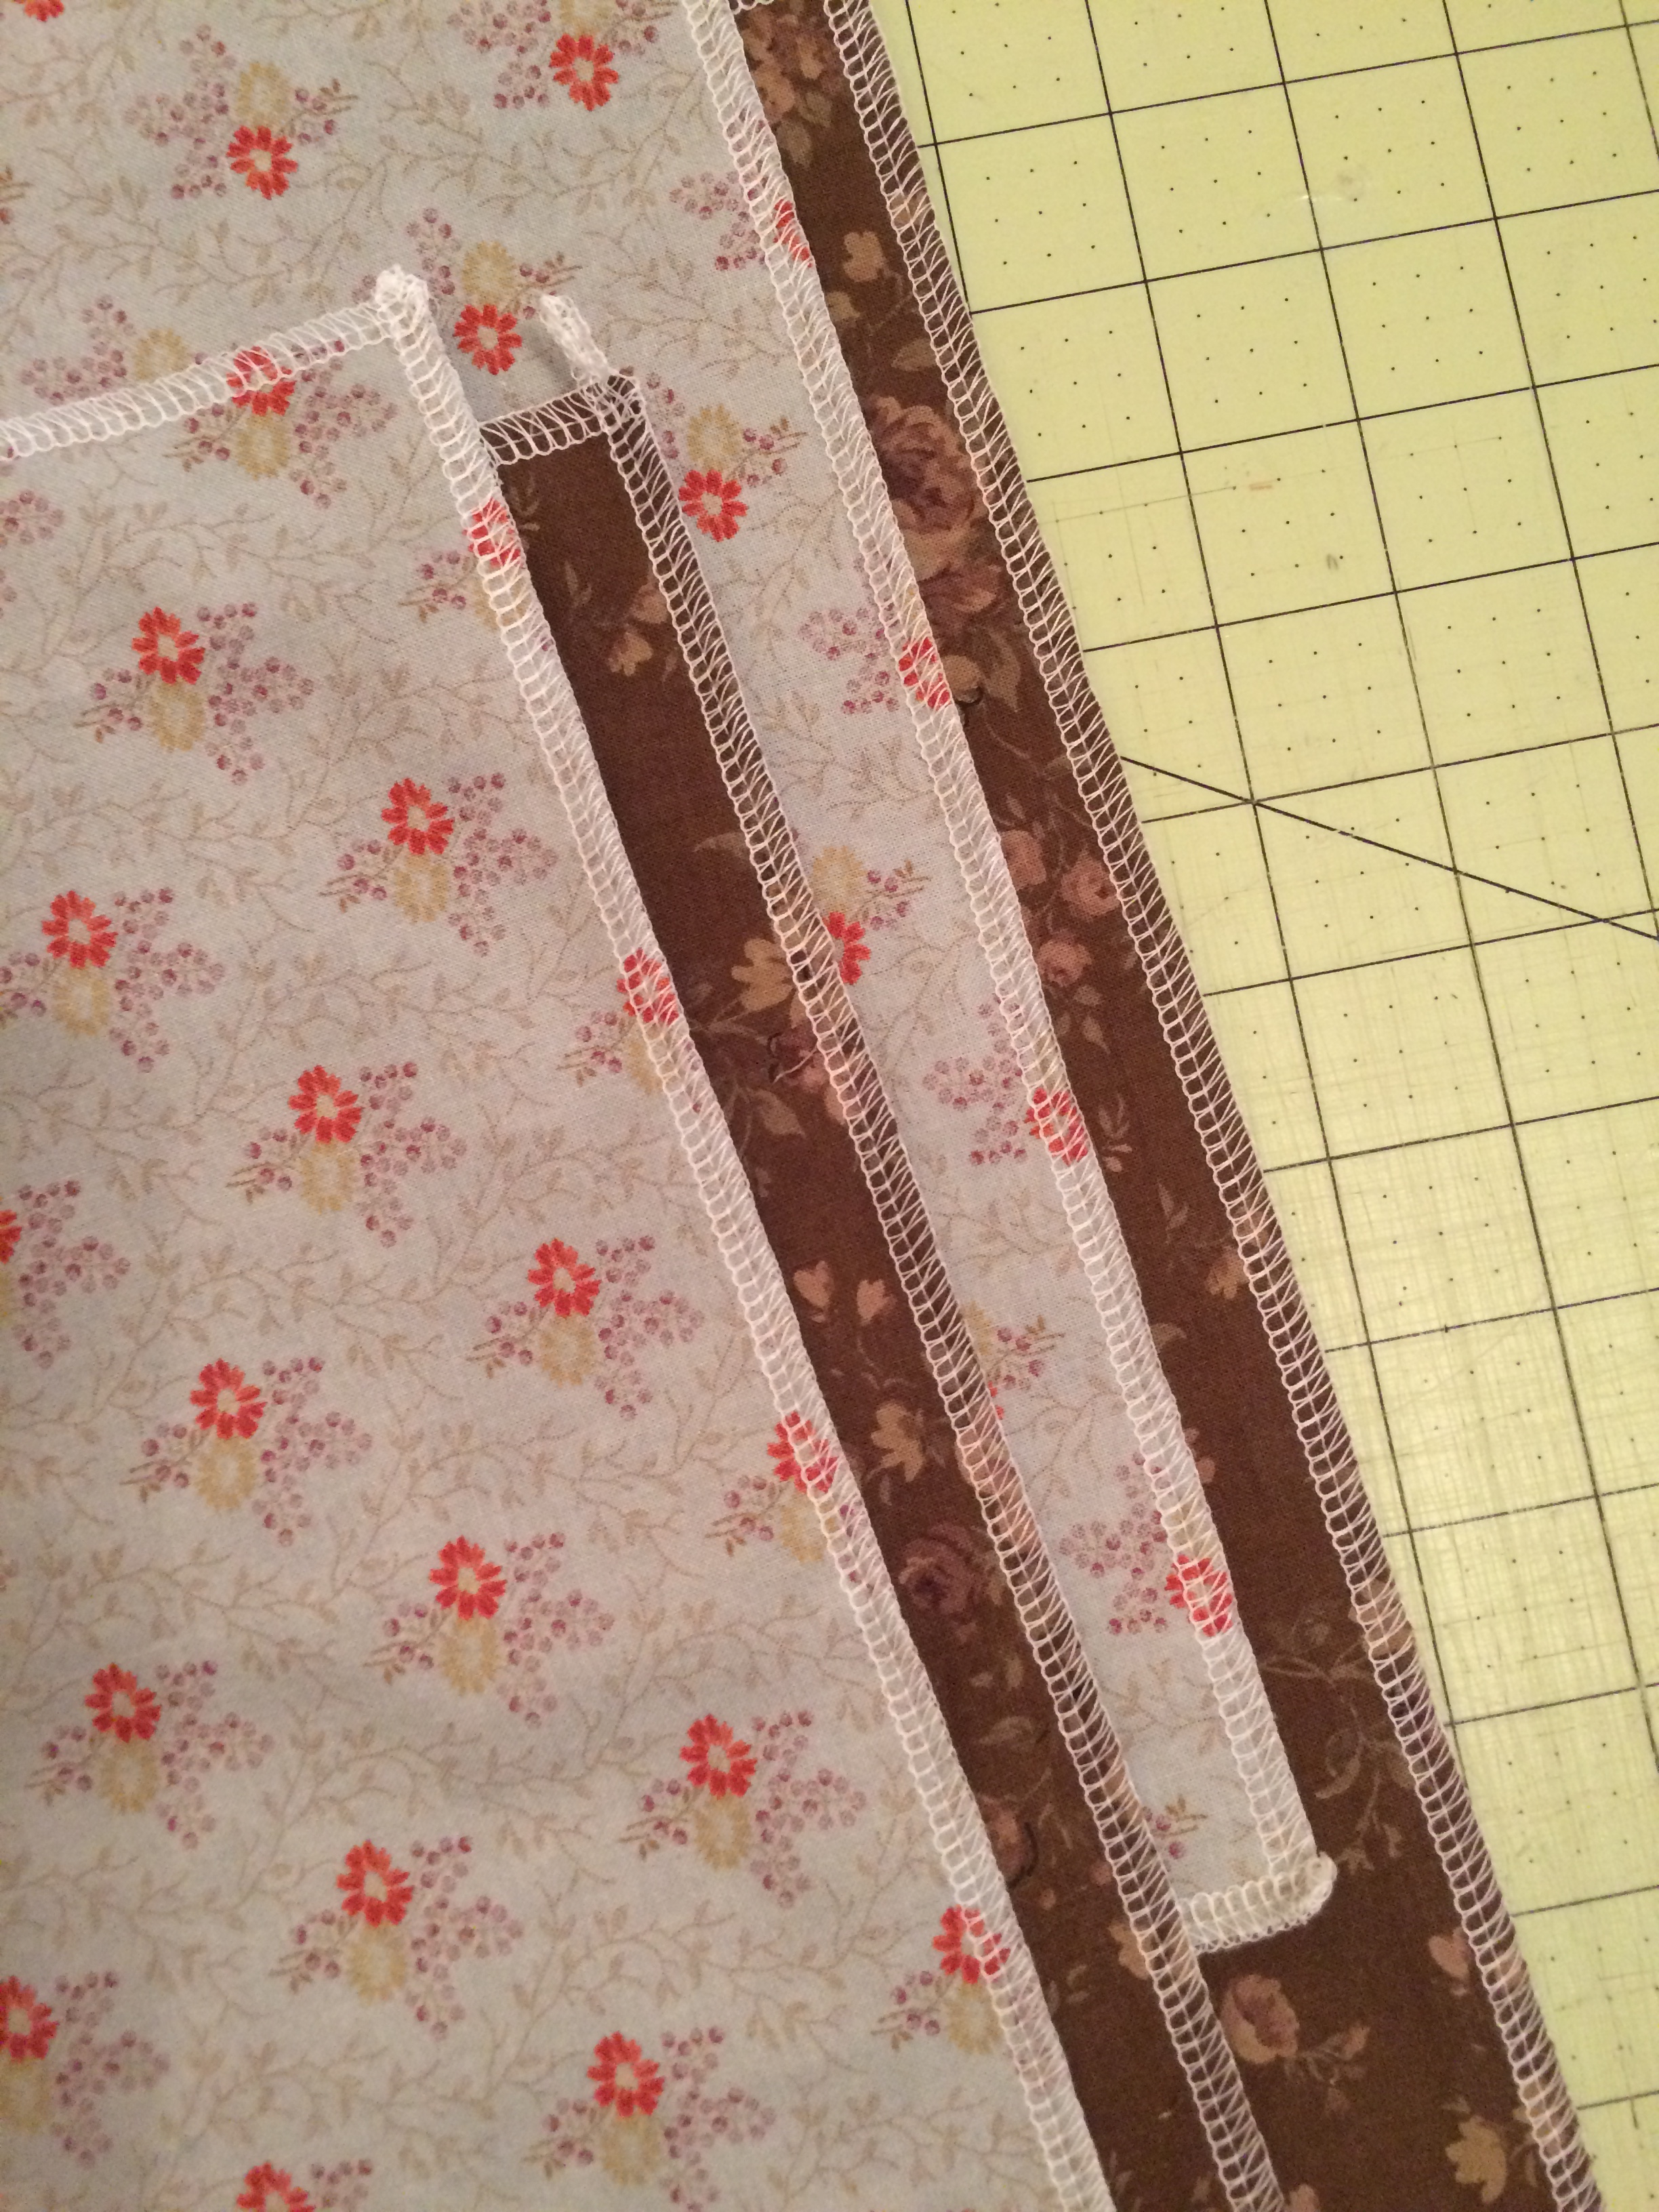
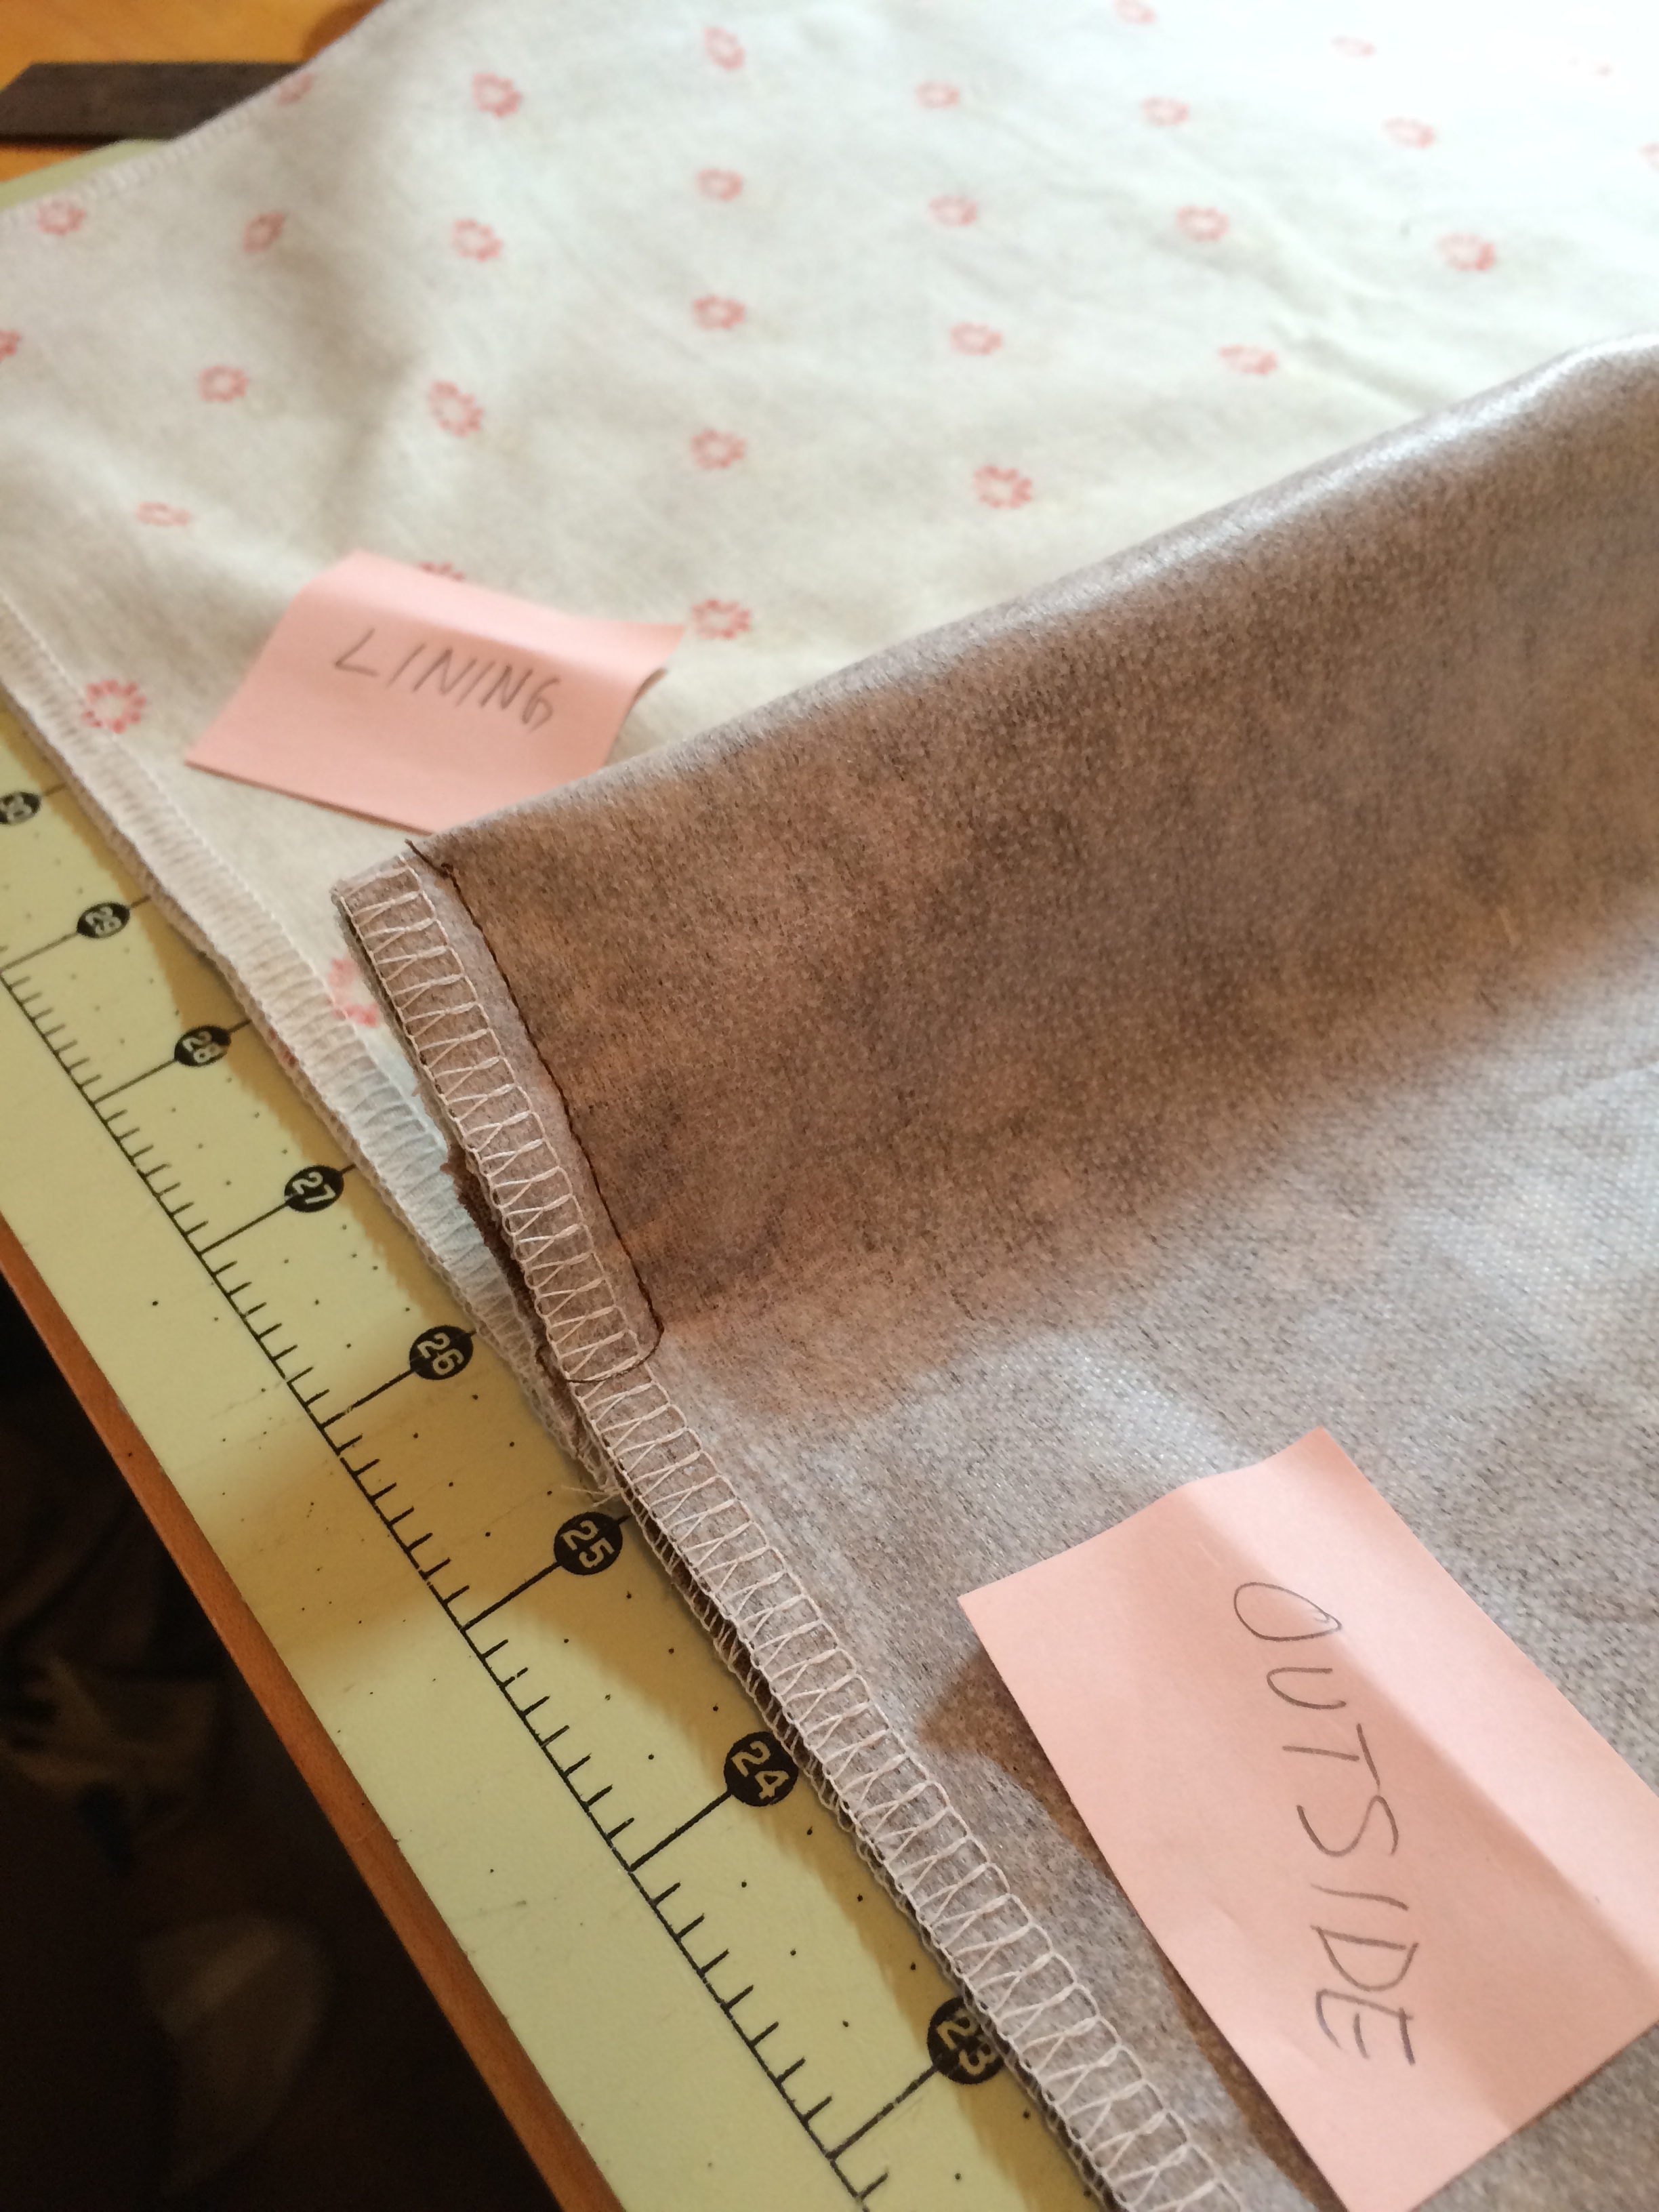
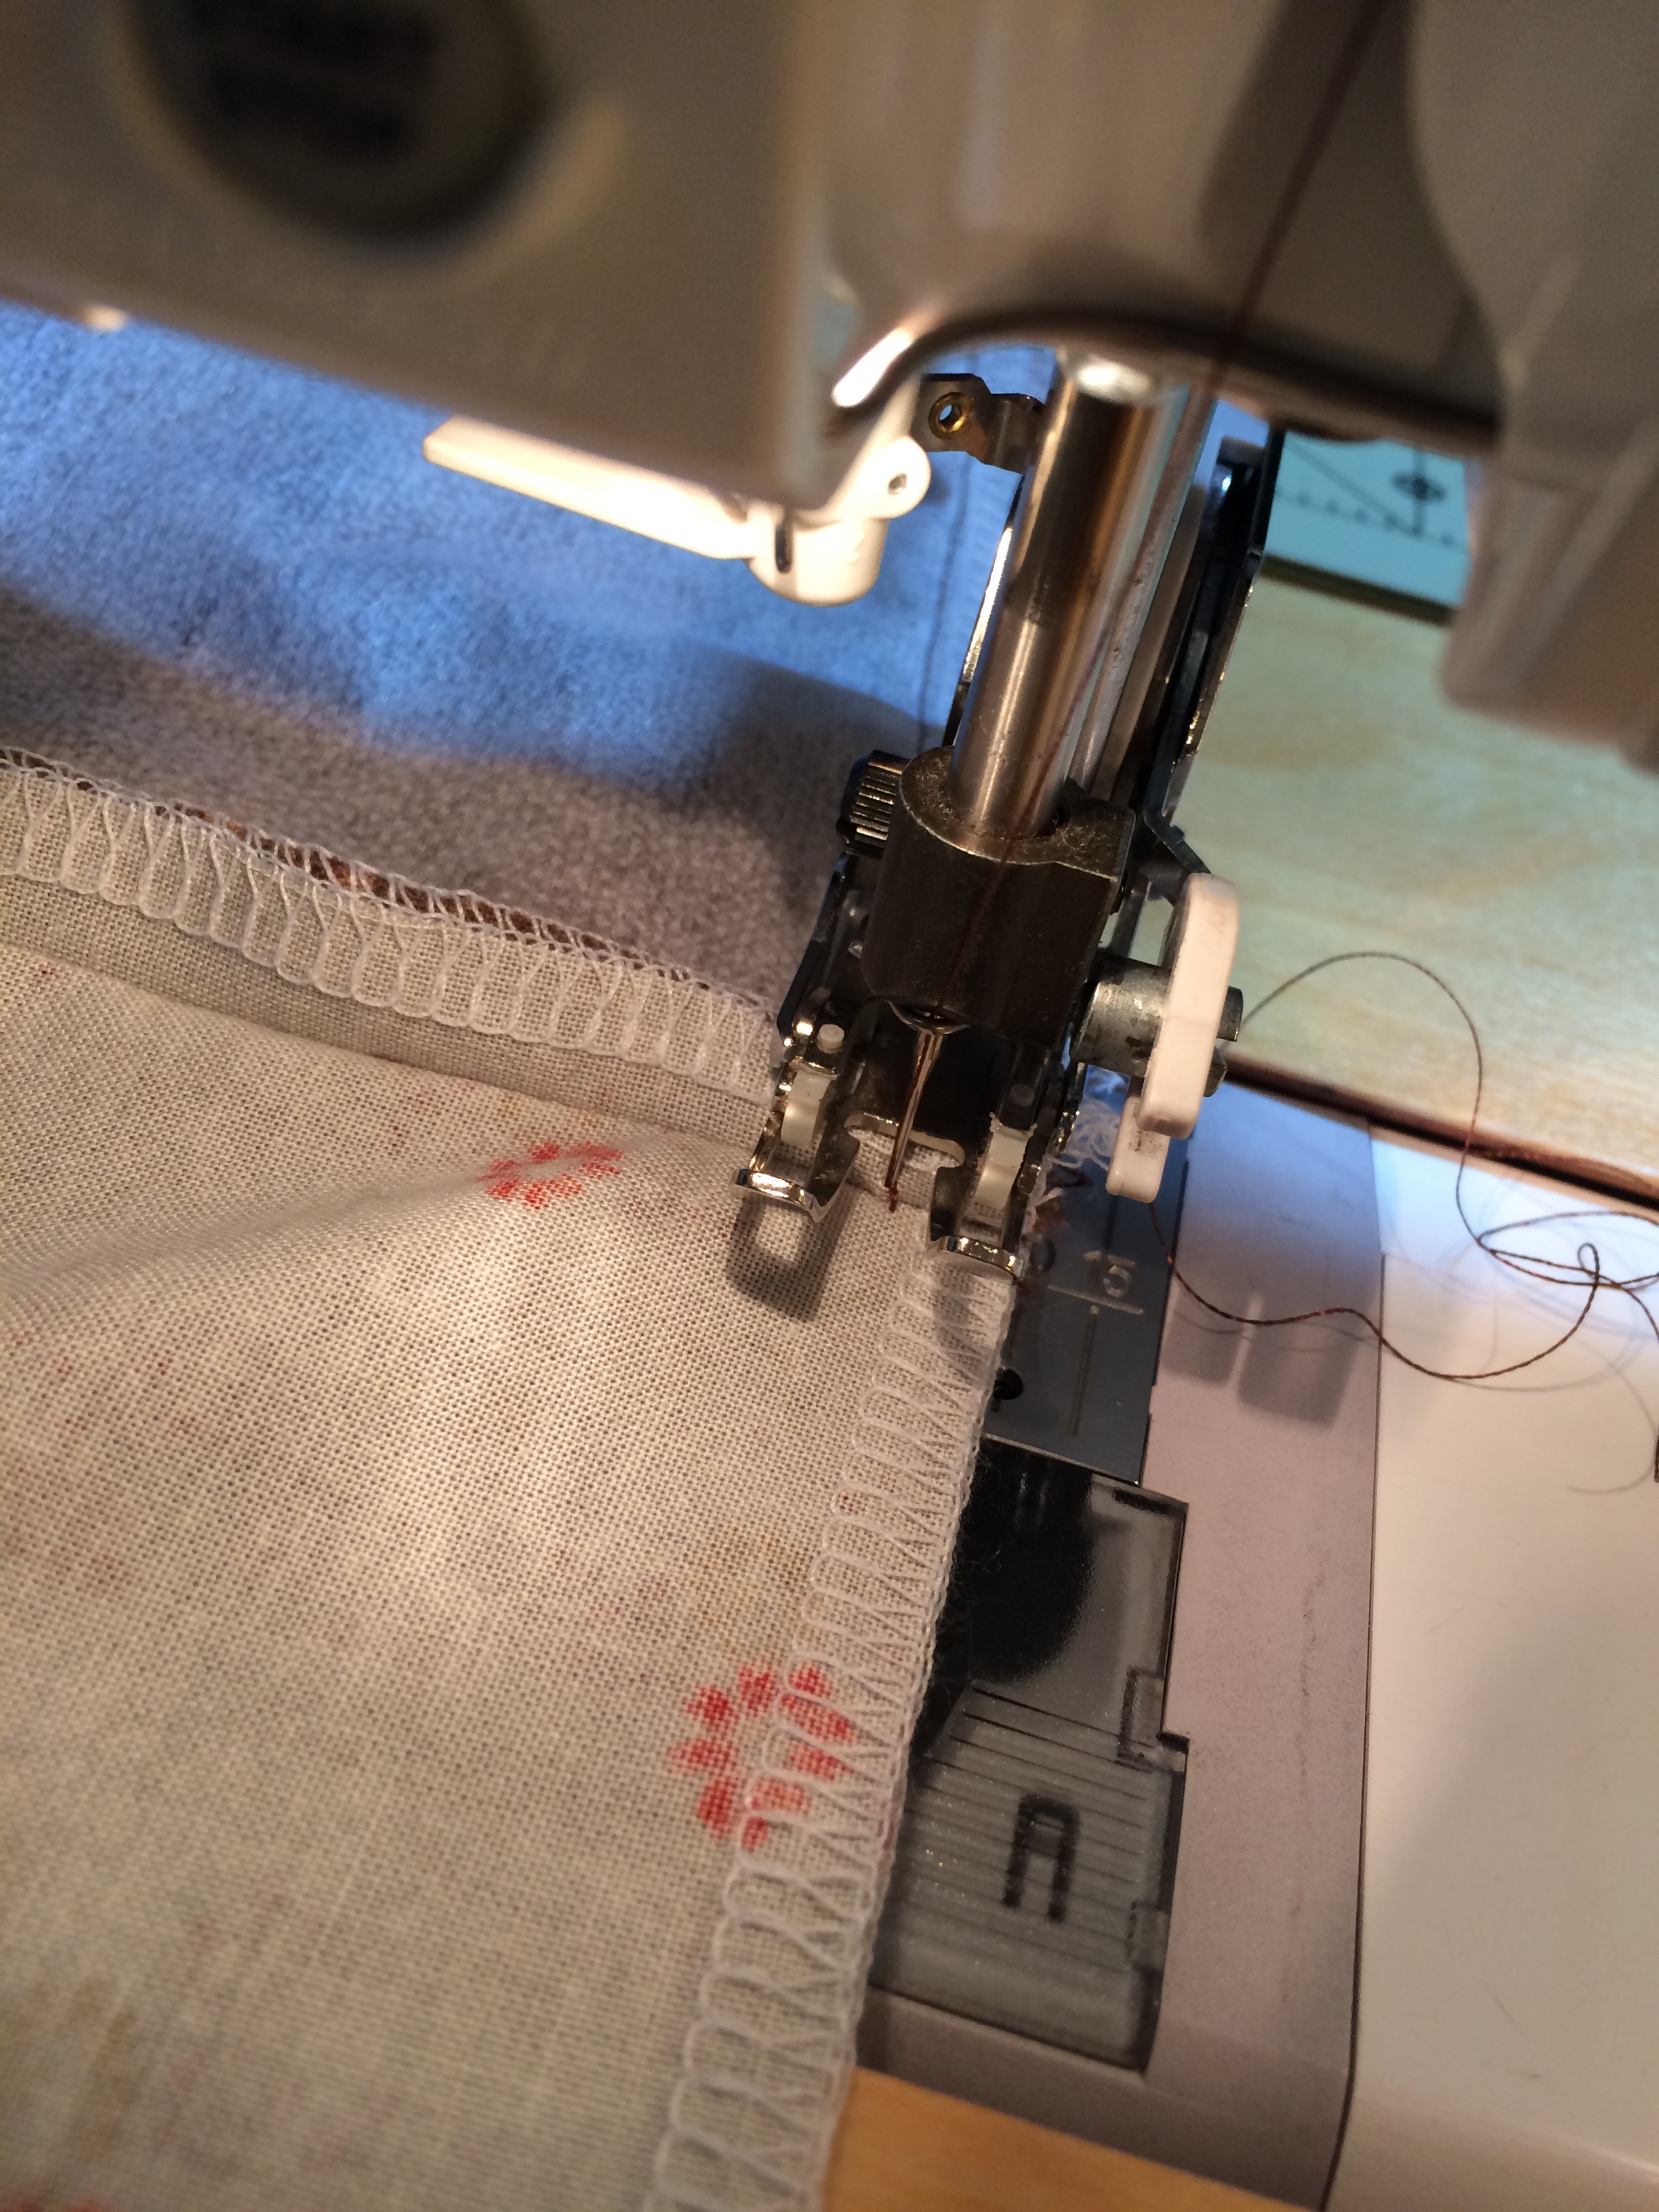
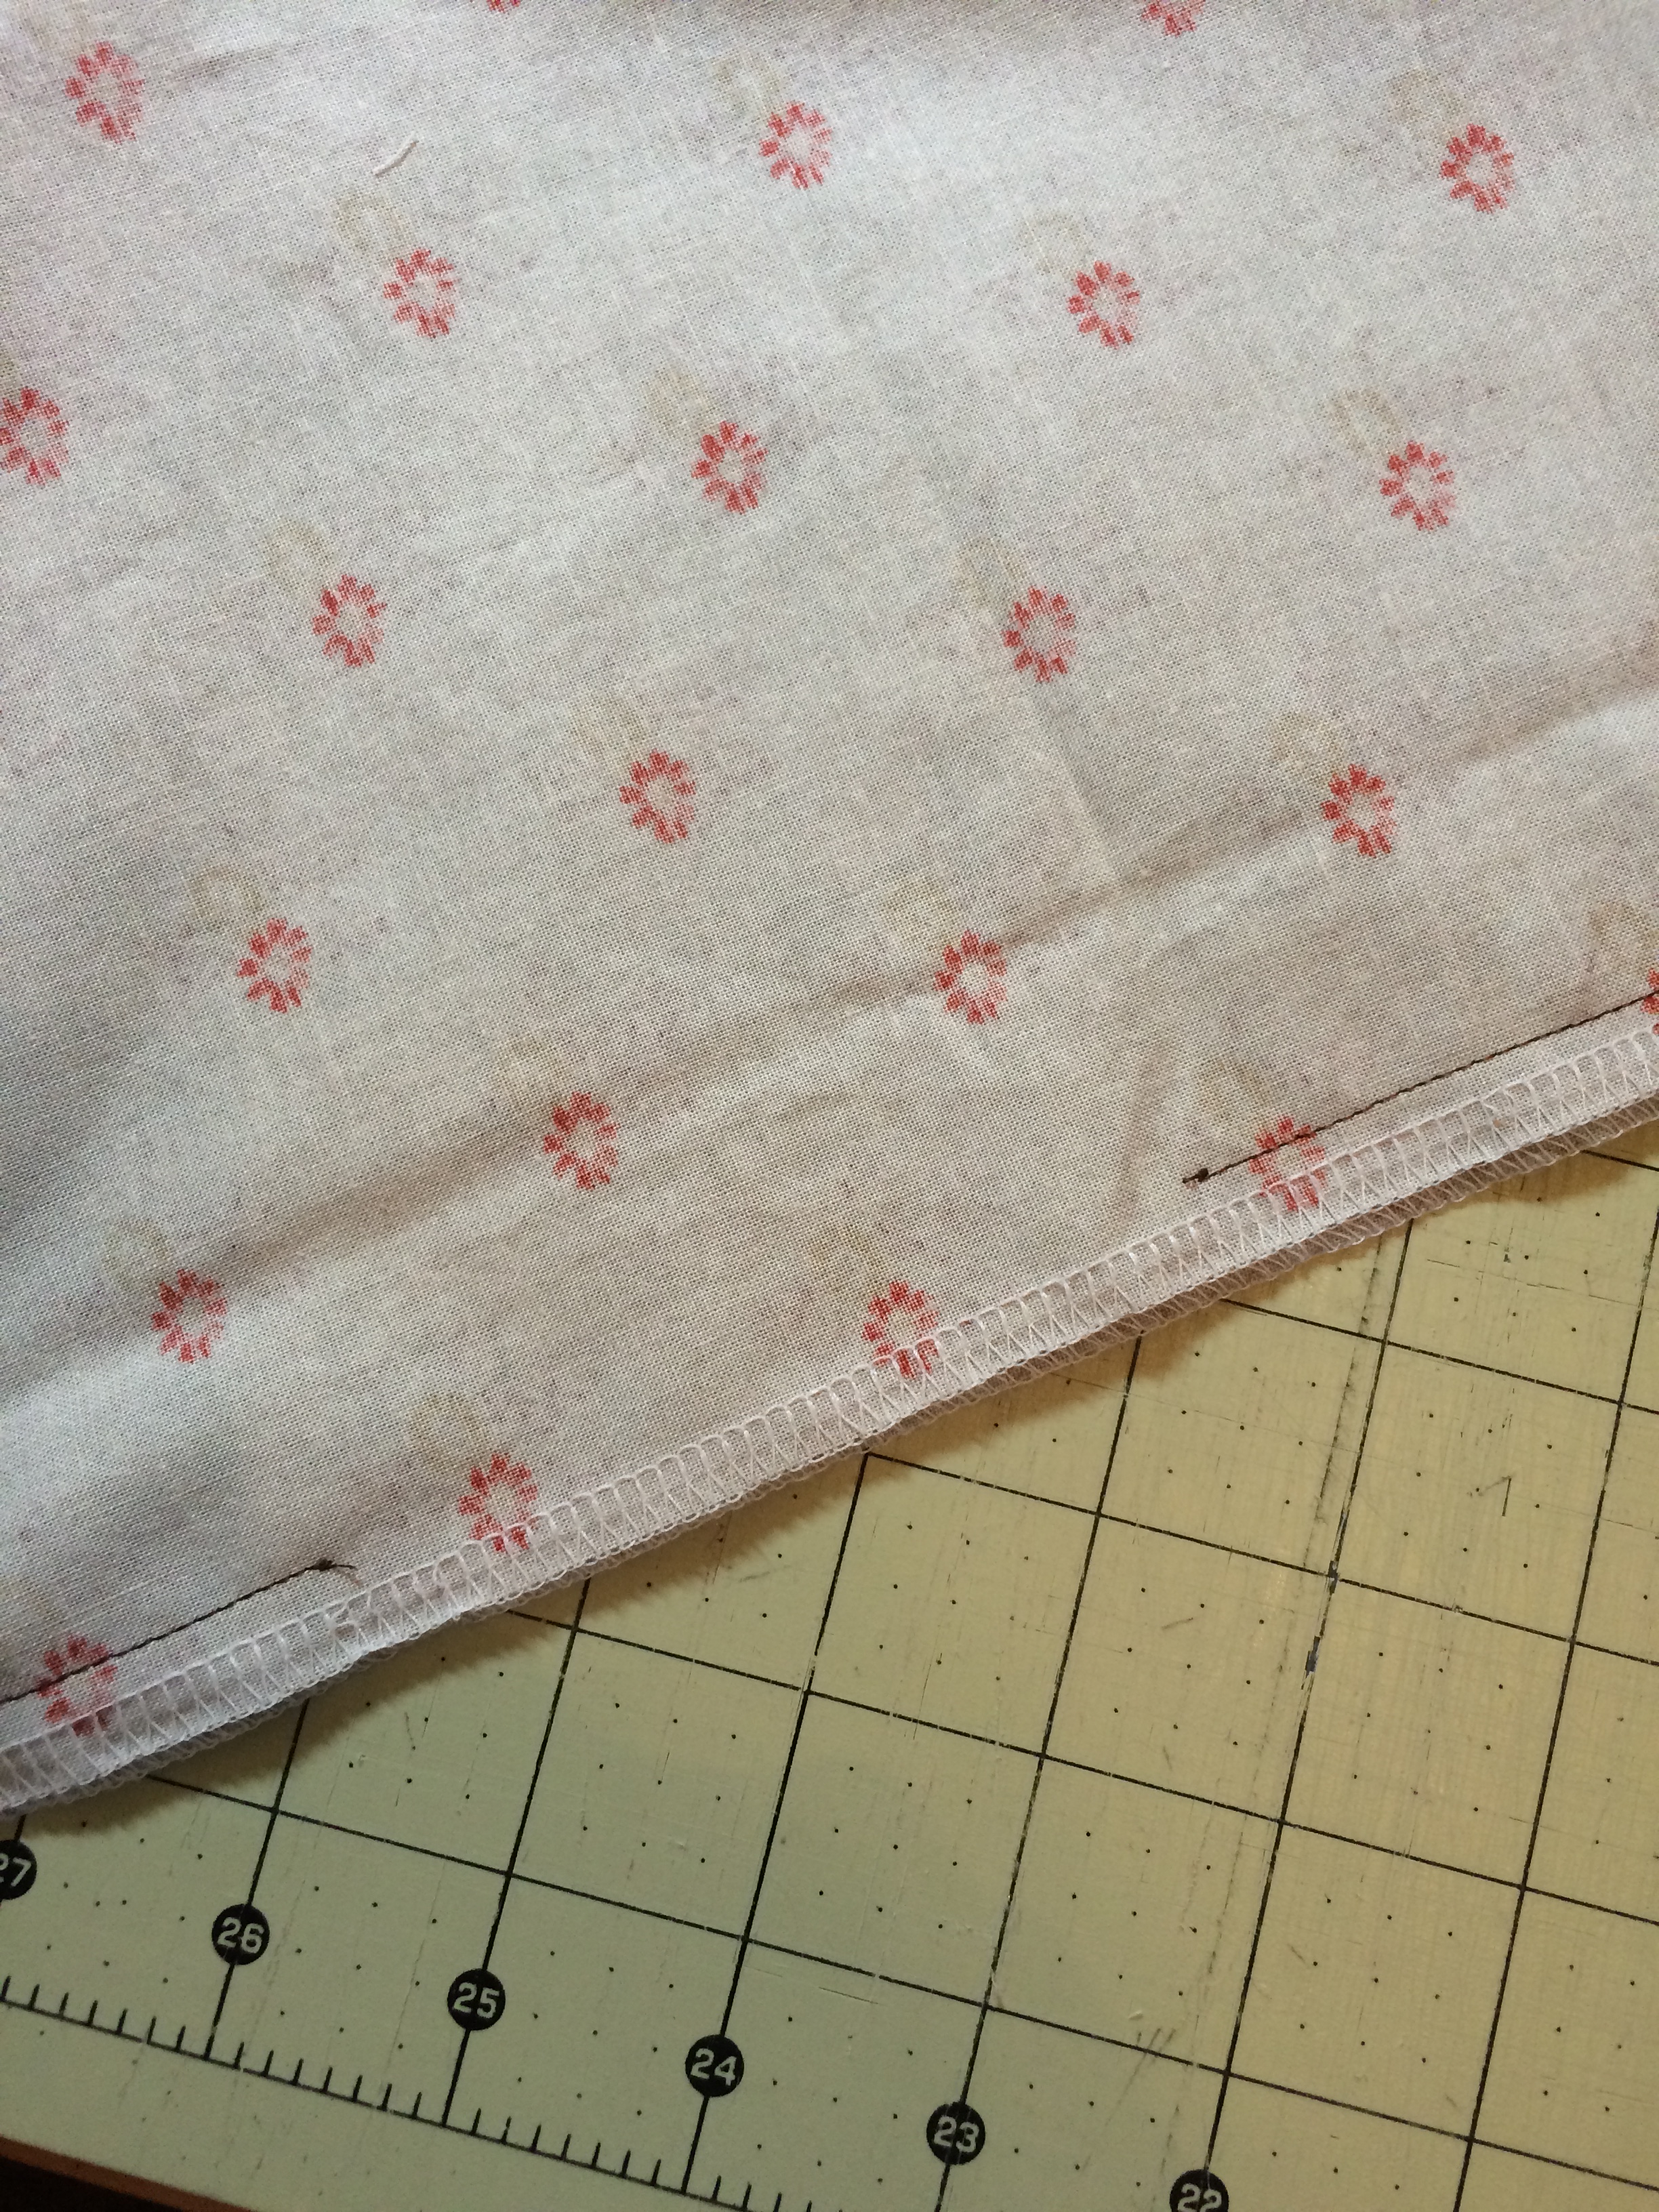
Even though ALL of the edges of fabric and seam allowances will NOT BE SEEN inside the project bag, I serge around all four pieces of fabric. I just like to have a finished edge. All seam allowances will be inside between the lining and the outside of the bag. You can use a serger or simply zigzag if you wish. This step is optional.
Now for sewing the bag together:
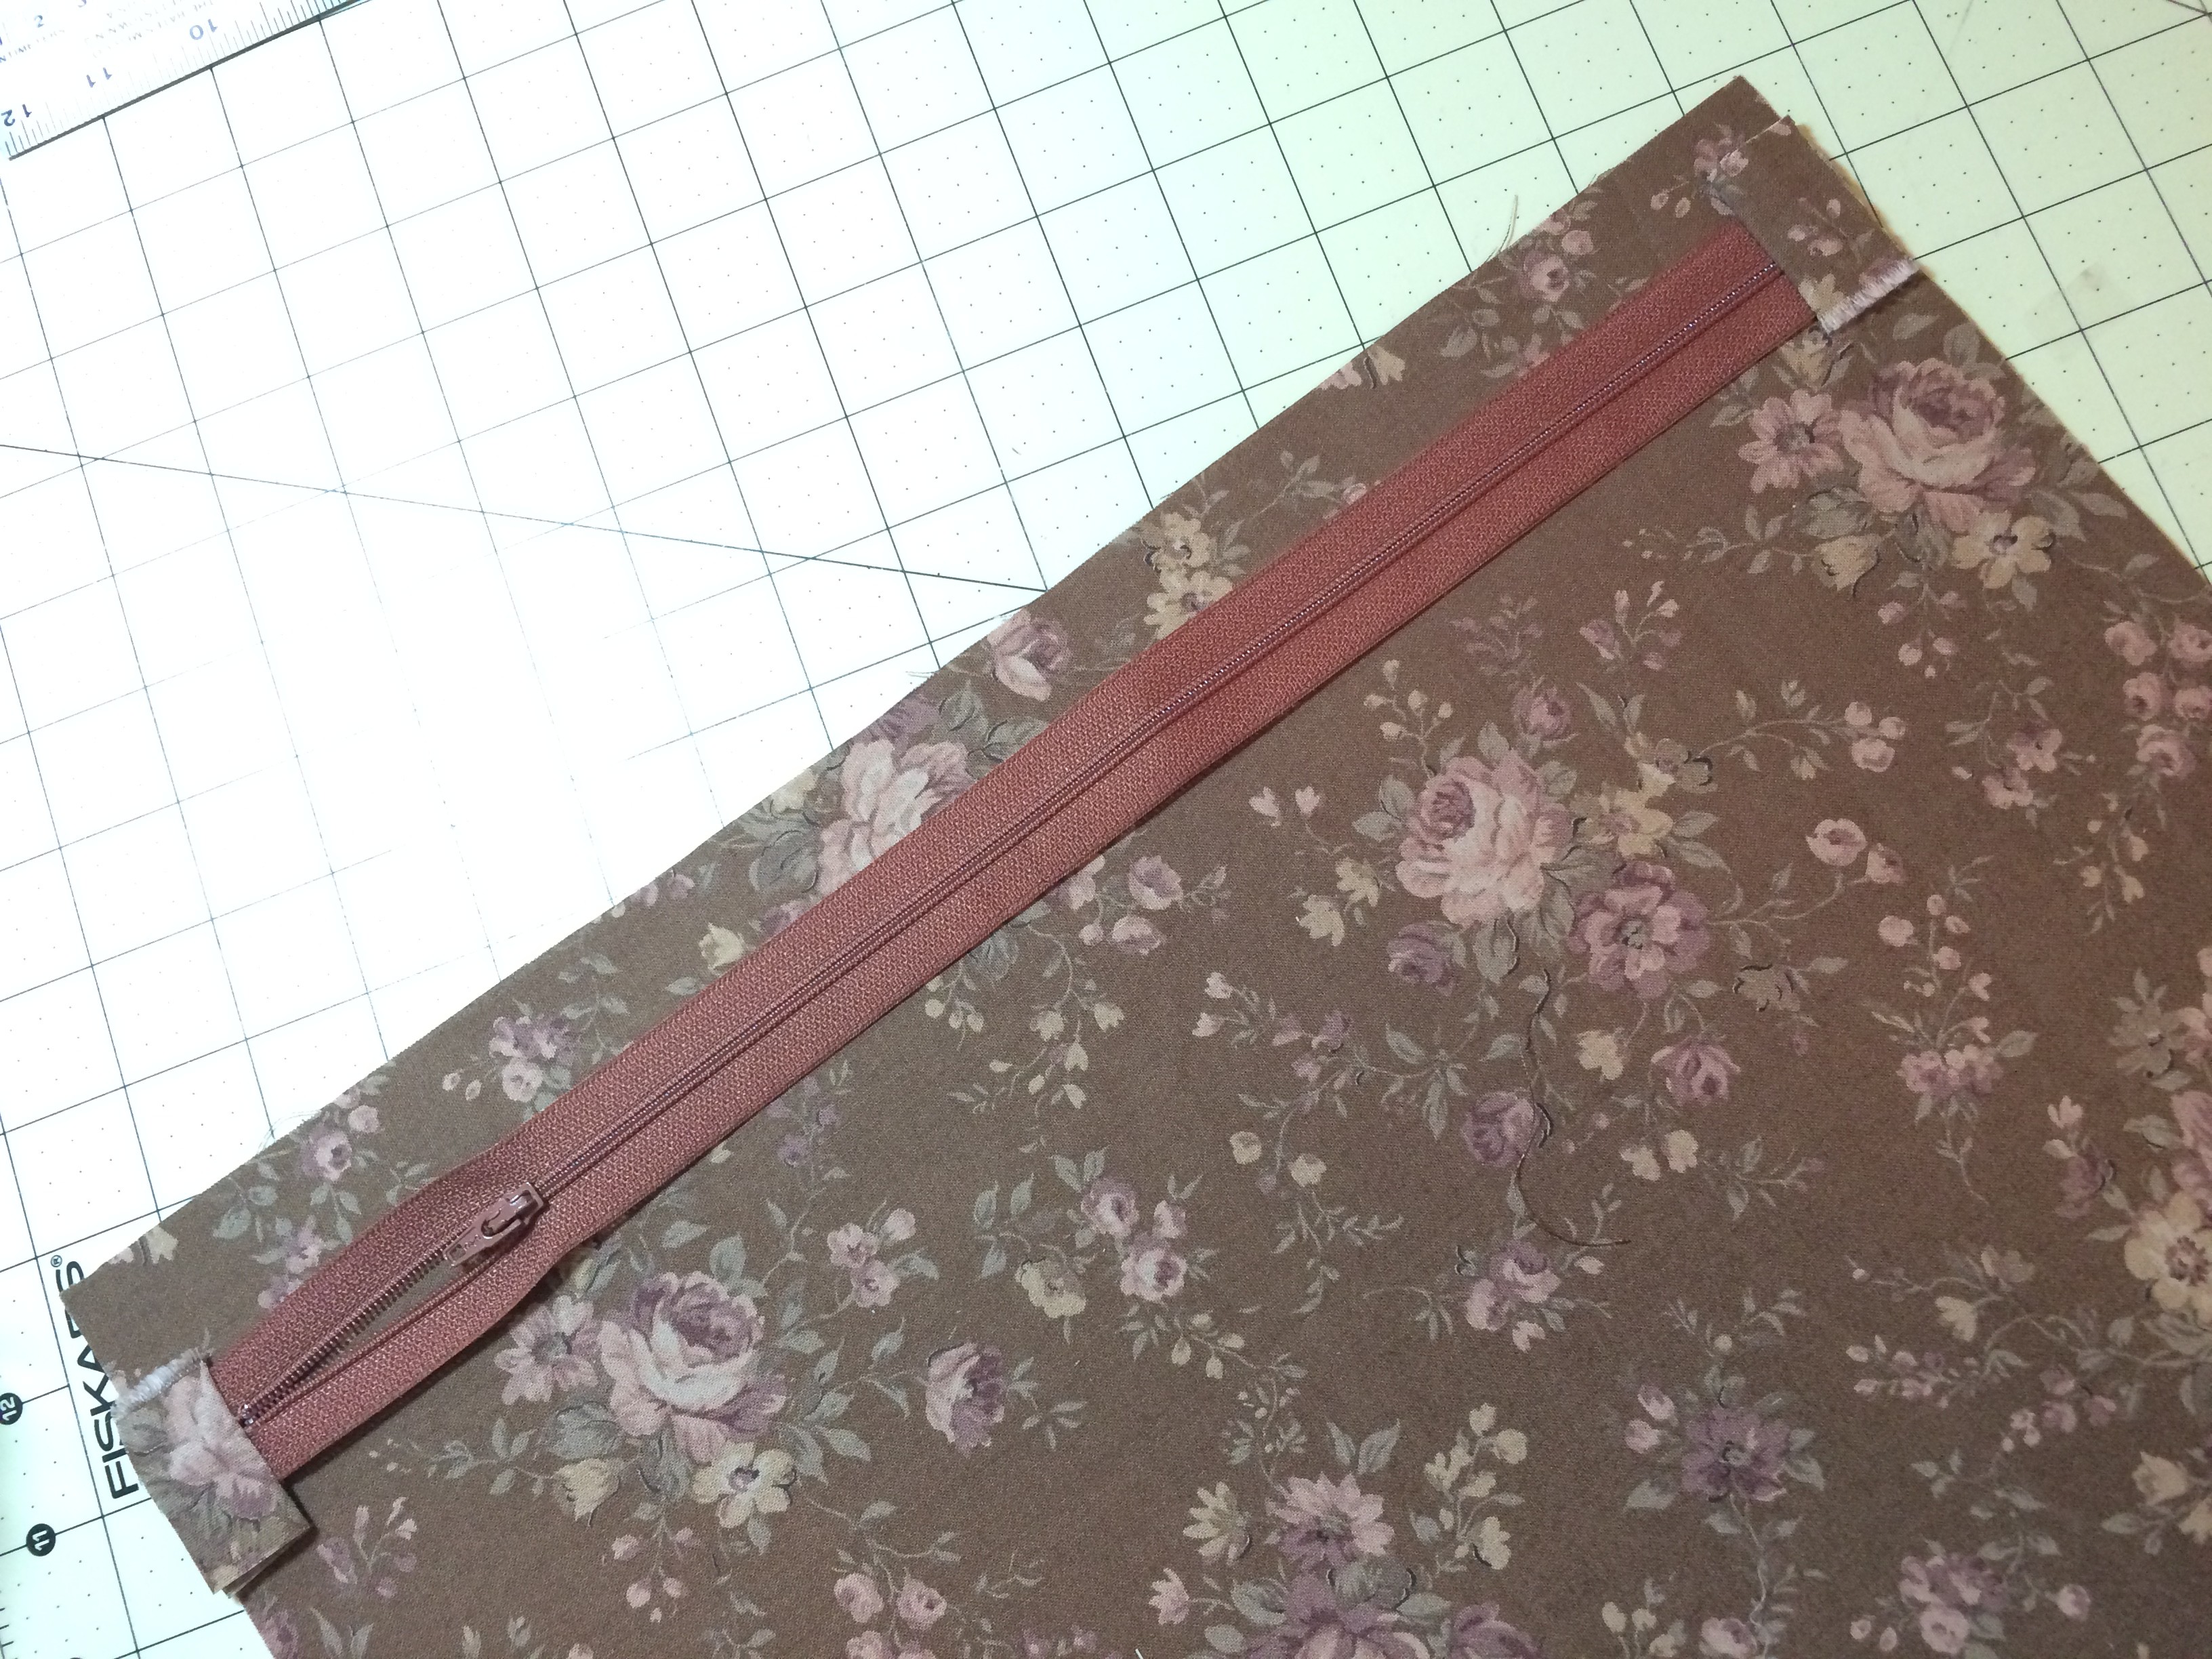
Take the longer back piece (main fabric) right side up and lay zipper across face down along the edge with zipper pull to the right. Lay longer lining piece on top of this (right sides together). Check with a ruler to see where the zipper teeth are. You want to sew about 1/8 inch from the zipper teeth all the way across. When finished, fold the front and back away from zipper (right sides now out). At this point you can press the front and back exposing the zipper. I tug at it slightly to be sure to leave room for zipper pull to go up and down. Topstitch through all about 1/8 inch from edge close to zipper.


Do the same with the two smaller pieces (main fabric and lining) on the other side of the zipper MAKING SURE THAT IF YOU HAVE AN EMBROIDERY THAT IT IS RIGHT SIDE UP!!
NOW ****LEAVE ZIPPER OPEN**** !!!!!
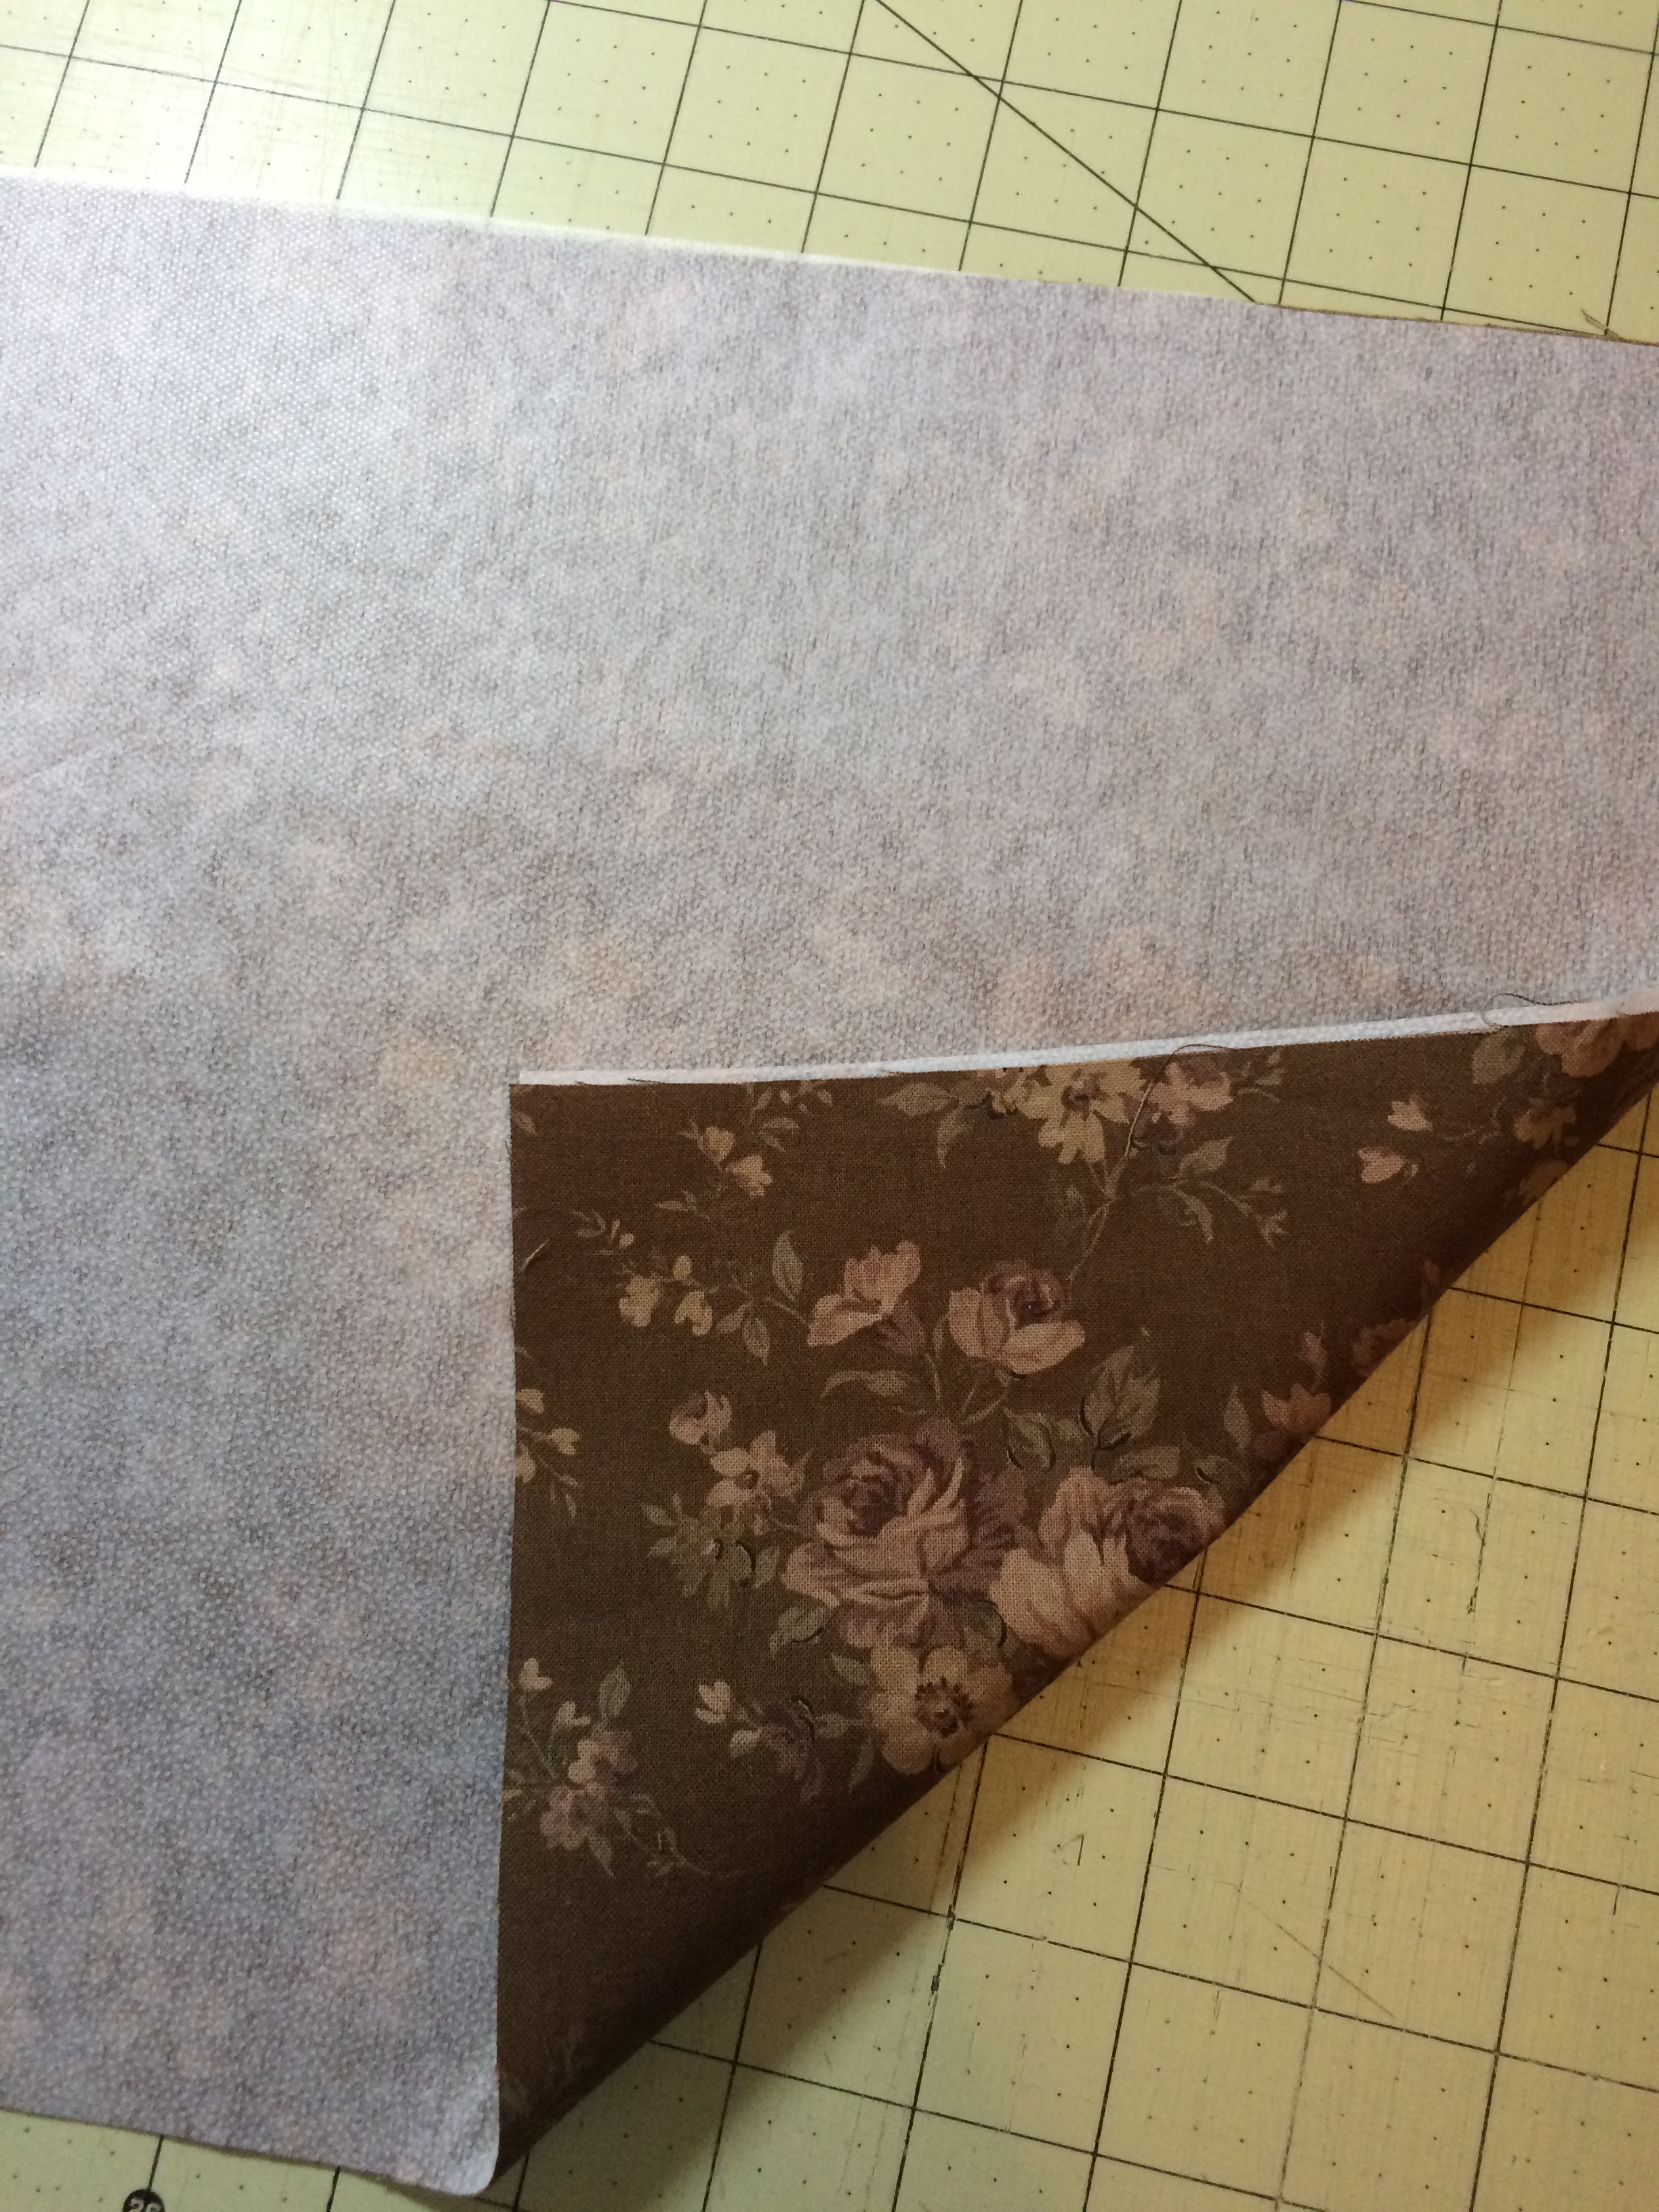
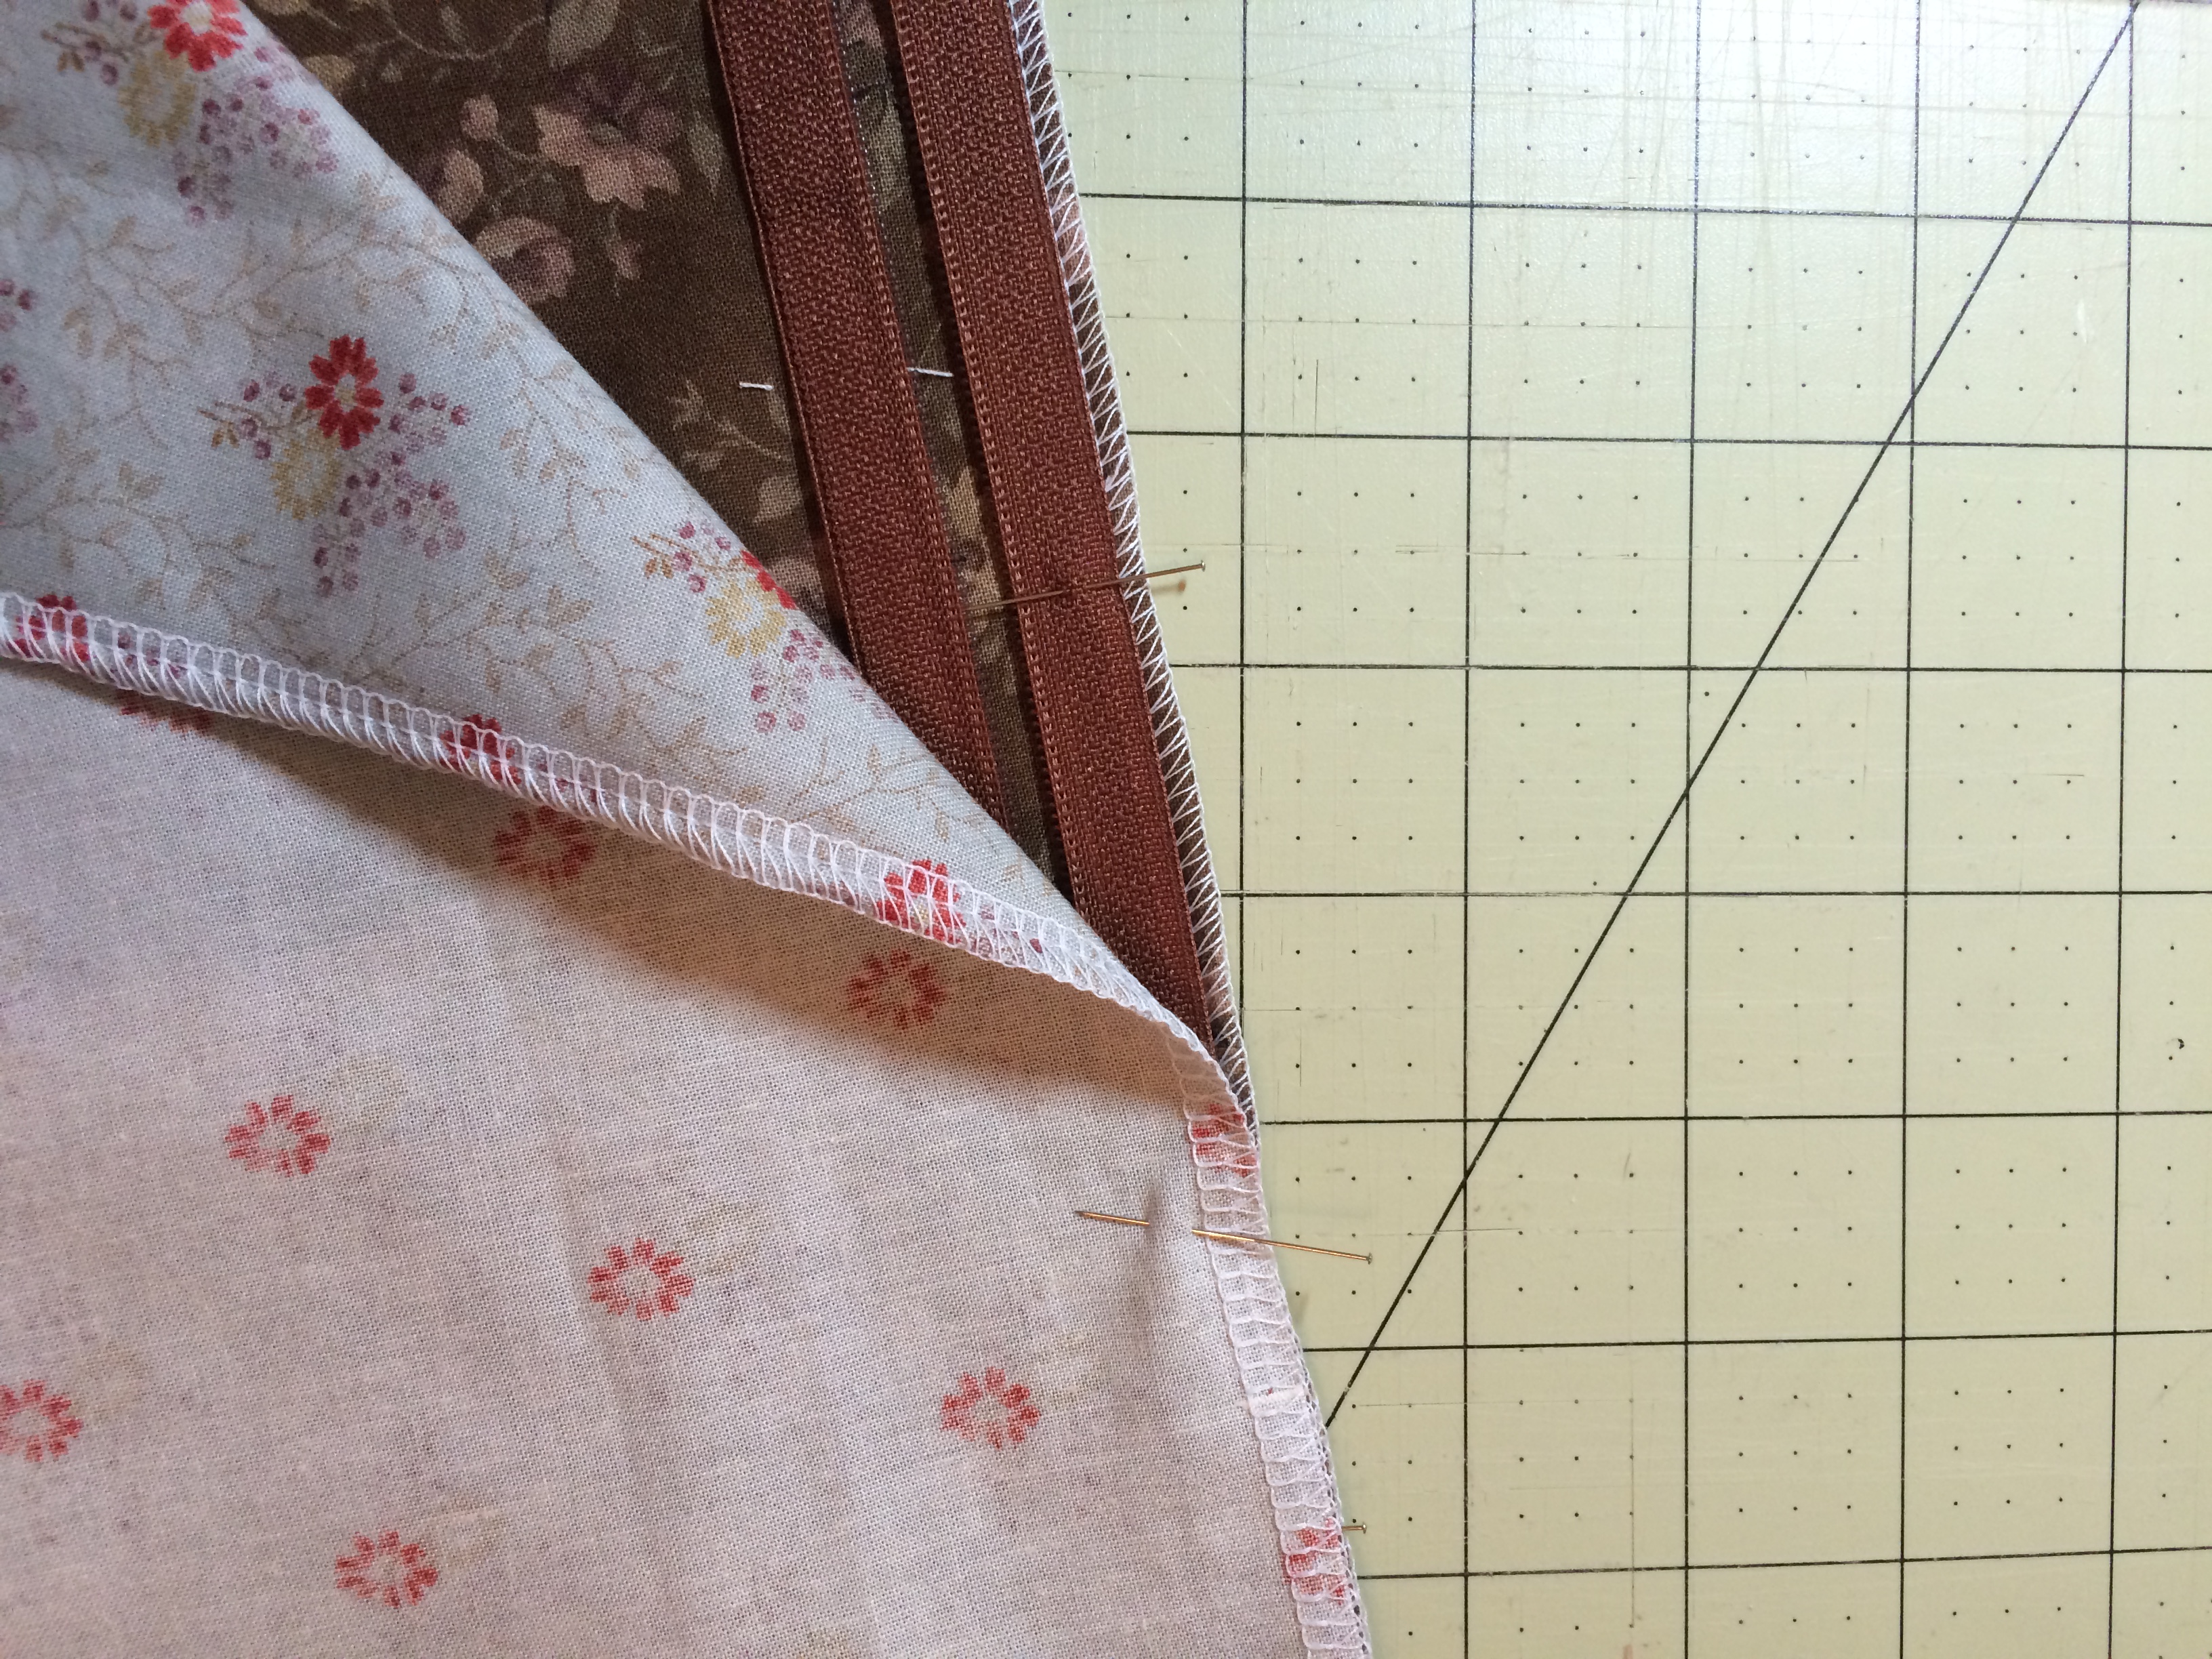
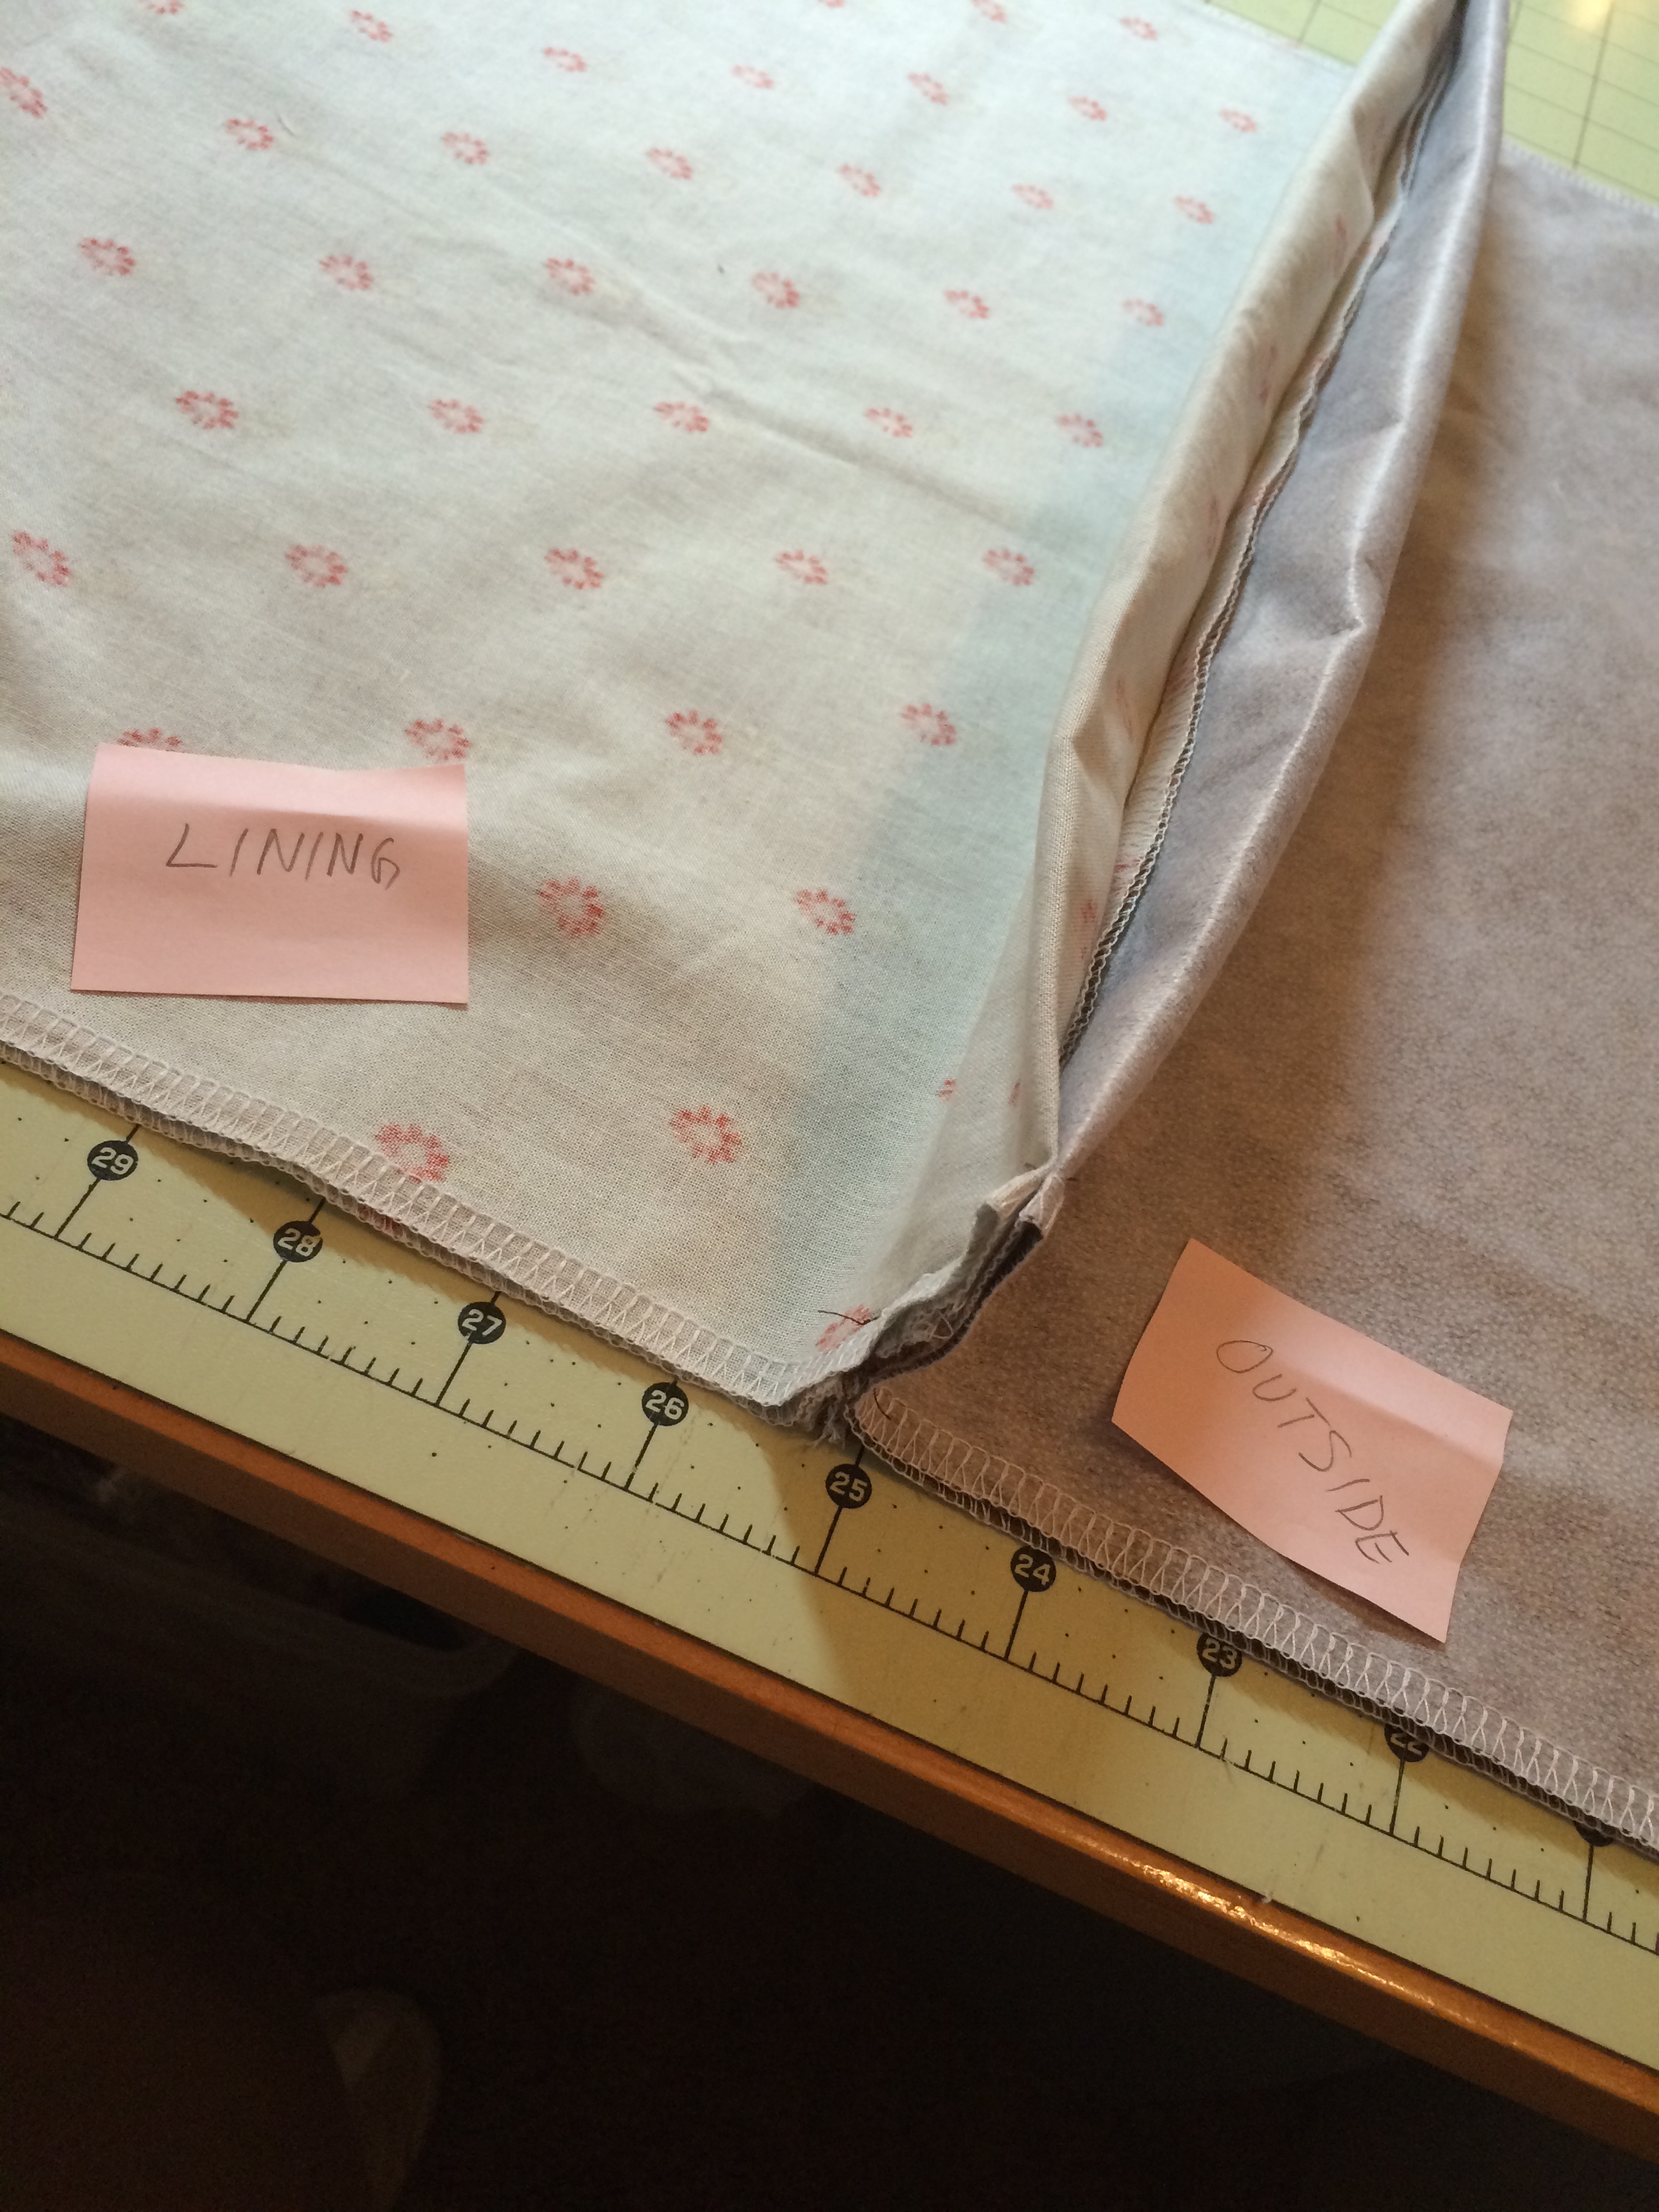
Match the bottom edges of the front right sides together and pin. Match the bottom edges of the lining right sides together and pin. This will give the folder over at the top which makes the zipper a “side zipper.”

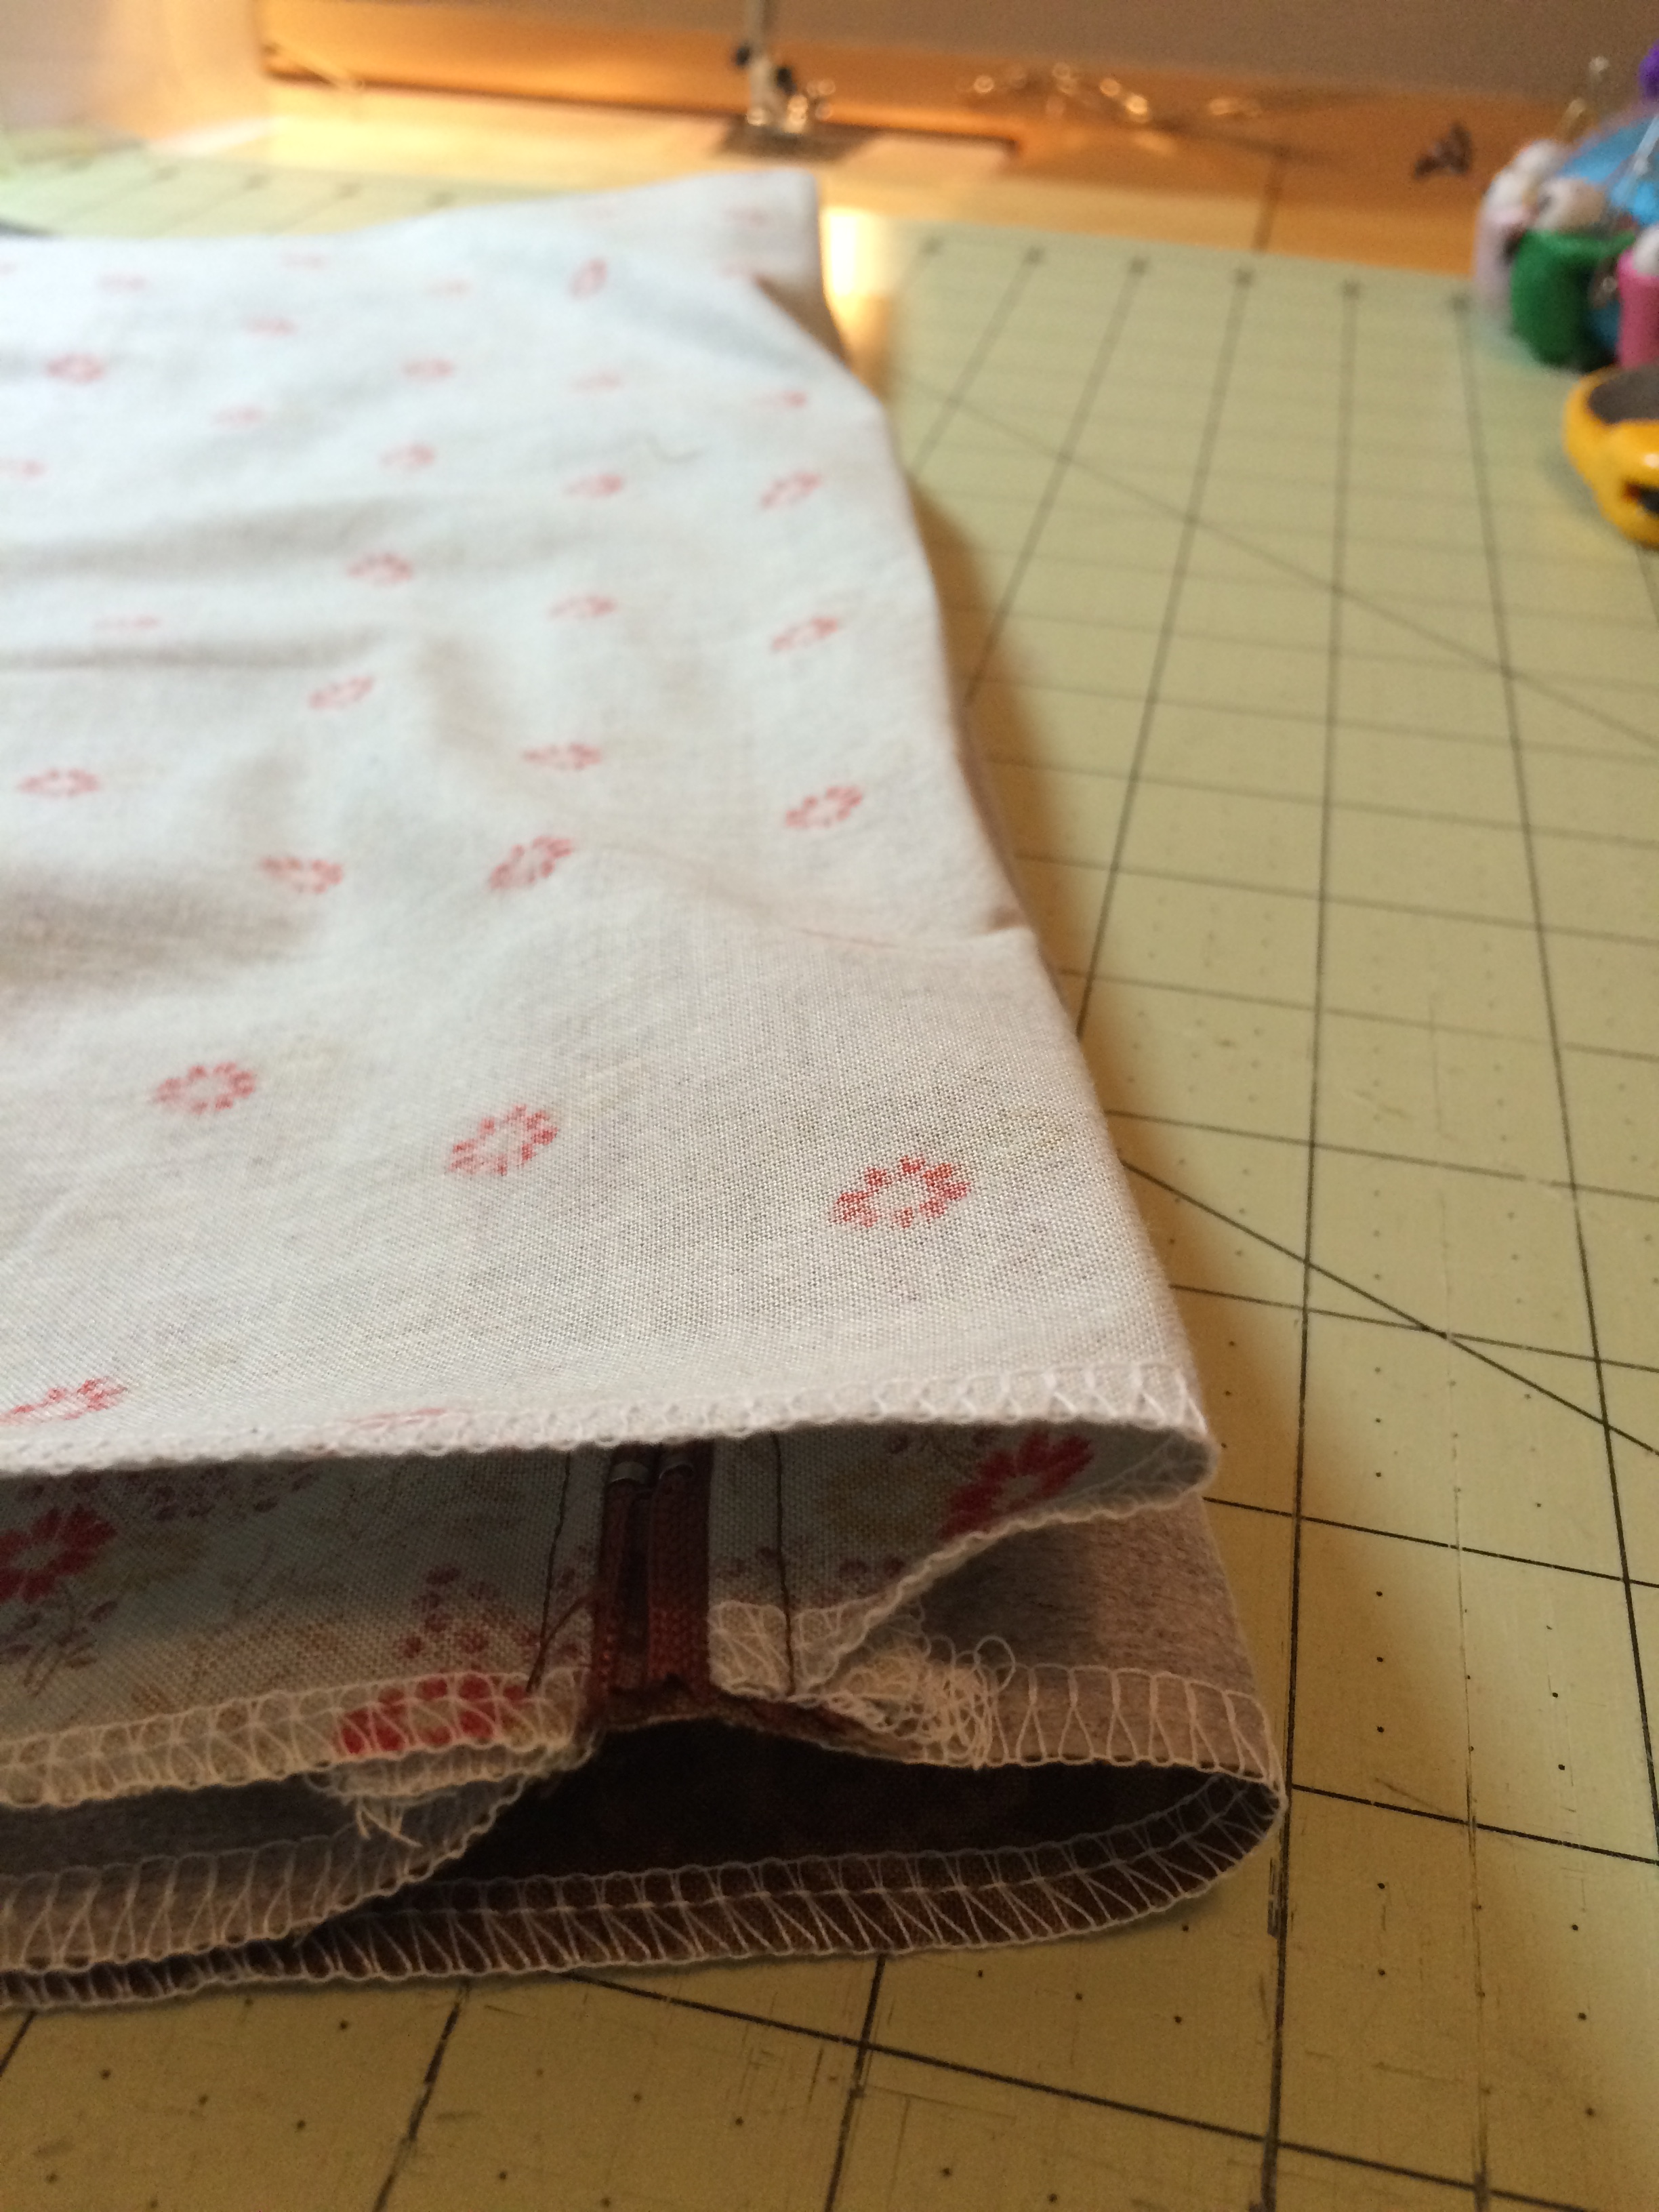
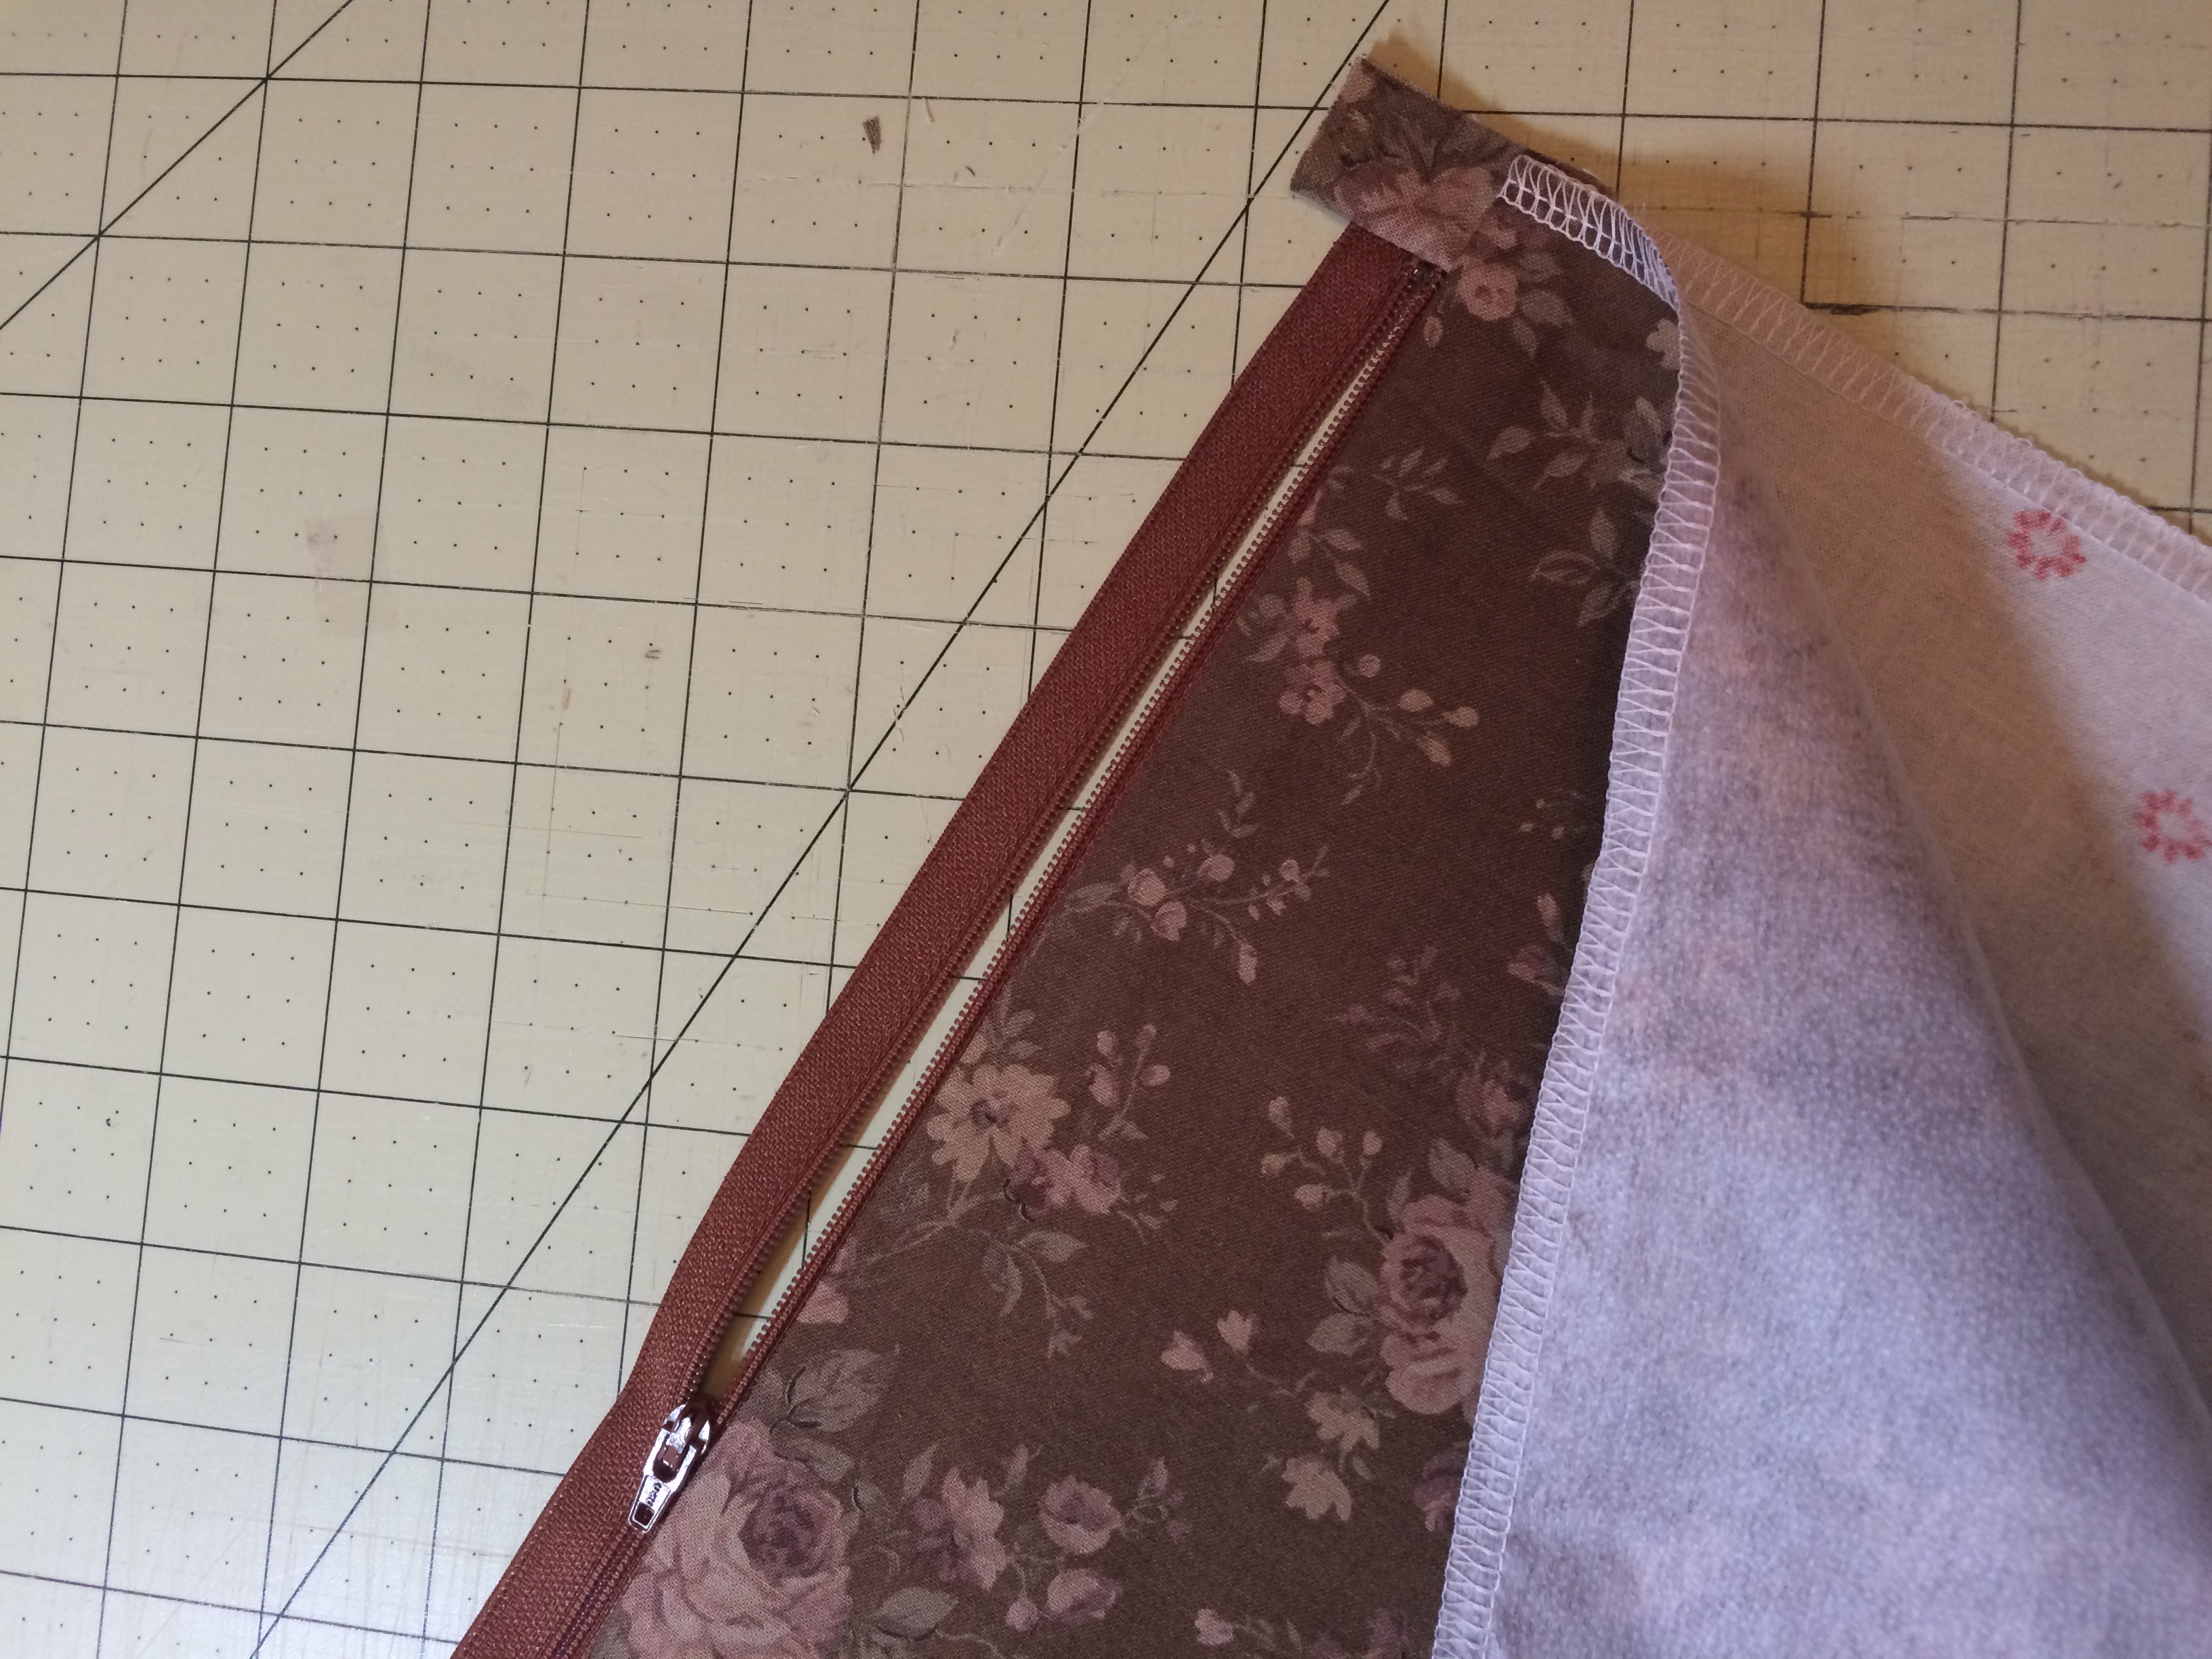
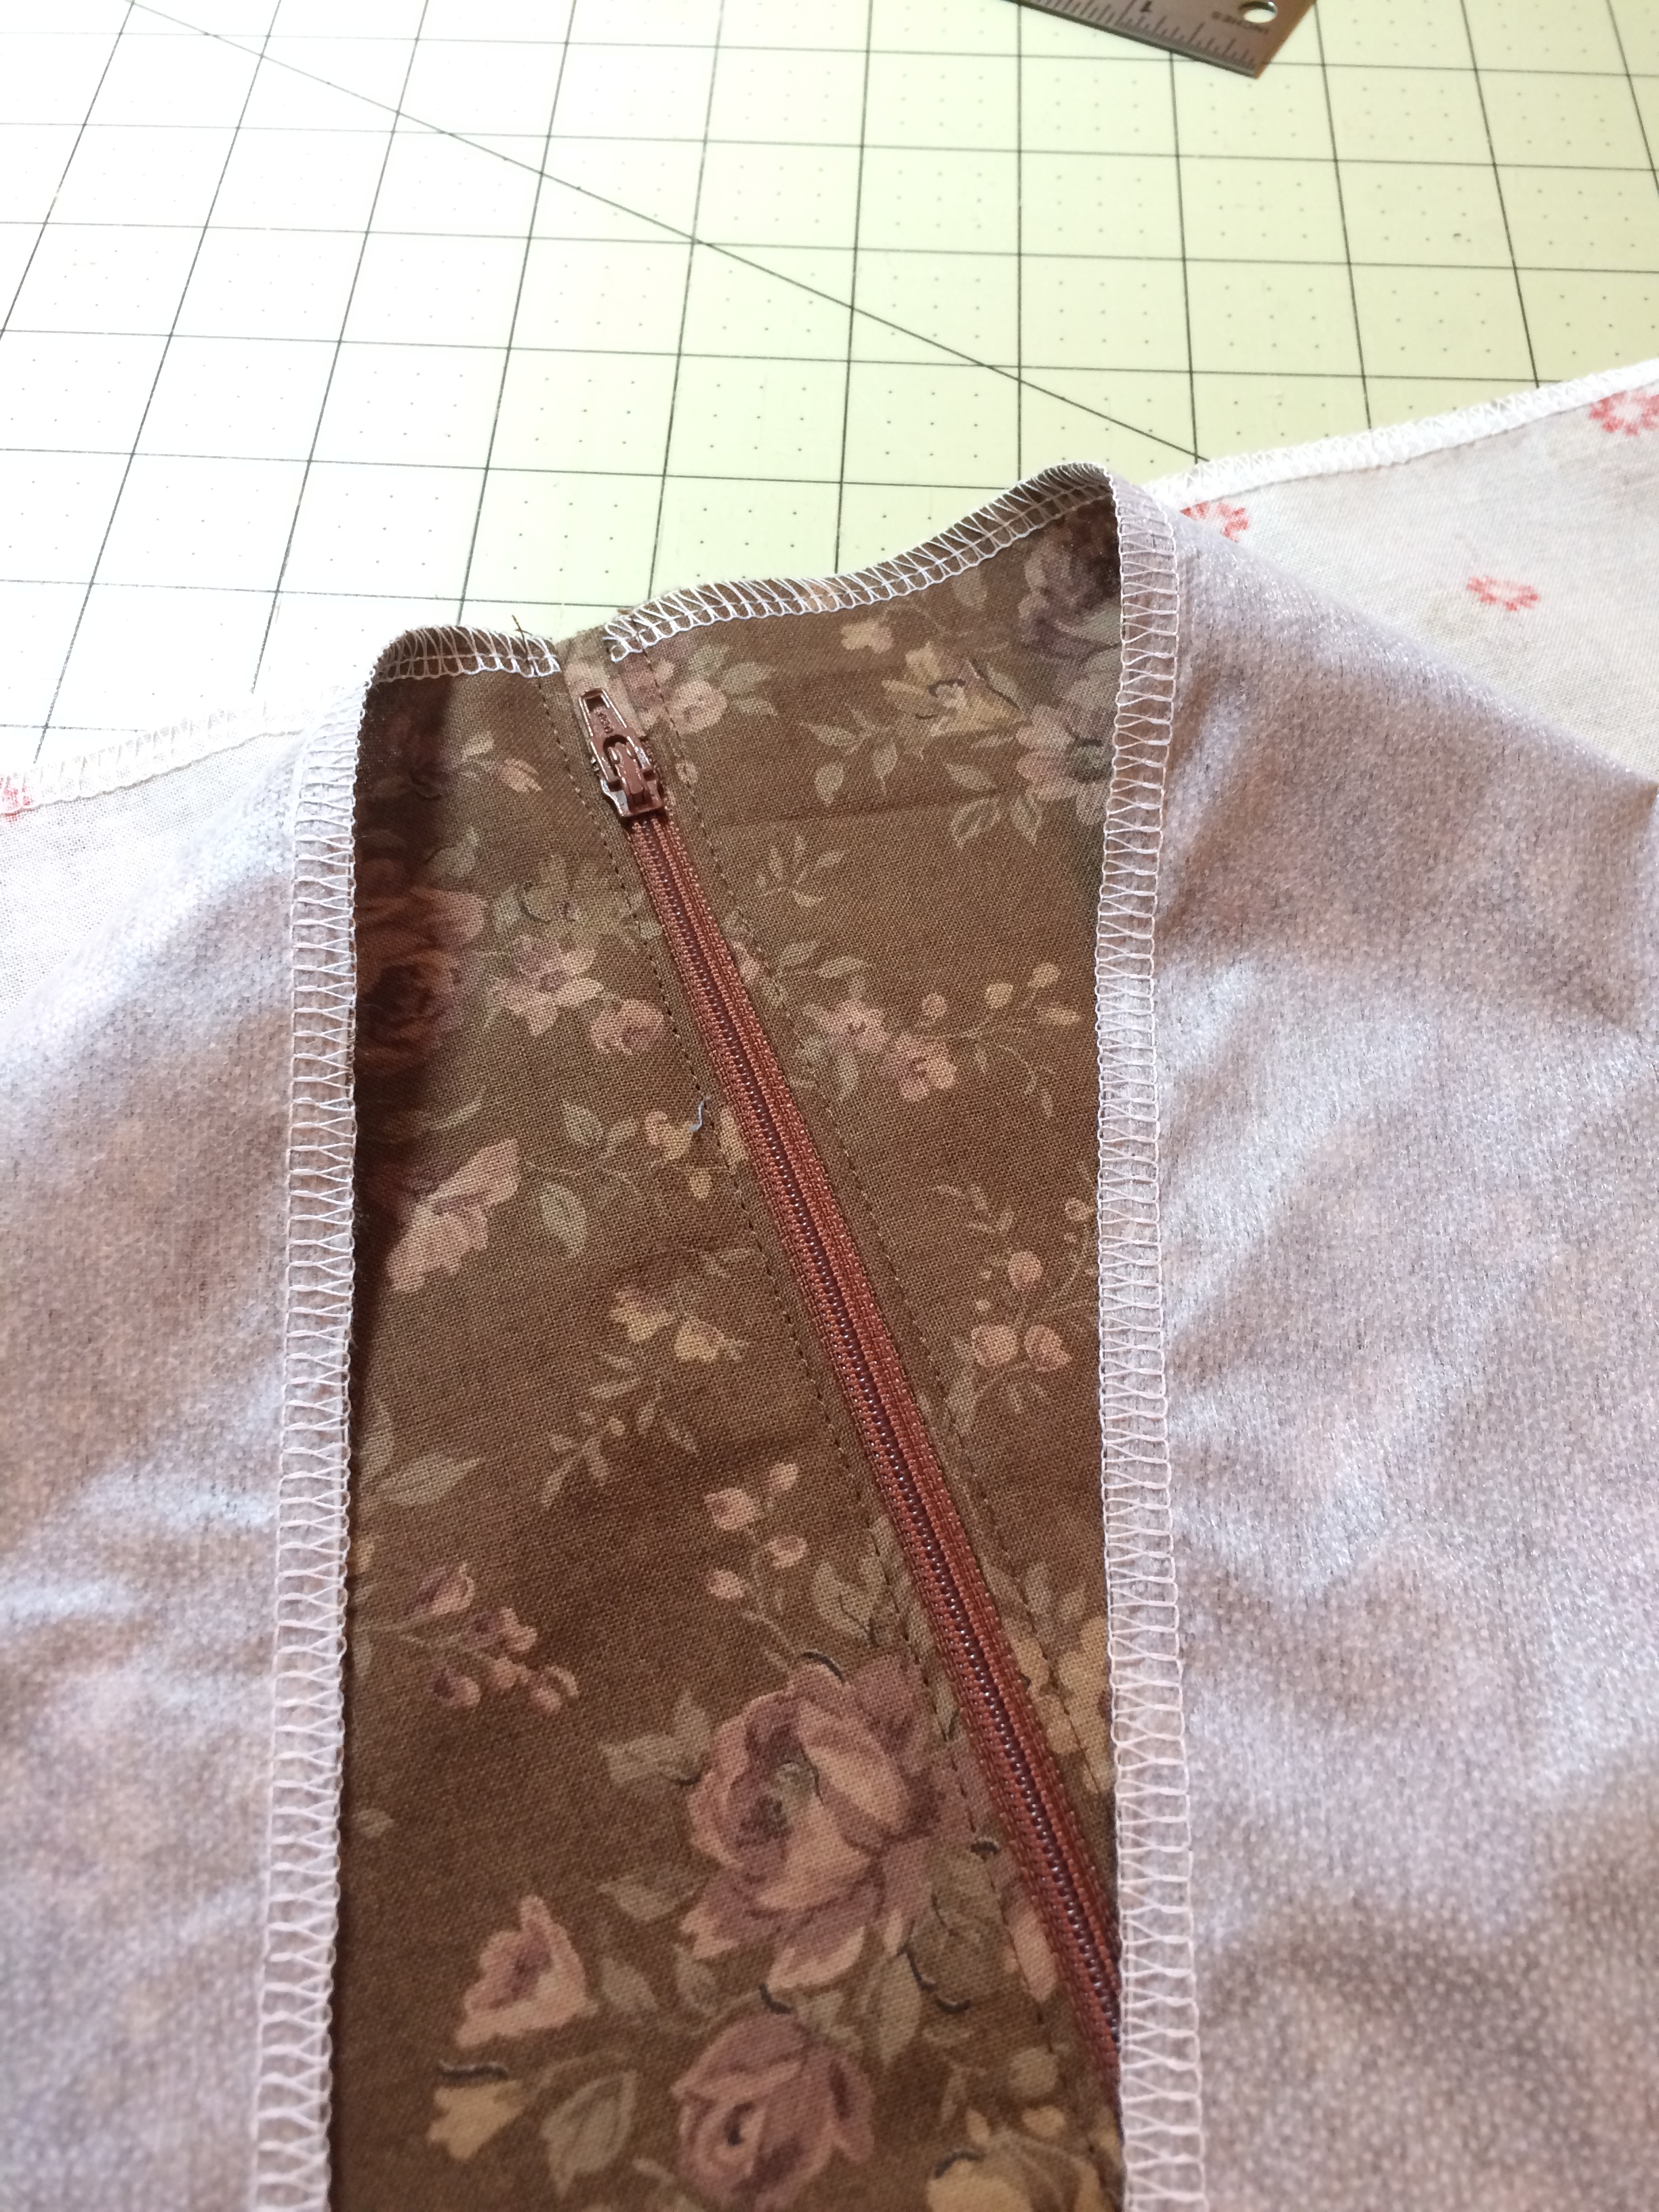
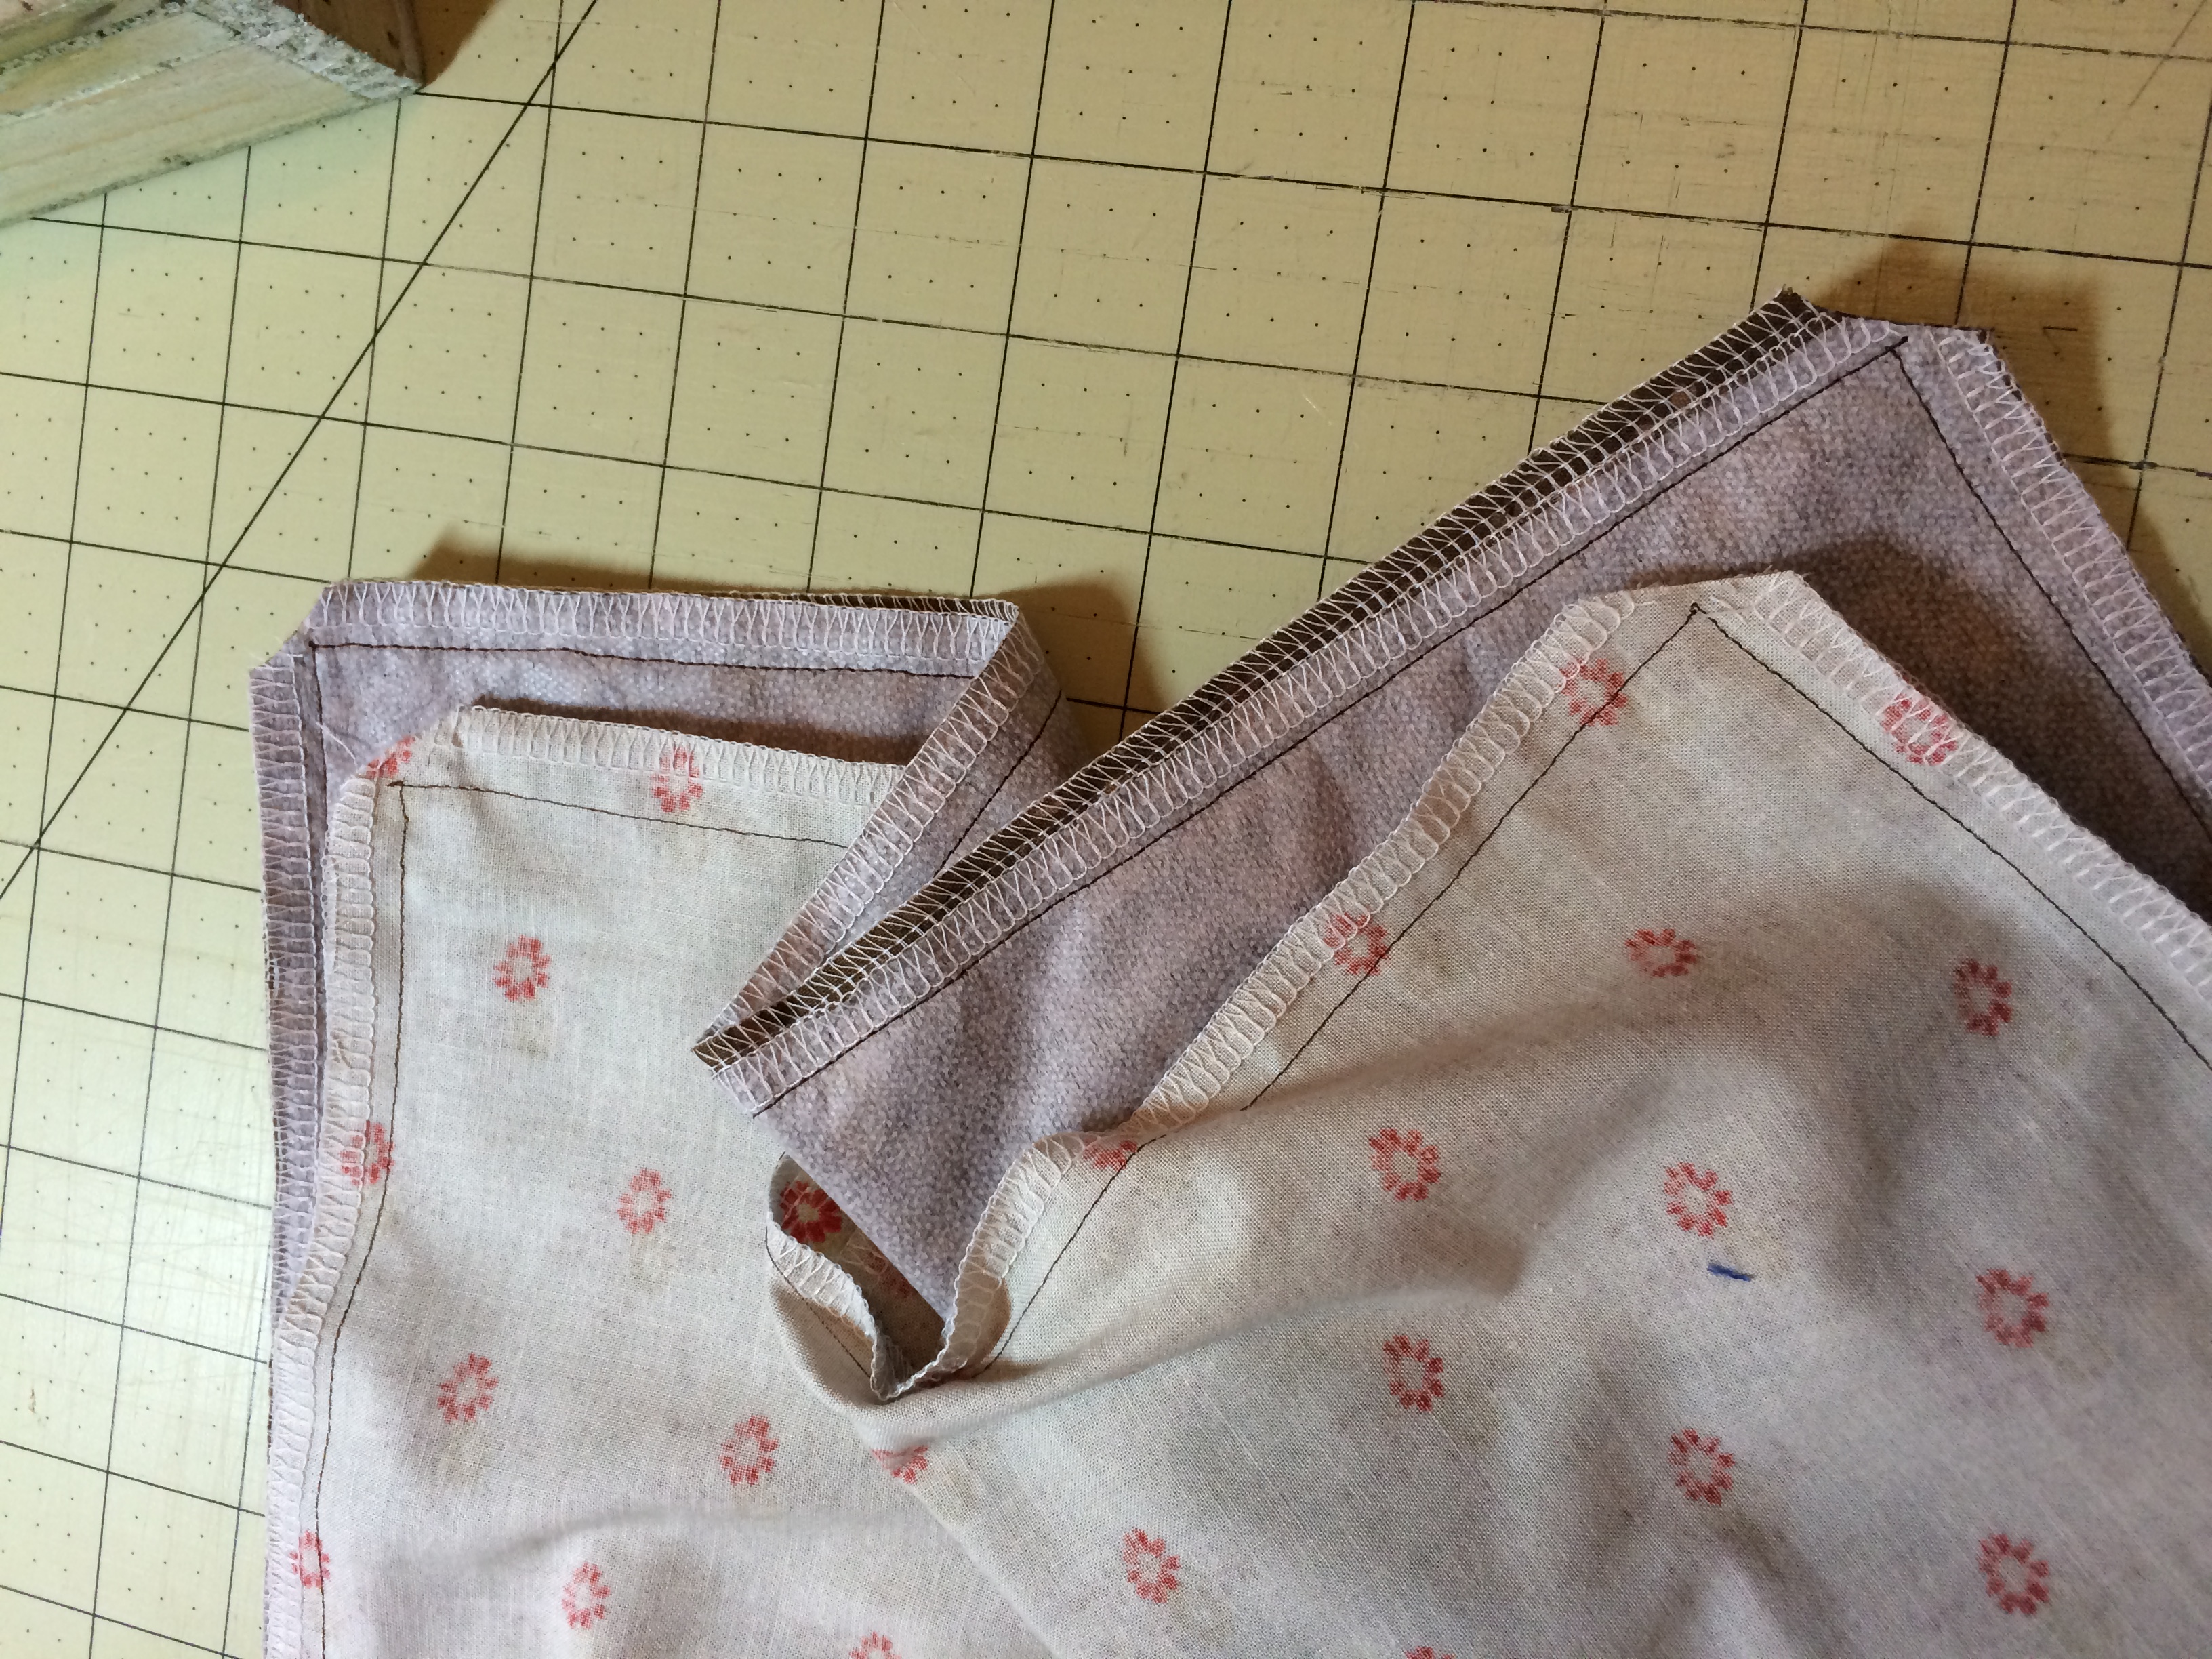
This is the tricky part. Holding this “fold over” section together between your fingers, put a pin at the point where you stitched the bottom row of top stitching on the zipper. You will now sew from the top of the bag down to this pin. Please see photos. The lining will be on one side of the zipper and the main fabric will be on the other side. You will have this sewn piece sticking up in the middle.
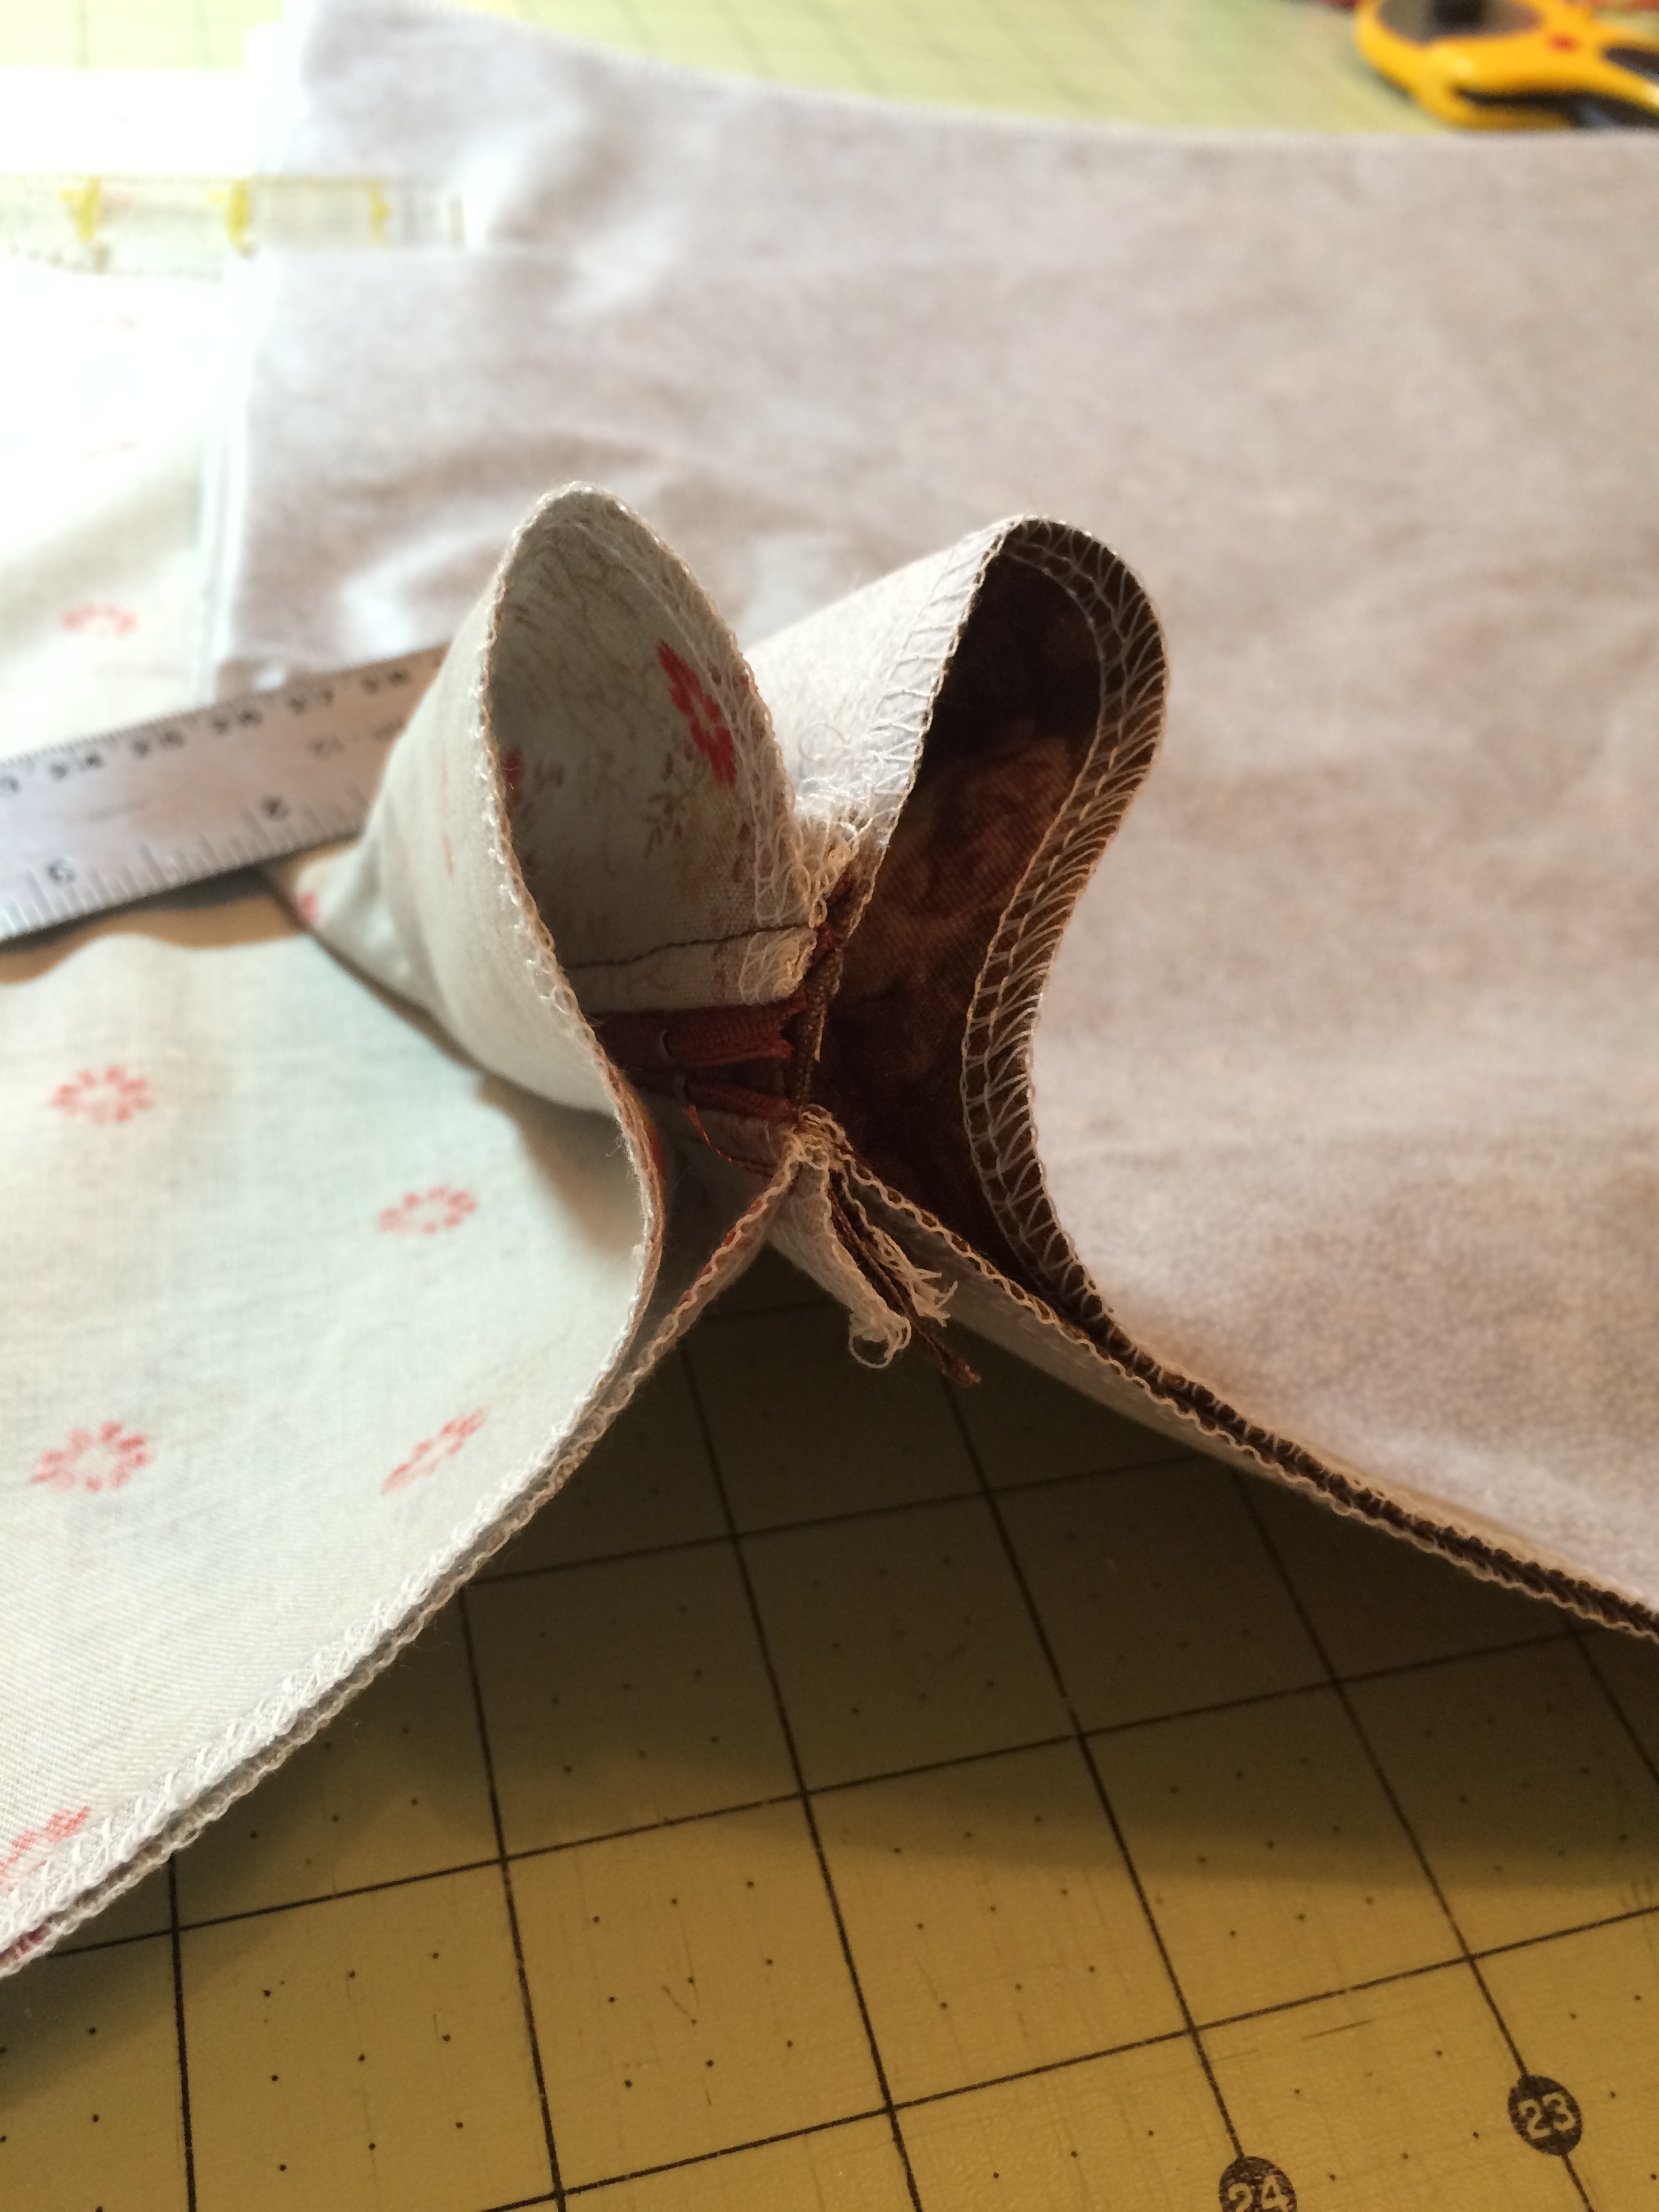
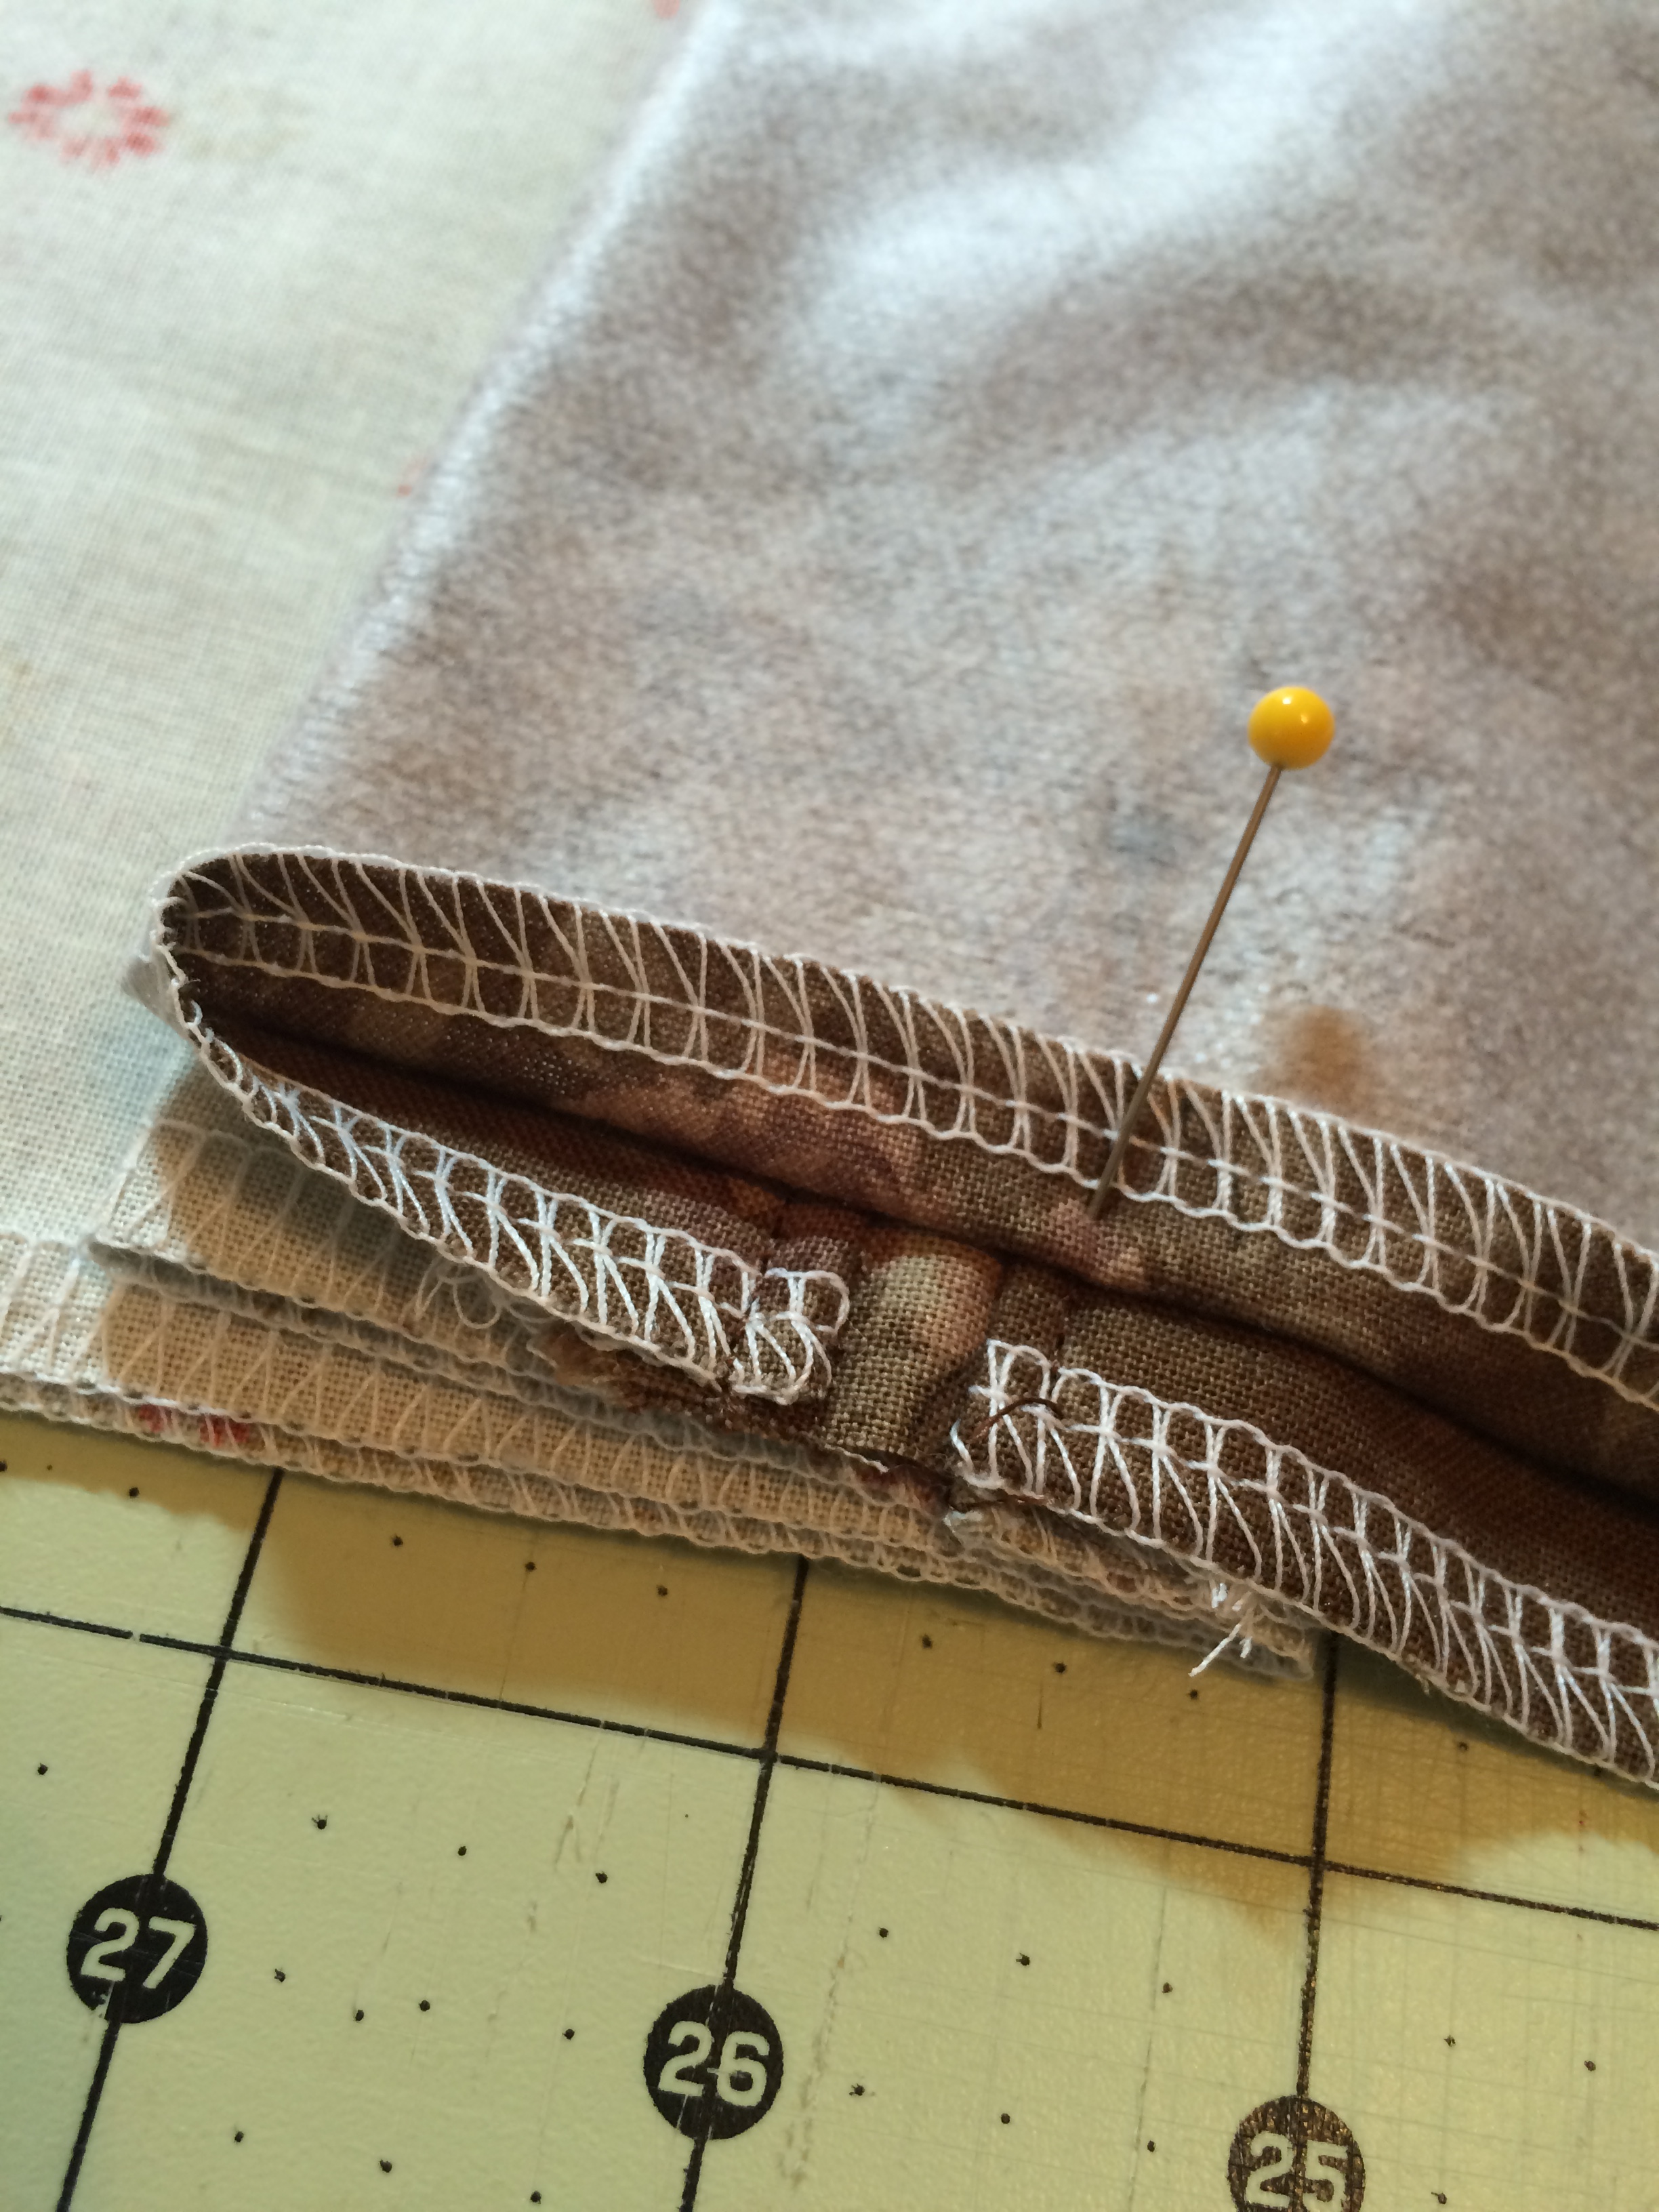
Now taking each side separately you will sew from the place where you ended this short stitching and continue sewing around the bottom and sides of the bag.
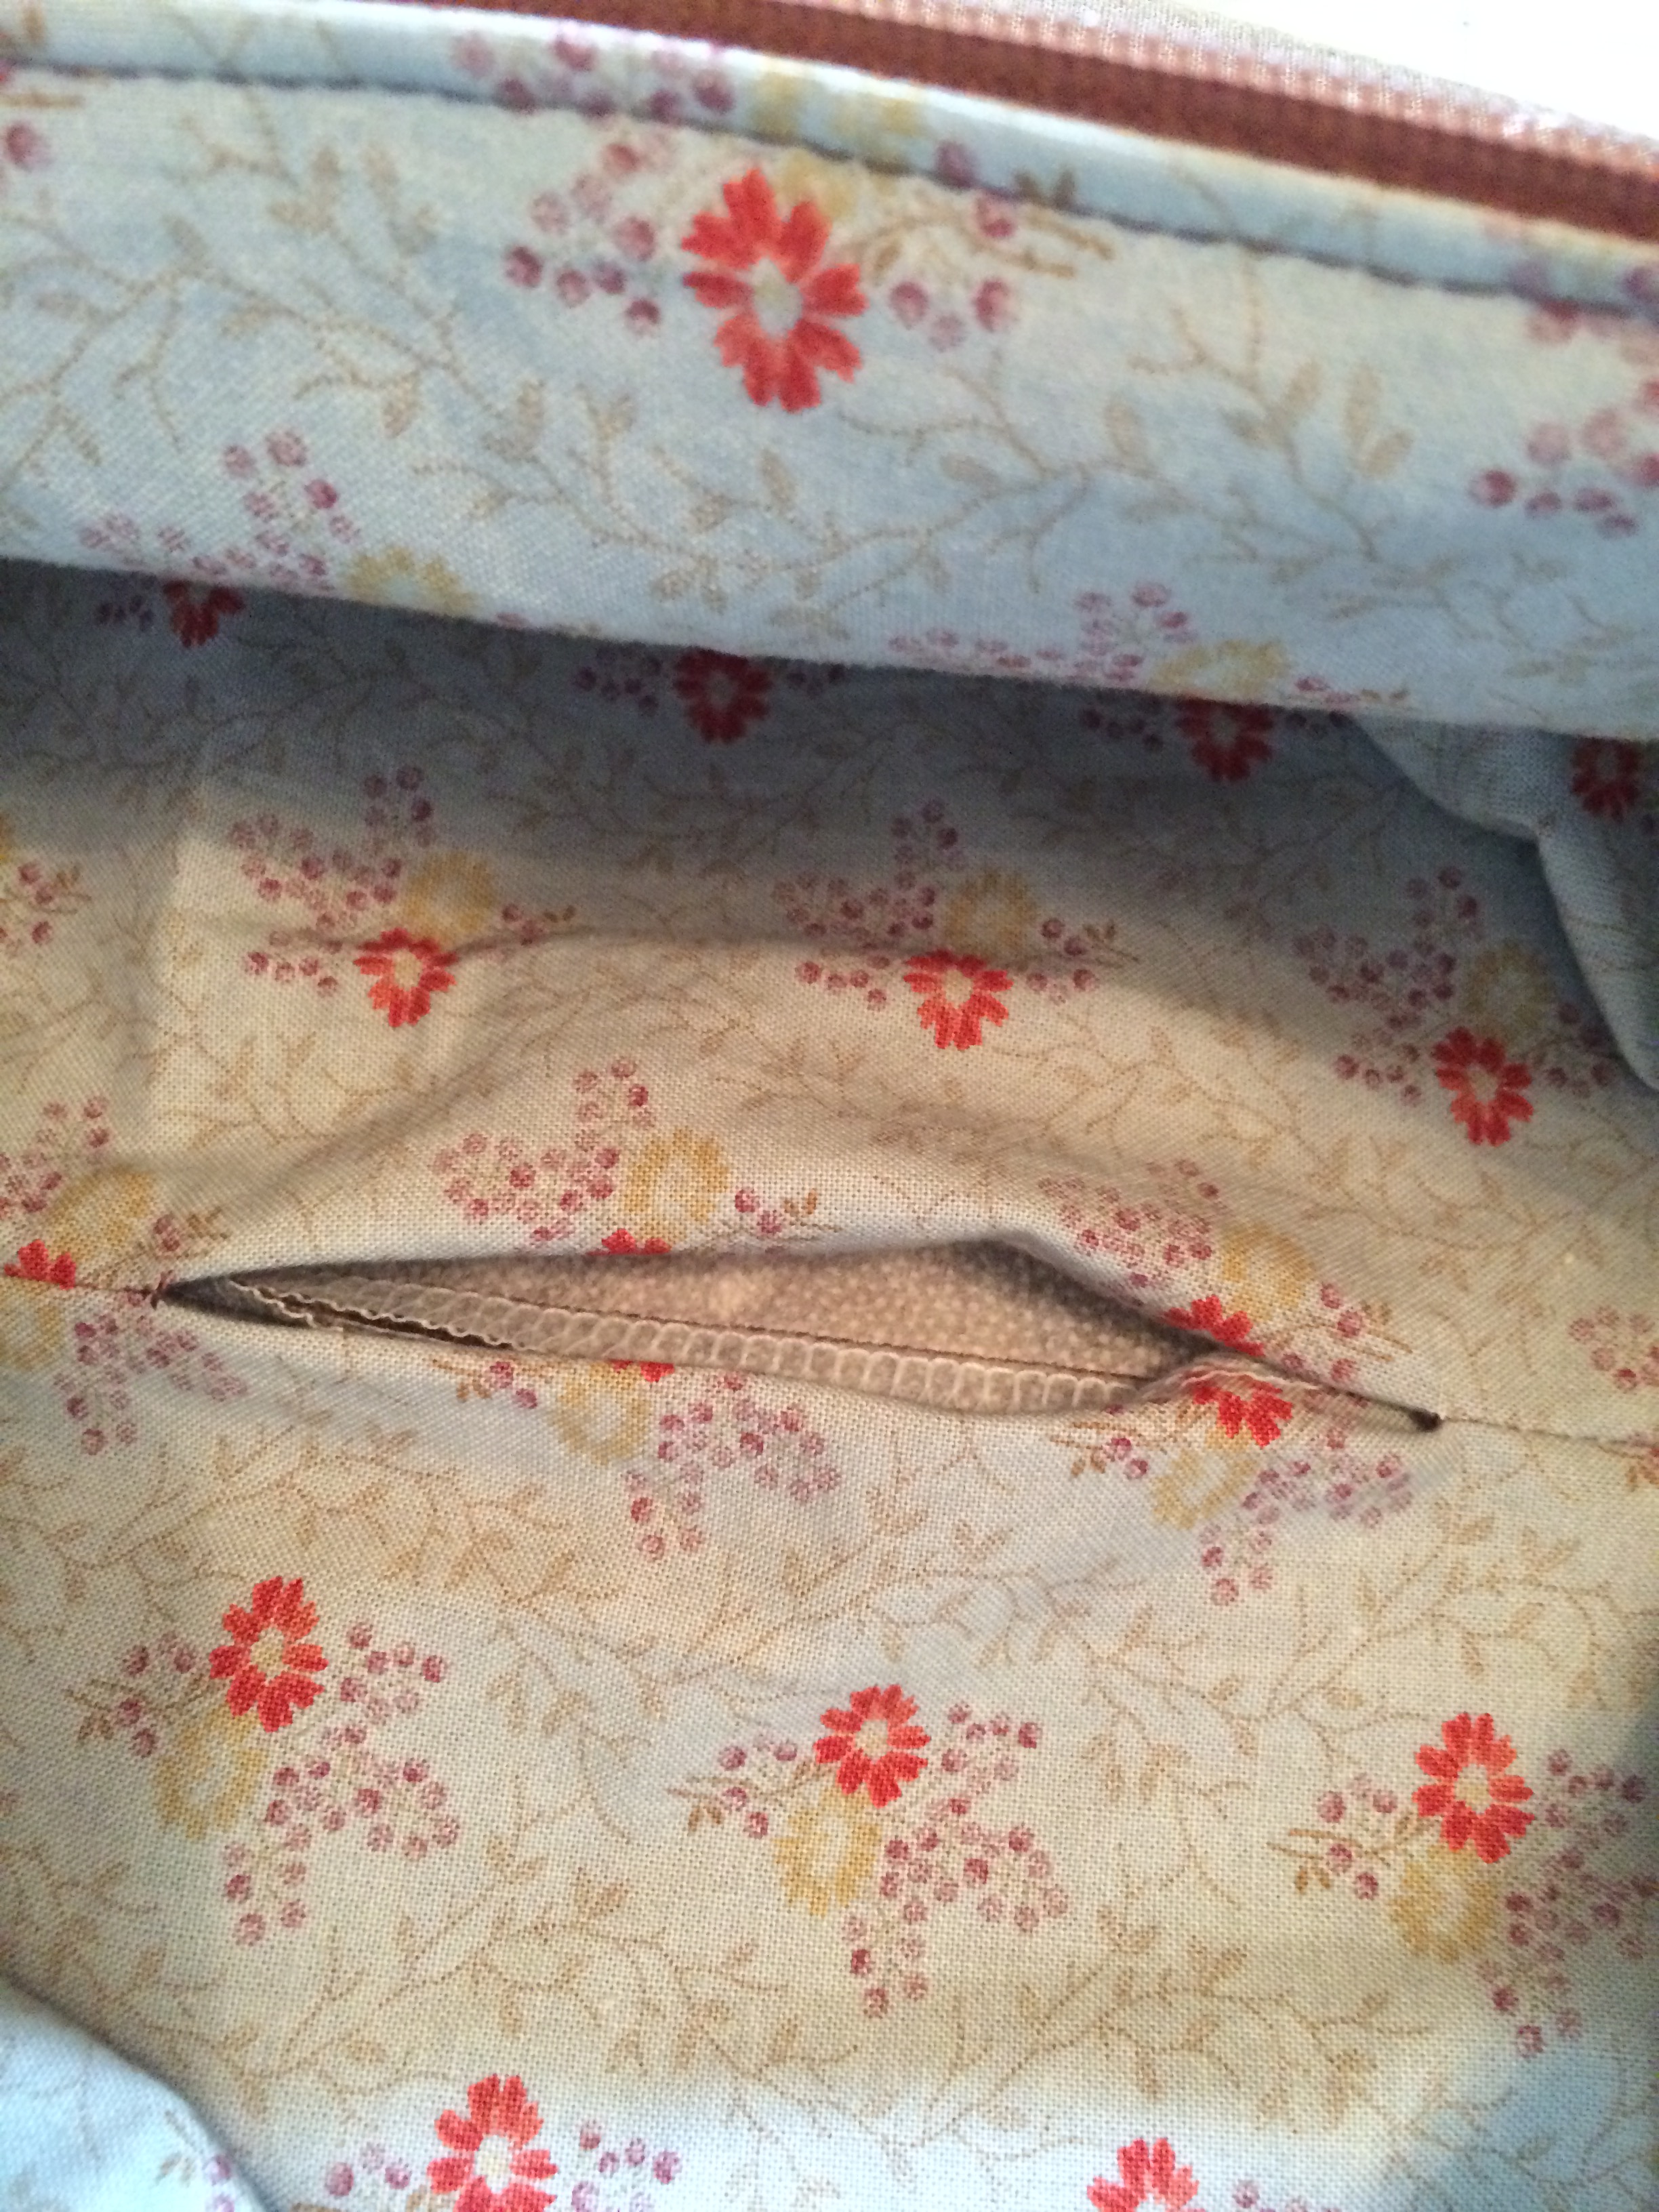
****When sewing the lining side**** you will leave an opening in the seam allowance at the bottom of the bag wide enough to fit your hand. See photo.
After you have sewn around the edges, clip across the four corners of the bag bottom.
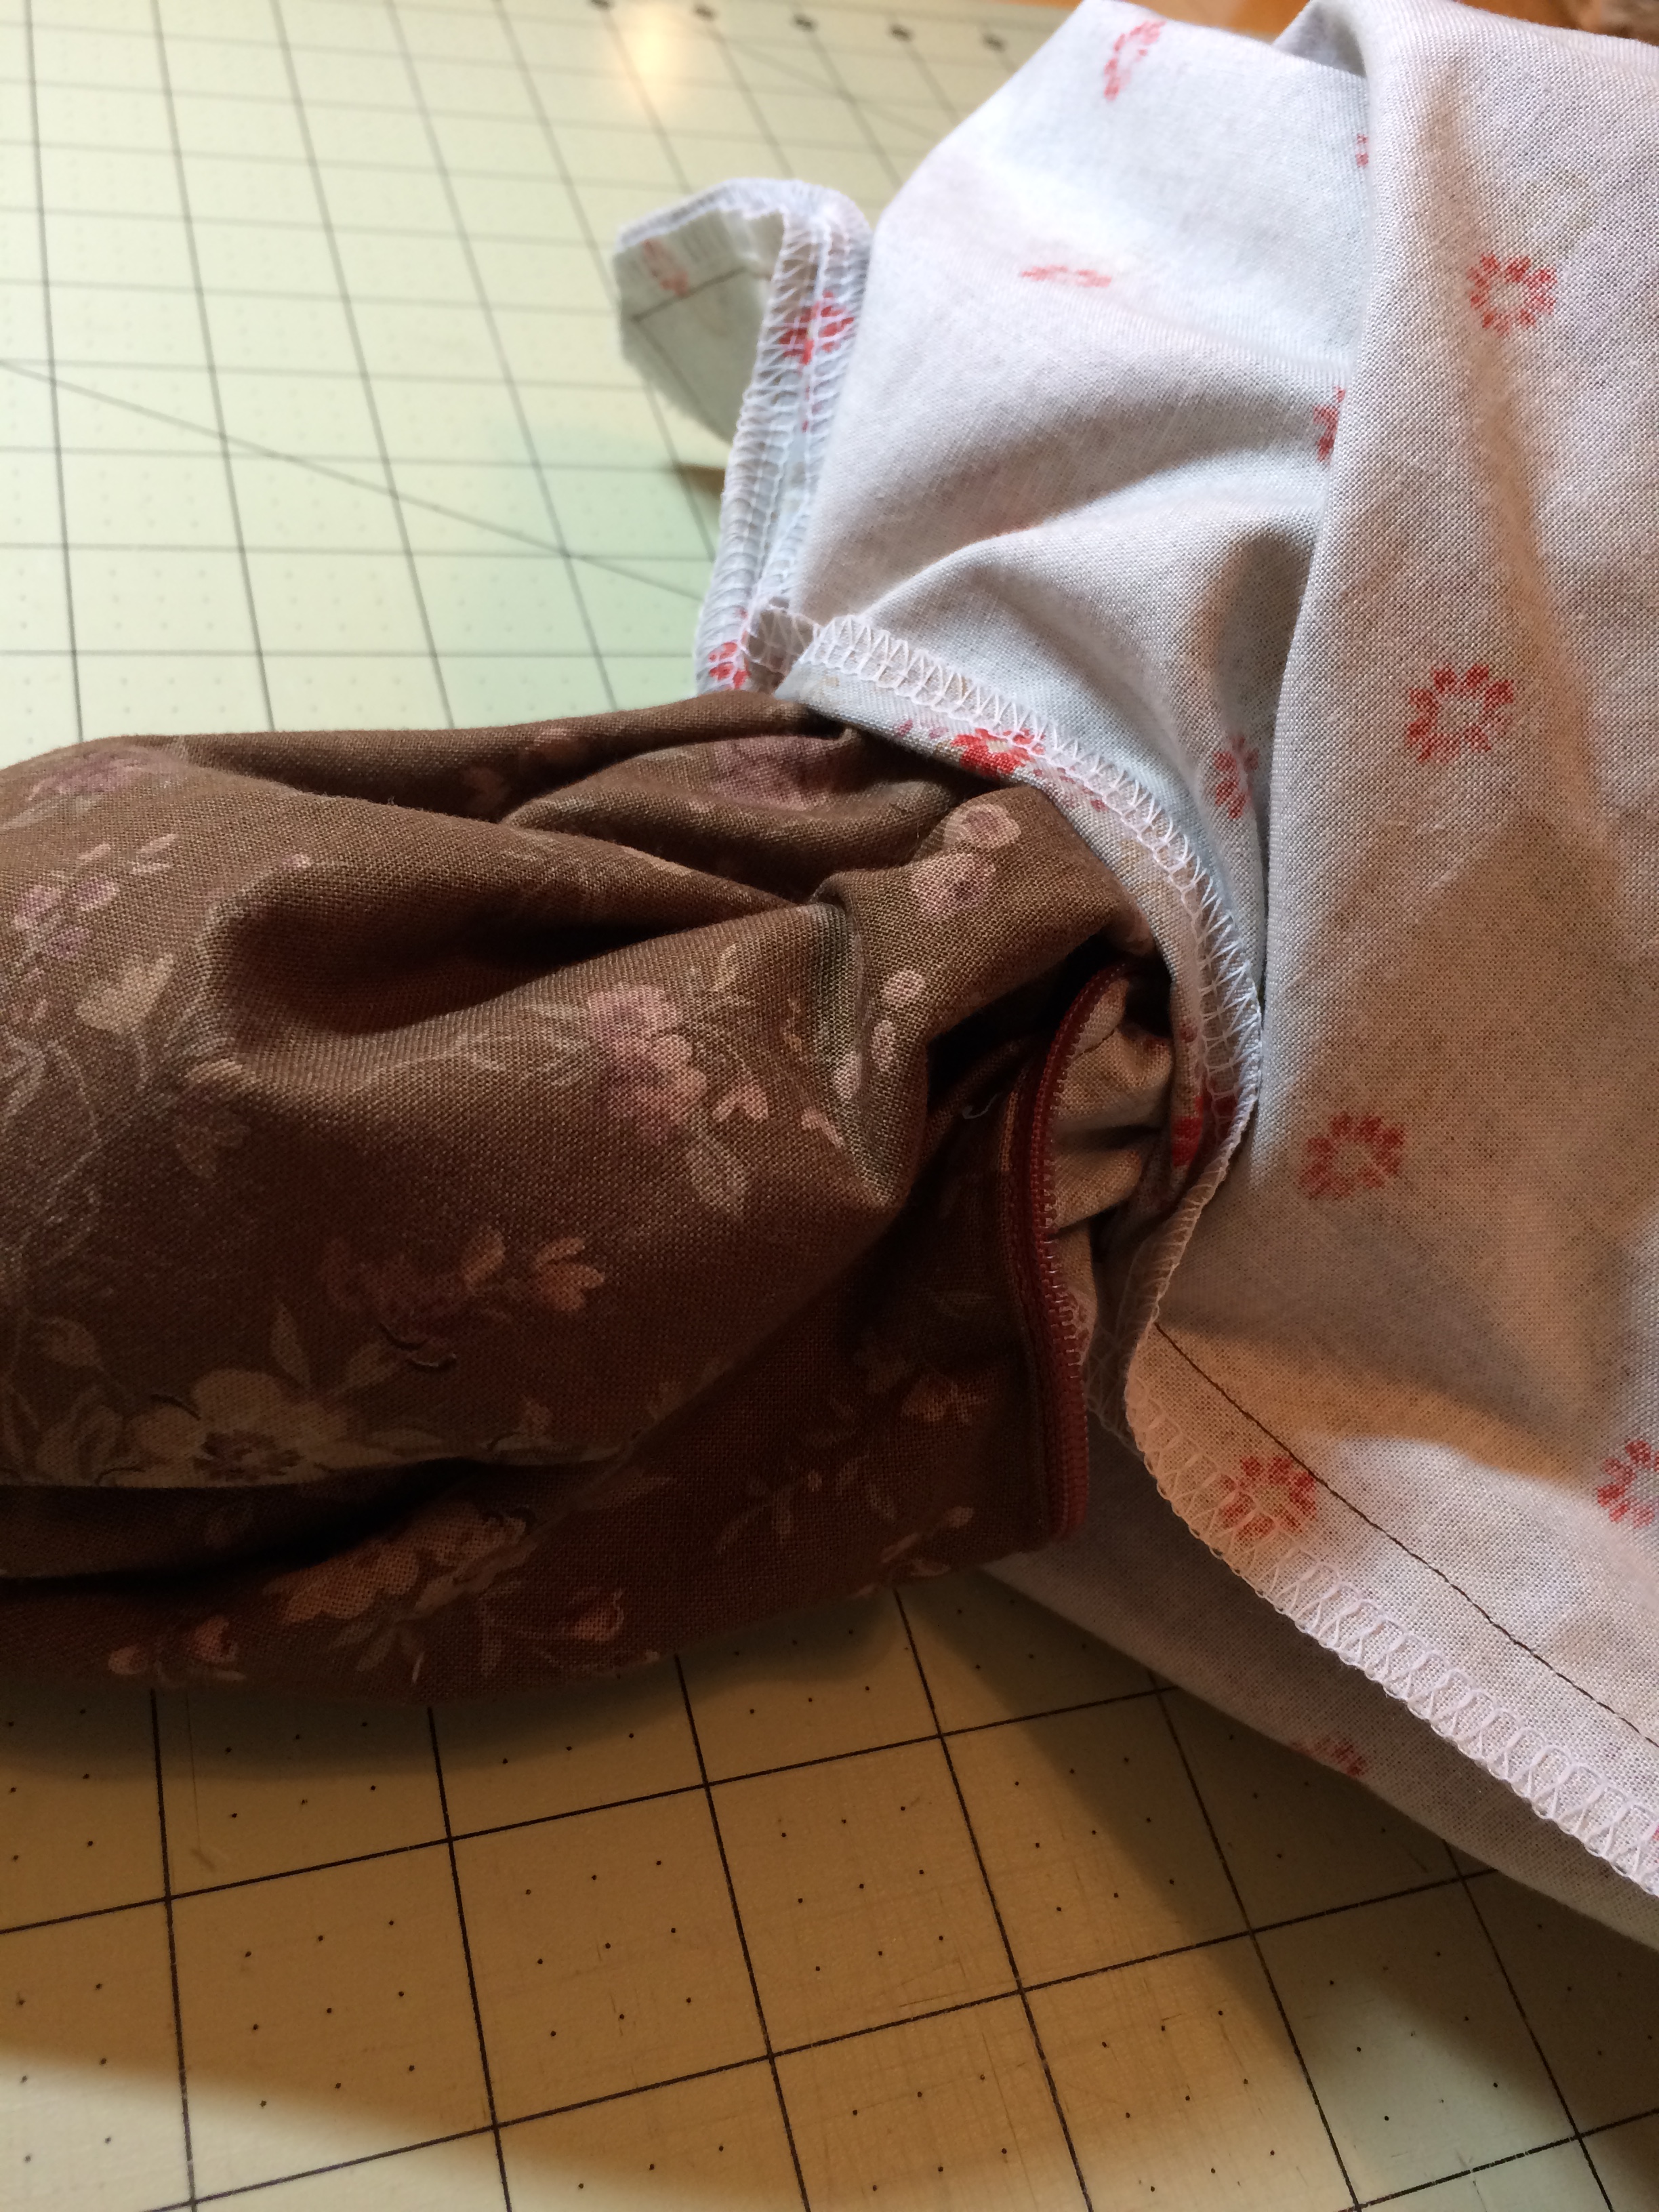
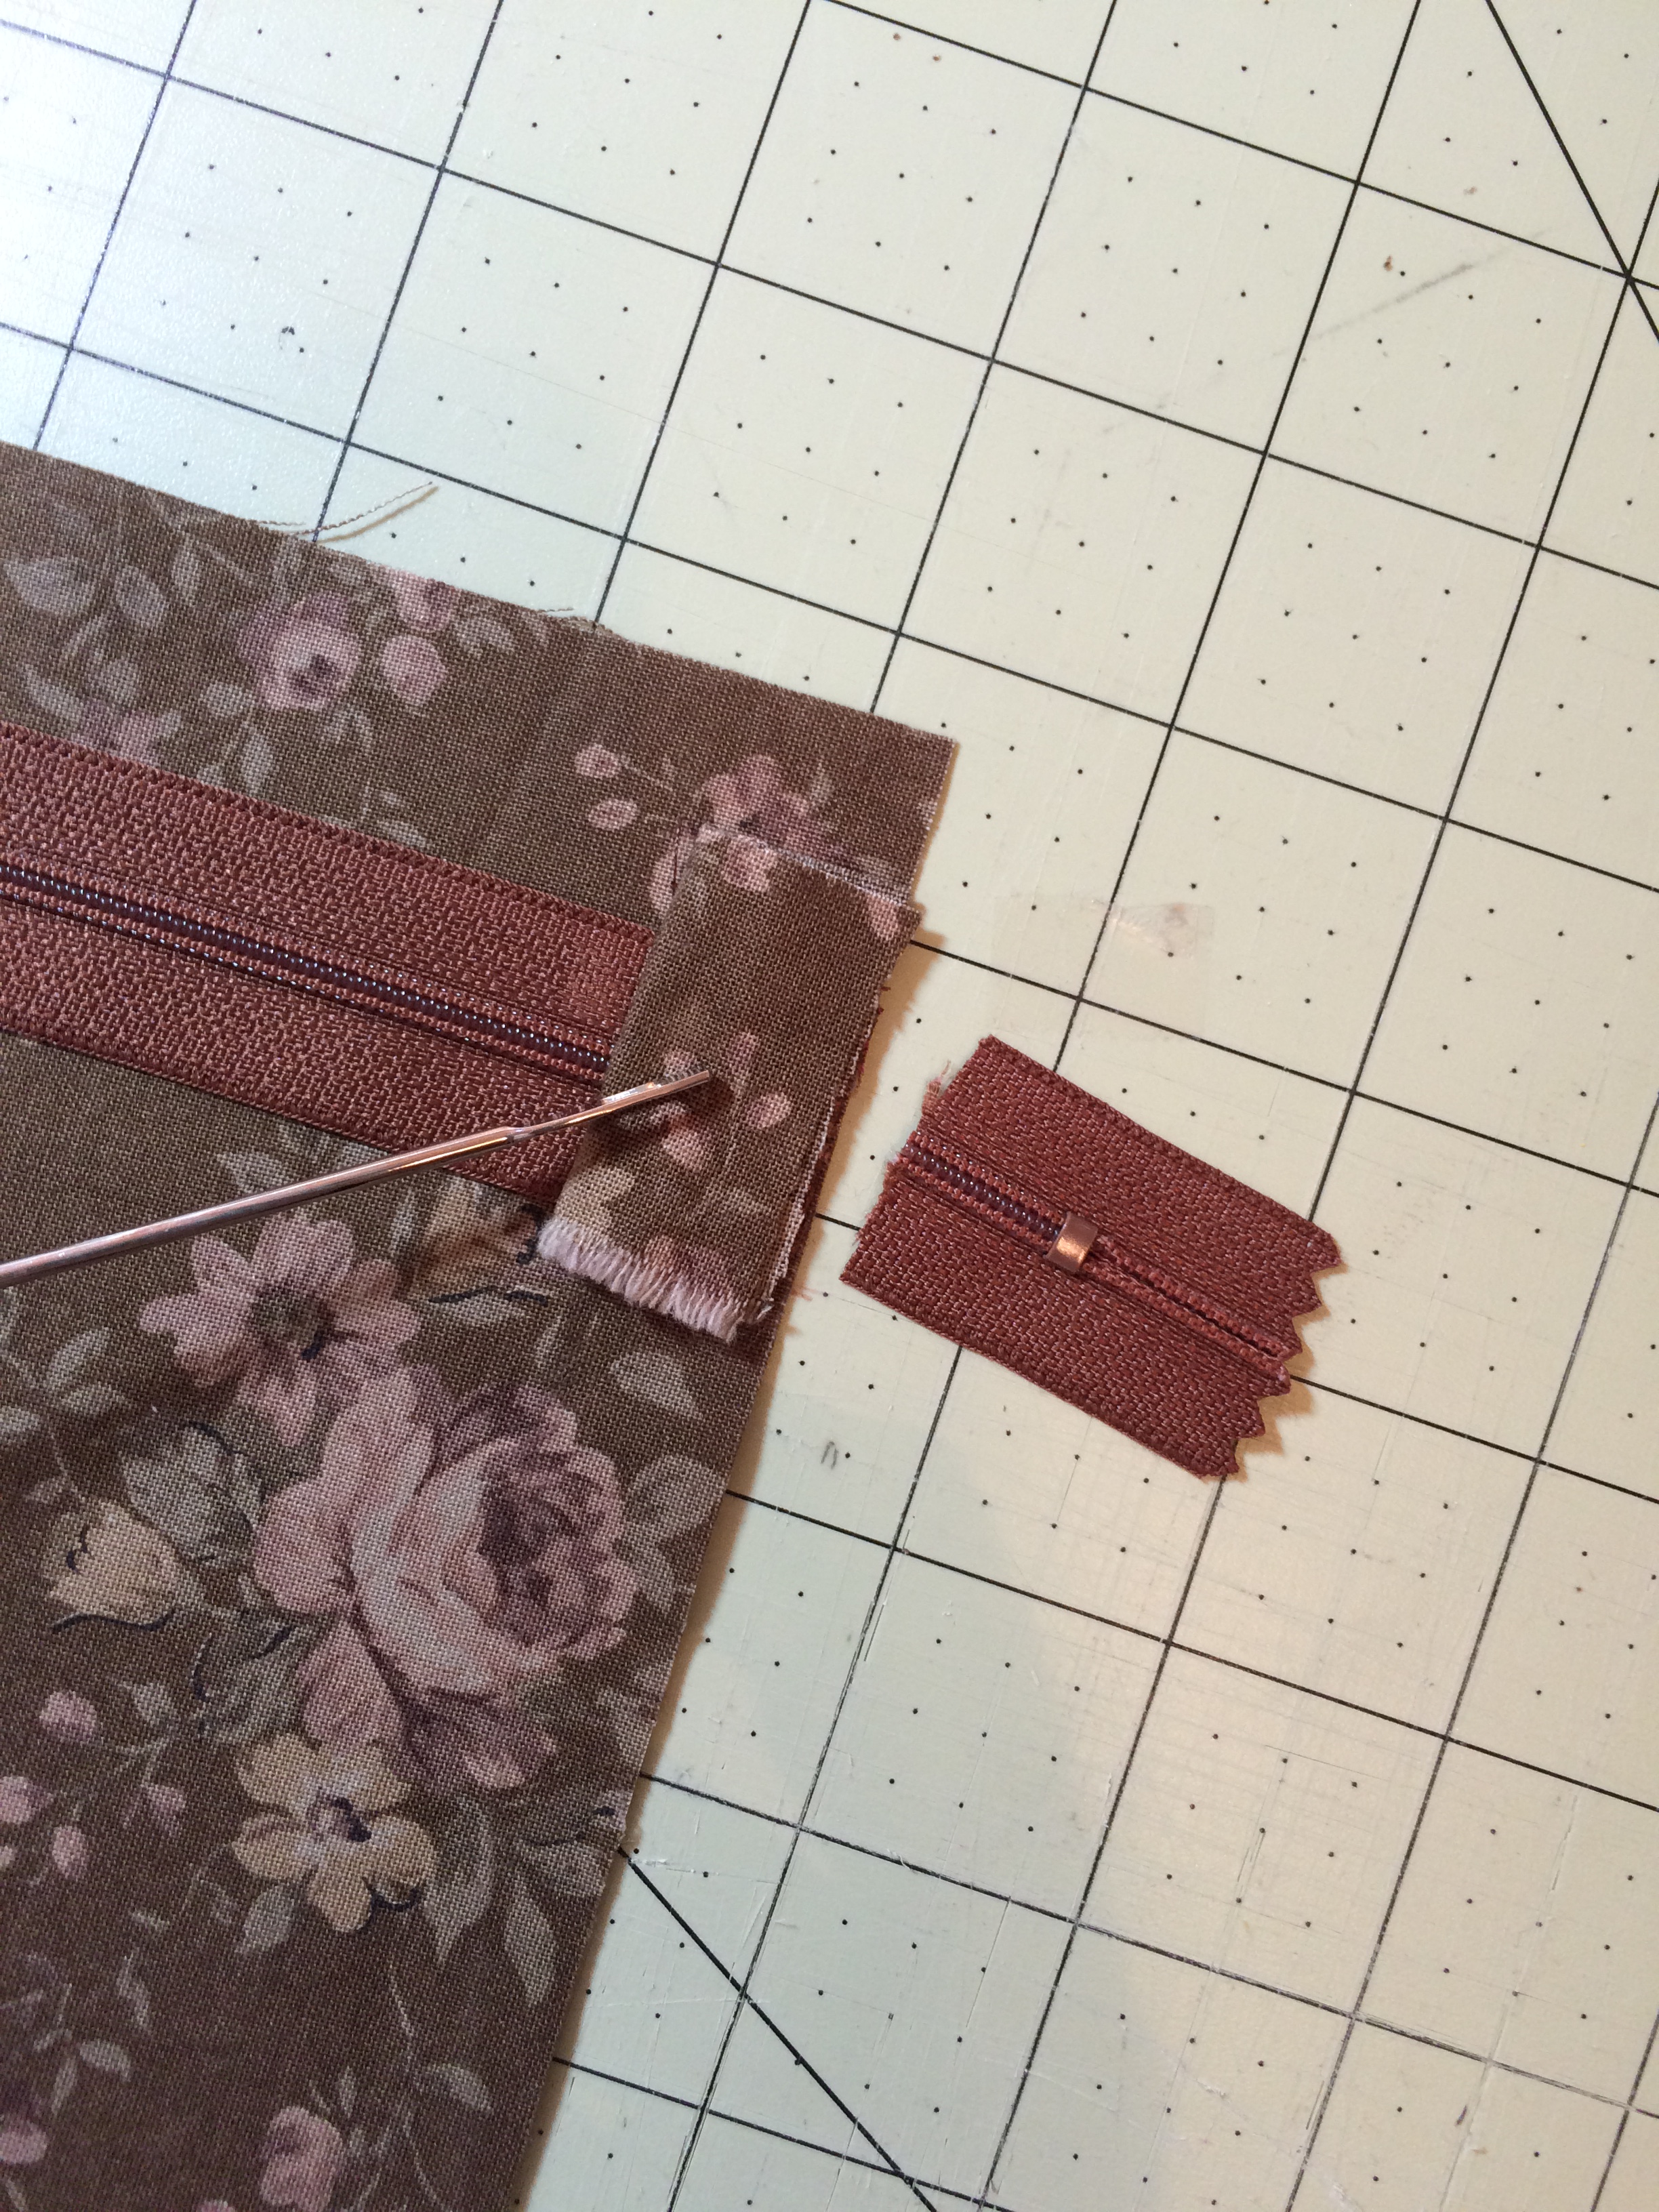
Placing your hand in the opening of the lining and reach in through the zipper (which is why you left if open) and grab the main fabric. Turn your piece inside out and using a tool poke the corners of the main fabric of the bag to make a sharp corner. Tuck the lining inside the bag smoothing it carefully. At this point I close the zipper, smoothing it some more, take my steam iron on the back of the bag and give it a nice press, especially at the edges where the ends of the zipper meet the edge of the bag. Now you can either topstitch the small opening in the lining or hand stitch it closed.
Voila! A lovely project bag that you made yourself!
***If any of the instructions are not clear, please let me know and I will try to clarify them.
Project Bag Tutorial PDF 12 x 15 Fully Lined Project Bag with Side Zipper


Leslee Shepler
Aug 04, 2015 @ 16:54:41
Thanks so much for sharing this…..I’ve been wanting to try some of Kathy Schmitz monogram letters in embroidered wreathes, in one of the project bags. I’m an experience sewer, but just can’t envision the order of stitching to ensure no raw edges inside. With these great directions and photos I’m feeling more confident to tackle it now. Thank you, Leslee
Averyclaire
Aug 05, 2015 @ 19:33:13
You are quite welcome. I would like everyone to learn to how to finish and am happy to post this gift to all.
Terry Rose Bailey
Aug 08, 2015 @ 10:21:15
Thank you😄love your very clear and detailed instructions
Gracie
Aug 08, 2015 @ 11:44:00
Great directions….thank you.
Annie
Aug 08, 2015 @ 16:53:38
Thanks for the tute. I love your details .. like the covers for the zipper ends and finishing the seams that will never show anyway.. just because!
Jana Coley
Aug 08, 2015 @ 18:14:41
Whoa! Autocorrect went nuts. I was trying ask if there was any way you could post the instructions as a pdf so it can be easily saved. Thanks!
Kathy LeMere
Aug 08, 2015 @ 22:42:21
Thank you
Mary Avaux
Aug 09, 2015 @ 07:12:47
How do I order one of these bags? Thank you
Maggy
Aug 10, 2015 @ 04:41:00
Merci pour ces instructions
very clear
Big kiss
primdollie
Aug 11, 2015 @ 10:11:42
Thank you so much for your detailed instructions! I absolutely love this bag and your work! I 1st saw it on FB! You are amazing! thank you so very much I hope to try this soon! :))
Marjorie
Aug 14, 2015 @ 10:51:58
Wonderfully clear–thanks!
Lenore Guajardo
Sep 03, 2015 @ 09:14:27
Thanks for sharing. I have got to try this great project.
averyclaire
Sep 09, 2015 @ 19:34:29
Thanks to all of you who are enjoying my tutorial. It was fun to do and I hope everyone is sewing like crazy to make one of their own!
Mollie Johanson
Jun 13, 2016 @ 13:09:25
I’m the editor for the embroidery section on About.com and I’m compiling a list of fantastic tutorials and patterns for stitching organizers and cases.
This would be a perfect addition to the list. May I use an image for my post? I will, of course, credit you and link to you.
Thanks!
Mollie Johanson
molliejohanson at gmail
averyclaire
Jun 14, 2016 @ 06:53:57
Of course. I would be delighted for you to use my tutorial!!!
Jessica Stewart
Mar 27, 2017 @ 14:26:12
Thank you so much for this lovely tutorial! I know they take a lot of time to make. I was wondering if I could have permission to make these and sell them to people on my etsy page?! Please let me know! Thank you!
averyclaire
Mar 27, 2017 @ 14:28:31
Sure. No problem!
Jessica Stewart
Mar 27, 2017 @ 14:29:07
Thank you so much!
lucia hsu
Jun 21, 2017 @ 07:33:56
I have been searching for this tutorial forevahhhhhhhh!!! Thank you so much for your generosity and kindless in sharing your hard work! wow! I’m so psyched! xo
lakestill
Nov 06, 2017 @ 07:06:42
Thank you for sharing your amazing talents in this awesome tutorial! I am so inspired to make my own! Do you have plans to make a tutorial on your project rolls? Blessings, Paula
Victoria Martin
Apr 25, 2018 @ 11:06:15
just found this blog!! Love this tutorial. THANKS FOR SHARING!!!
Patti
Apr 16, 2020 @ 14:28:03
I don’t know how to leave a photograph, but I finished my first project bag. Thank you so much for the tutorial 😁😁
JK
Aug 19, 2020 @ 13:55:38
I love this bag!
Mary
Jan 26, 2021 @ 12:09:33
Thank you for this cute bag.
Is there anyway you can make the instructions available so I can print it out.
Thank you very much,
Mary
joyce cange
Apr 16, 2021 @ 05:59:27
Do you have a printable instruction sheet? Can’t wait to make this bag. Thx
averyclaire
Apr 16, 2021 @ 10:59:50
I have sent the tutorial to your email.
GAYLE SOILEAU
May 18, 2021 @ 16:04:35
i would love the emailed printable copy of the bag instructions please…..
Zsófi
Mar 17, 2023 @ 05:15:38
Great tutorial, well illustrated, thanks for sharing! Zsófi